Observations
Observations menu allows to verify the raw data observations and assign the reference or rover status before processing the data.
Click Observations.

The Observations toolbar is opened.
In the central panel the imported observations are visualized.
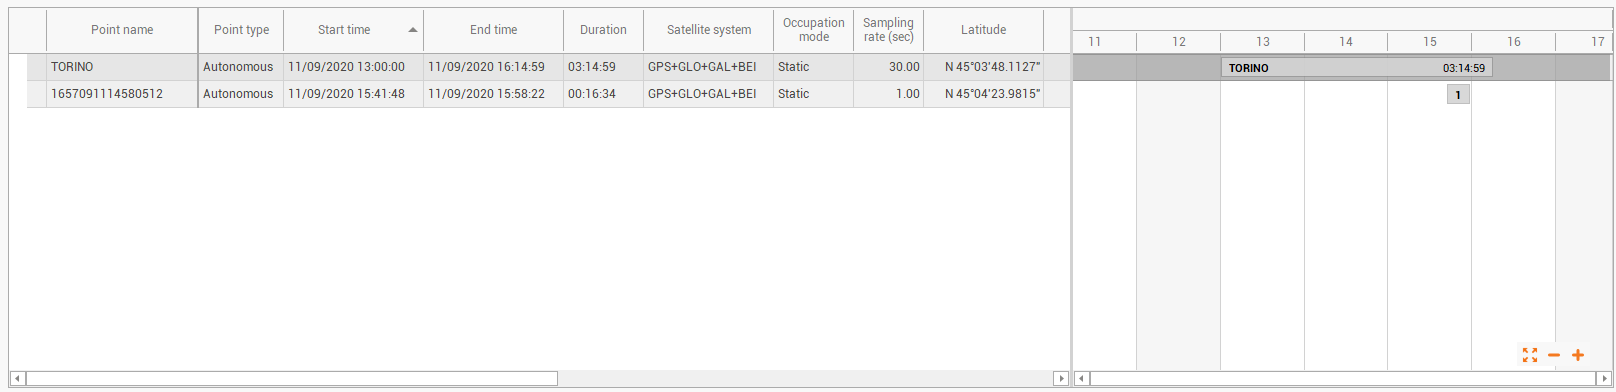
The table shows the raw data sessions imported. The information available are:
Point name: the name of the static point.
Point type: the type of the point:
Autonomous: the point status is navigated.
Control: the point status is control. The coordinate of the point is fixed.
Averaged: the coordinate of the point is an average. It is possible to expand the information from the Points page.
Fixed PP: the point status is ambiguity fixed.
Float PP: the status of the point is float.
Adjusted: the point has been adjusted with network adjustment
Start time: the start of the static session.
End time: the end of the static session.
Duration: the session duration.
Satellite system: the satellite system recorded in the raw data.
Occupation mode: the occupation mode if static or kinematic.
Sampling rate (sec): the sampling rate in seconds of the imported raw data.
Latitude: the latitude of the point.
Longitude: the longitude of the point.
Height: the height of the point.
WGS84 ECEF X: the geocentric coordinate X of the point.
WGS84 ECEF Y: the geocentric coordinate Y of the point.
WGS84 ECEF Z: the geocentric coordinate Z of the point.
Antenna height: the height of the antenna.
Antenna name: the name of the antenna used to record the data.
Antenna SN: the serial number of the antenna used to record the data.
Receiver name: the name of the GNSS receiver used to record the data.
Receiver SN: the serial number of the receiver used to record the data.
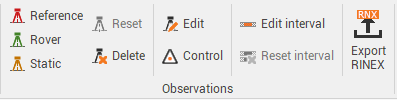
Using the Observations toolbar, or right-clicking on an observation, it is possible to edit the points and assign the status Reference or Rover.
Reference
 : assign this status to an observation if the raw data is from a reference station/base.
Rover
 : assign this status to an observation if the raw data is from a rover.
Static
 : assign this status to a raw data to process it as SPP (single point positioning).
Reset
 : to reset an assigned status.
Delete
 : to delete an observation.
Edit
 : to edit the observation properties, for example to change its coordinates, the antenna height or the point name.
Control
 : to set the point type as Control. A control point is a point with known coordinates, for example a reference station.
Edit internval
 : to modify the time inverval of an observation.
Reset inverval
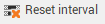 : to restore the original inverval.
Edit the observation properties
Using the function Edit, it is possible to edit the properties of an observation. This function opens a window.
Observation page:
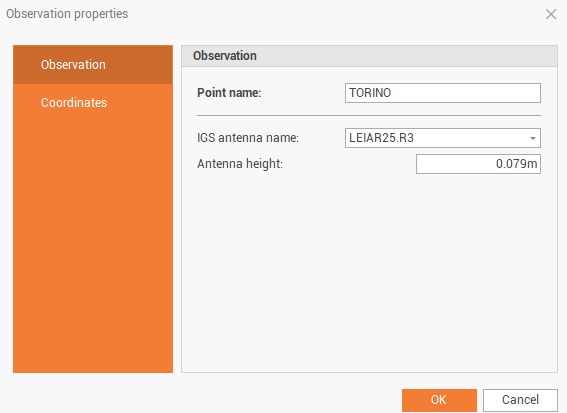
Point name: the name of the observation, it is possible to modify the name editing this field.
IGS antenna name: the IGS antenna name for this observation, it is possible to force a difference antenna name from antennas available in the Antennas page.
Antenna height: the height of the antenna, it is possible to modify the value editing this field.
Coordinates page:
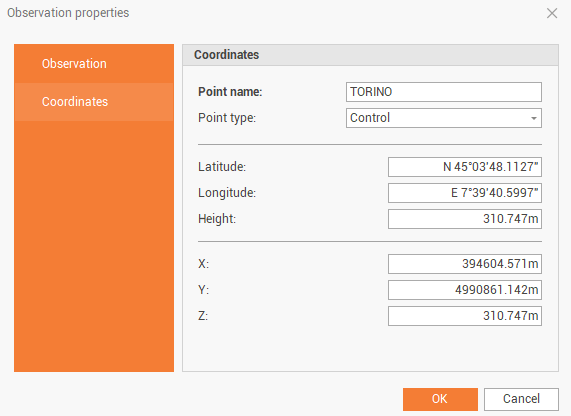
Point name: the name of the observation, it is possible to modify the name editing this field.
Point type: the type of point, it is possible to change the point type depending on the available types for the selected observation.
Latitude/Longitude/Height: the WGS84 coordinates for the point. The coordinates are editable if the point type is Control.
X/Y/Z: the local coordinates for the point, depending on the coordinate system assigned to the project. The coordinates are editable if the point type is Control.
Edit the inverval
Using the function Edit interval it is possible to edit time interval of a selected observation.
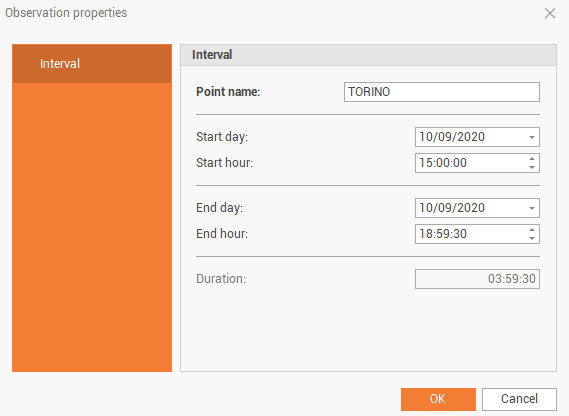
Start day: the starting day for the observation, change this field to use selected observation from another starting day.
Start hour: the starting time for the observation, change this field to use selected observation from another starting time.
End day: the ending day for the observation, change this field to use selected observation from another ending day.
End hour: the ending time for the observation, change this field to use selected observation from another ending time.
Duration: the duration of selected observation.
Export RINEX
It is possible to export observations in the standard RINEX format.
Select the observations to export.
Click Export RINEX.

This command opens a new window.
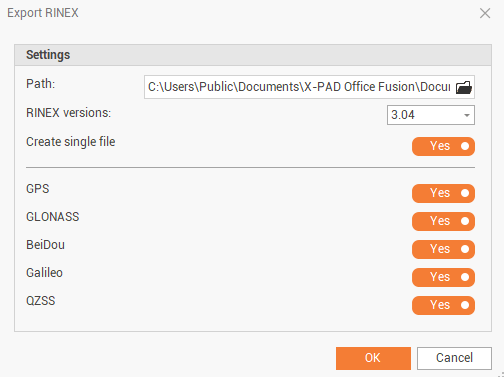
Path: the destination folder where to save the RINEX data.
RINEX versions: the RINEX version to export the data (2.11, 3.02, 3.04)
Create single file: enables/disables the creation of a single file or multiple files in case more observations are selected.
GPS/GLONASS/BEIDOU/GALILEO/QZSS: enables/disables the inclusion of observations from the selected constellations.
Click OK to export the data.