Equipment setup
Setting Up as a Real-Time Rover
The following equipment setup is used for real-time rover.
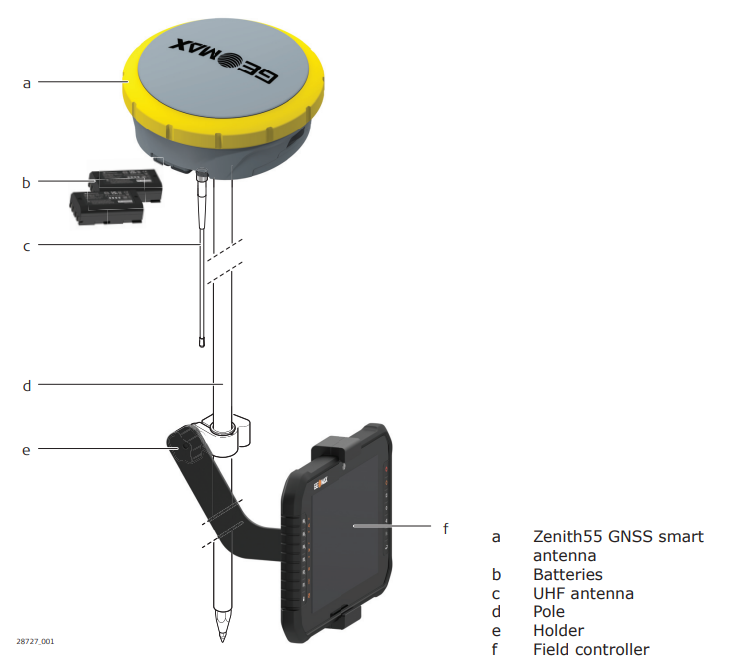
Attach the field controller to the pole. Clip the field controller into the holder and lock it by tightening the screw on the holder.
Turn on the field controller.
Insert the batteries into the GNSS smart antenna.
Connect the UHF antenna to the GNSS smart antenna. This connection is only required when using the internal radio.
Press ON/OFF button on the GNSS smart antenna for 2 s to switch on the GNSS smart antenna.
Screw the GNSS smart antenna on to the top of the pole.
Connect X-PAD software on field controller to the GNSS smart antenna through Bluetooth.
Setting up as a Real-Time Base
This procedure shows how to setup the Zenith55 to work as real-time base.
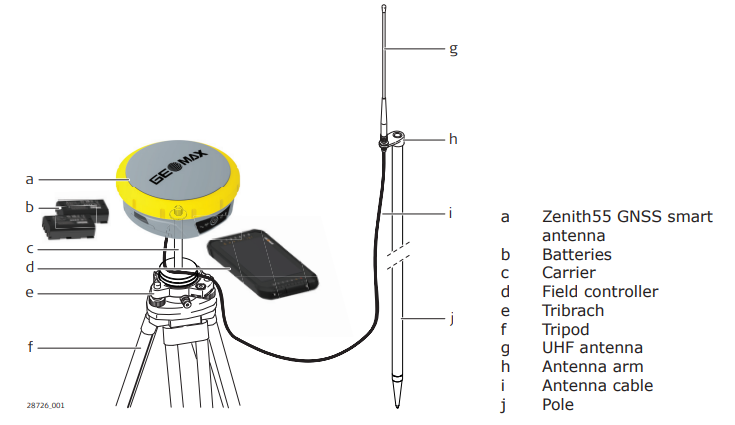
Set up the tripod.
Mount the tribrach on the tripod.
Ensure that the tribrach is over the marker.
Mount and level the carrier on the tribrach.
Insert the batteries into the instrument.
Connect the UHF antenna to the instrument using the antenna arm and the antenna cable.
Press the ON/OFF button on the instrument for 2 s to switch on the instrument.
Screw the instrument onto the carrier.
Check that the tribrach and carrier are still level. 1
Connect X-PAD software on field controller to the GNSS smart antenna through Bluetooth.
Measure the instrument height using the measuring tape. Refer toInstrument components for information on the instrument height (ARP).
Start the base using X-PAD software (see X-PAD Ultimate).
The base can also be started from Zenith55 Web Interface.
Setting up as a Post-Processing Base
The following equipment setup is used for static operations over markers.
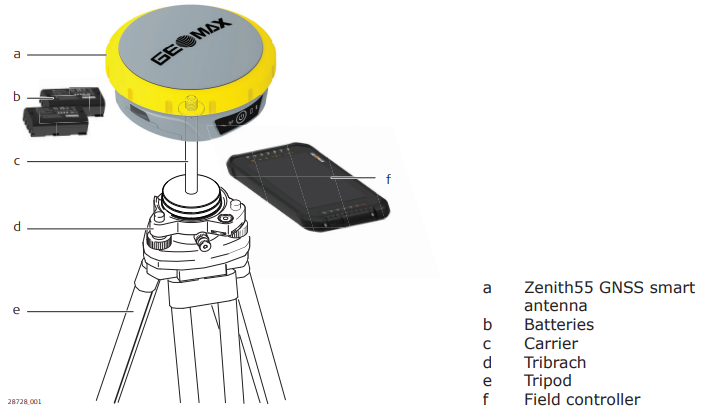
Set up the tripod.
Mount the tribrach on the tripod.
Ensure that the tribrach is over the marker.
Mount and level the carrier on the tribrach.
Insert the batteries into the instrument.
Press the ON/OFF button on the instrument for 2 s to switch on the instrument.
Screw the instrument onto the carrier.
Check that the tribrach and carrier are still level.
Connect the field controller to the GNSS smart antenna through Bluetooth.
Measure the instrument height using the measuring tape. Refer toInstrument components for information on the instrument height (ARP).
Start the base using X-PAD software (see X-PAD Ultimate).
Connect X-PAD software on field controller to the GNSS smart antenna through Bluetooth.
Measure the instrument height using the measuring tape. Refer toInstrument components for information on the instrument height (ARP).
Start the raw data logging using X-PAD software (see X-PAD Ultimate).
The raw data logging can also be started from Zenith55 Web Interface.