Working with IMU
For more information refer to Working with IMU GNSS receivers.
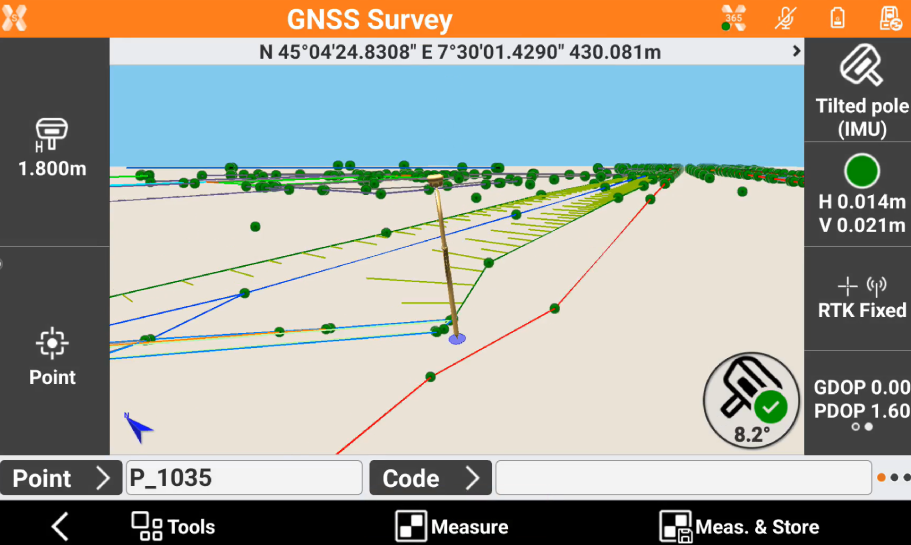
Points can be measured with a tilted pole while holding the pole tip over the point. That eliminates the need to check whether the circular bubble on the pole is levelled.
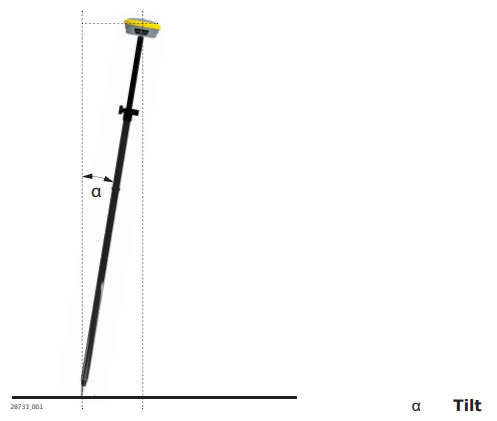
Measurements performed with a tilted pole are reliable and accurate. The Inertial Measurement Unit (IMU) measures and defines the amount and the orientation of the tilt.
Measurements are immune to magnetic interferences due to the IMU implemented in the sensor.
To be able to perform measurements with a tilted pole, it is required to have a fixed RTK solution. When measuring points with a tilted pole, initialise the IMU. The IMU or tilt compensation can be initialised by moving the sensor around. Initialisation status is indicated in X-PAD field software. Move the sensor to maintain the initialisation, for example moving to the next point to be measured.
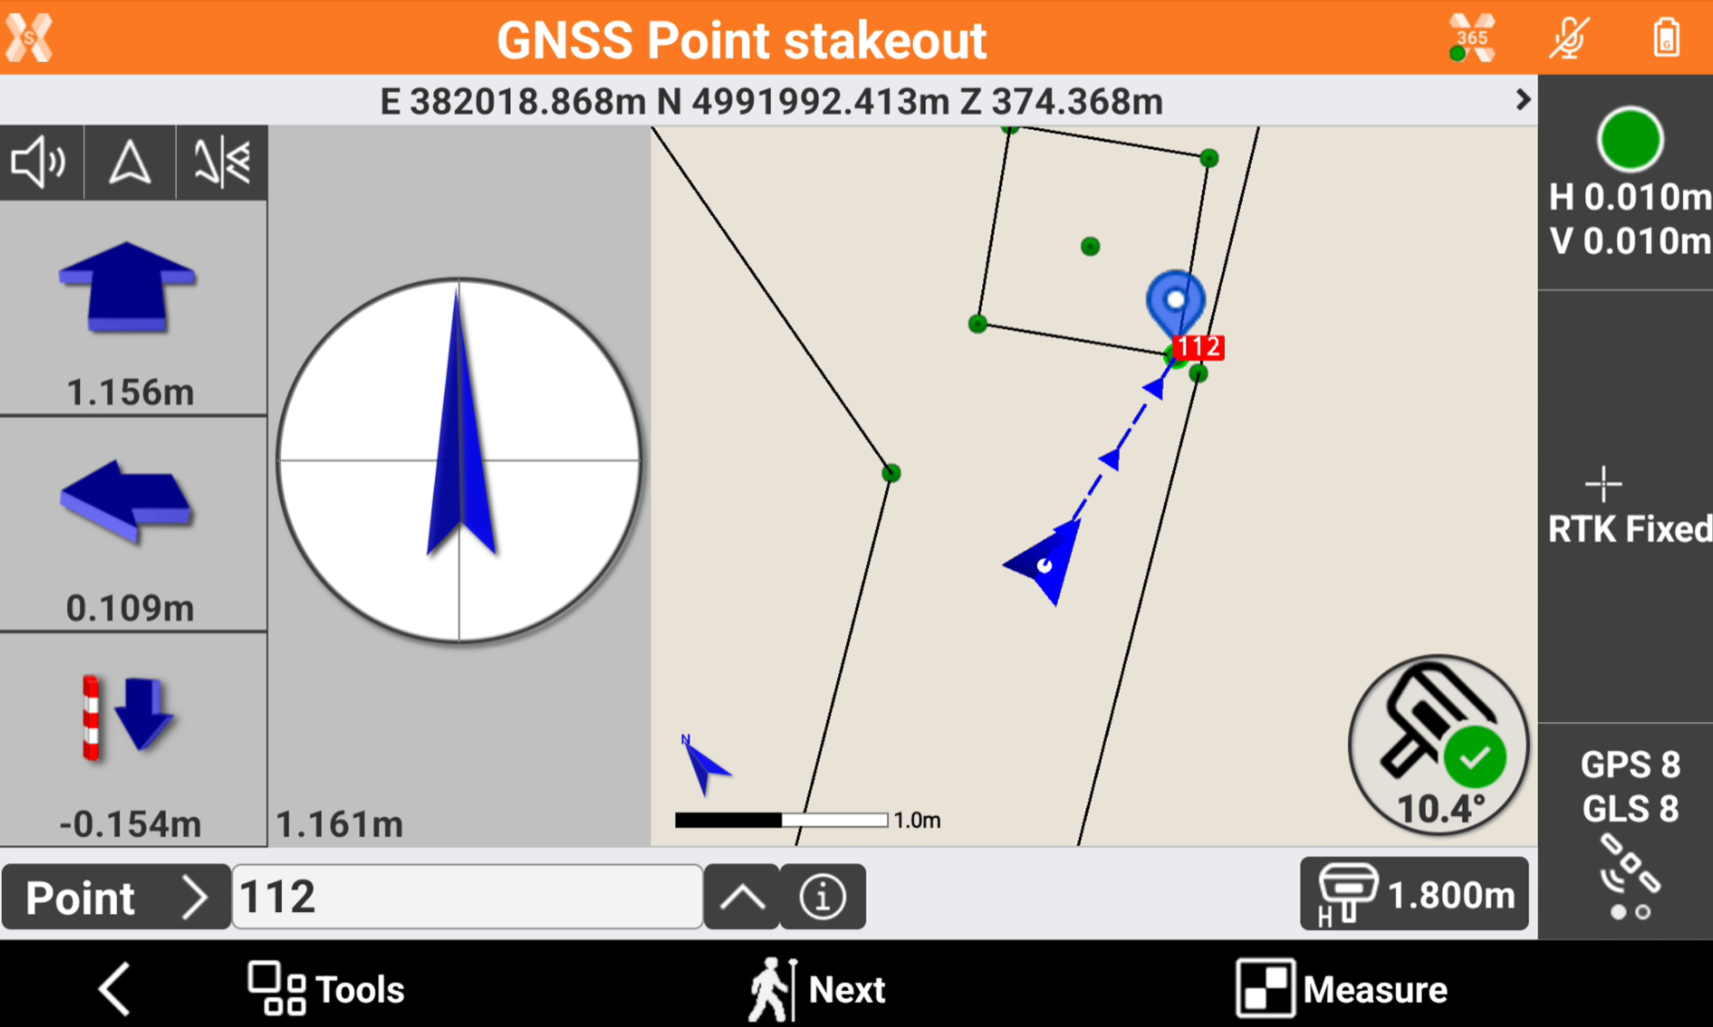
Points can also be staked out using the tilted pole.
Advantages:
No need to level the pole.
Faster surveying procedures.
Faster staking out of points.
The pole can be tilted up to 60°. To ensure high accuracy measurements, it is recommended that the pole is tilted no more than 30°.
Precondition for performing tilt compensated measurements is the initialising of the IMU. To initialise the IMU, move the Zenith55 around by taking a few steps or shaking the antenna back and forth.
Tilt compensation step-by-step
This step-by-step procedure describes the tilt compensation implemented into the X‑PAD field software.
Zenith55 must be configured to receive RTK correction data and the sensor needs to have reached a fixed solution.
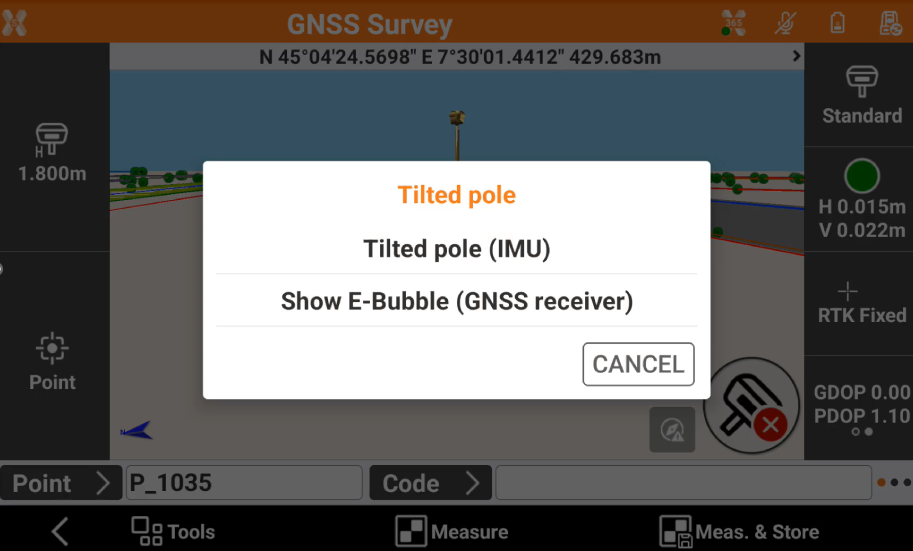
Inside the selected job, go to the Survey tab and open a survey application.
The tilt initialization icon appears in the bottom right corner of the screen, showing that tilt functionality is deactivated.

Click on the icon to activate the IMU.
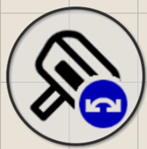
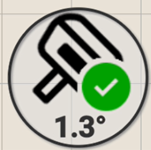
The tilt initialization icon shown on the right appears when the tilt compensation is activated, but not yet initialized to have high accuracy. Measurements cannot be taken yet.
To initialize the tilt compensation, move the antenna around by walking or shake the antenna back and forth.
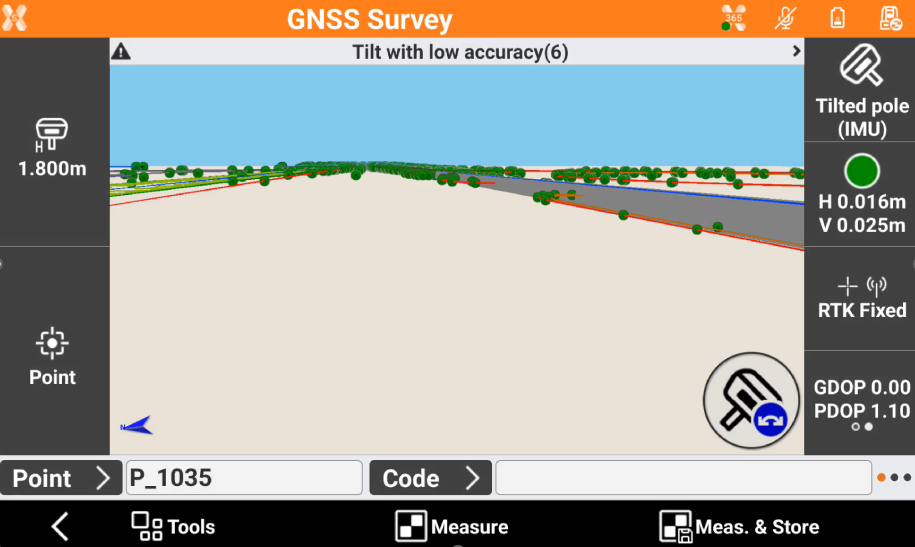
Once the tilt compensation is initialised and good GNSS accuracy has been met, the icon shown on the right appears. This icon shows the current amount of tilt and means measurements can now be performed.
Now all measurements can be done with tilt compensated.
In the same way the IMU can also be used in stakeout functions to stakeout objects with the pole tilted.
IMU verification procedure (firmware 0.24.251102)
The software offers a tilt verification procedure useful in these cases:
The user wants to confirm the tilt measurement accuracy under current installation.
A different pole is used on the GNSS. Since the straightness of the pole is critical to tilt measurements we recommend the tilt verification procedure.
The IMU verification procedure is not used to inizialize the IMU.
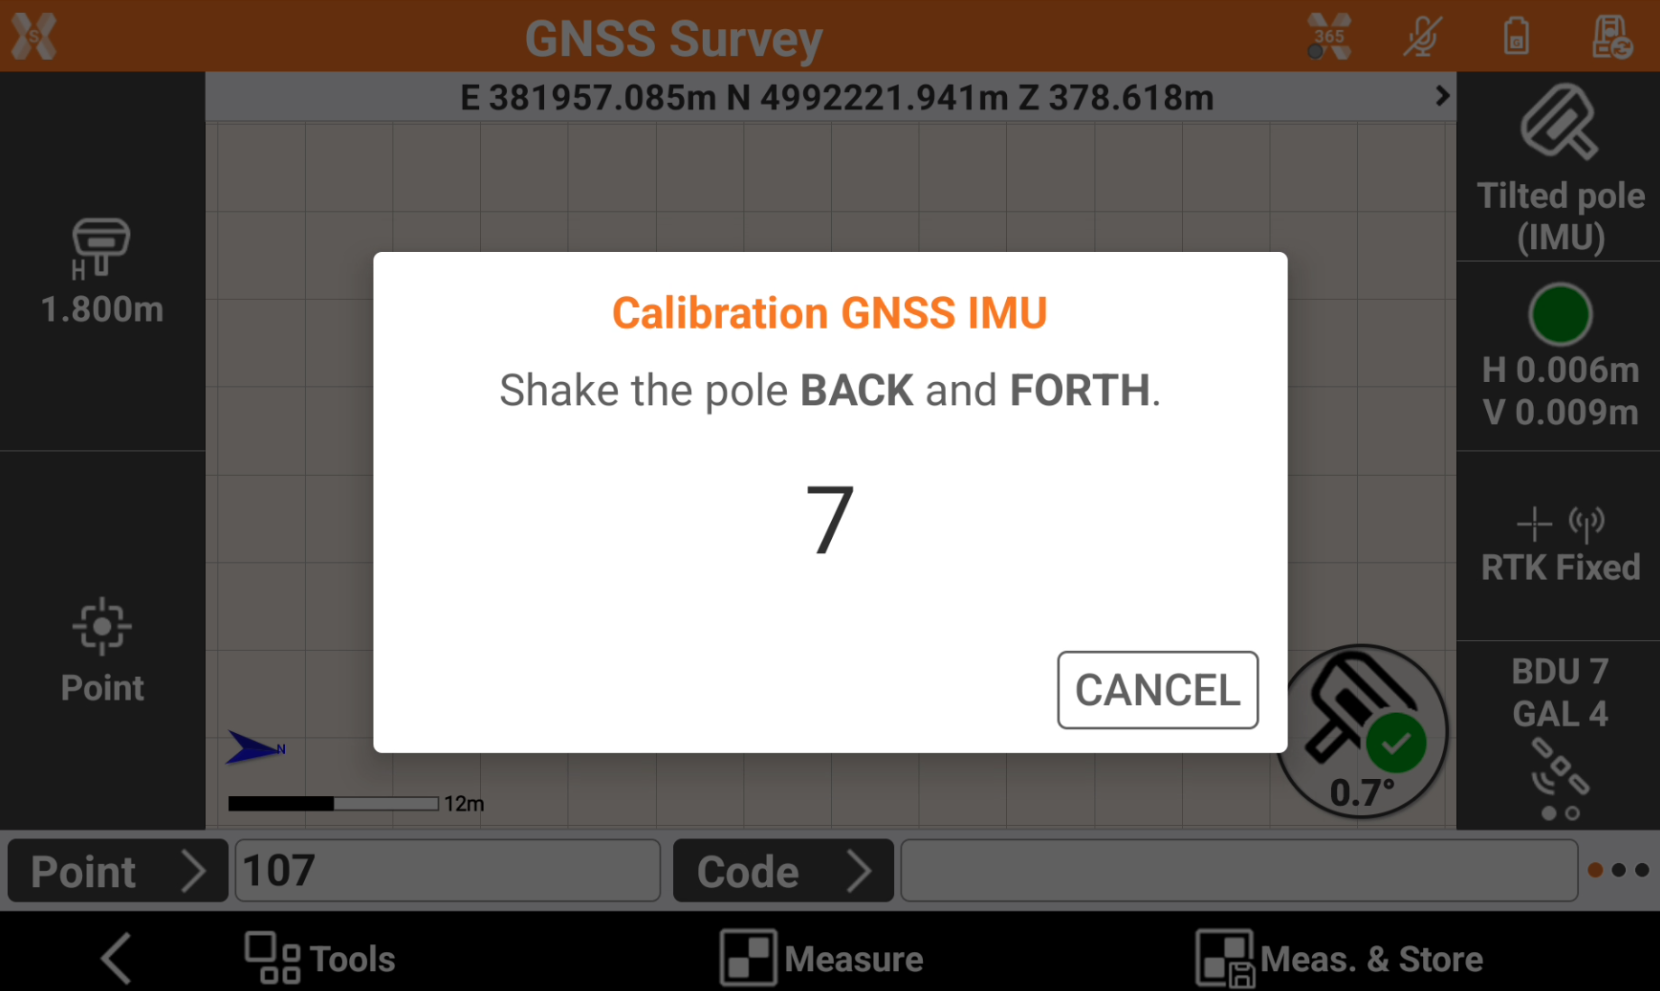
To start the procedure wait until the IMU is inizialized. Then click on IMU icon and select Calibrate IMU.
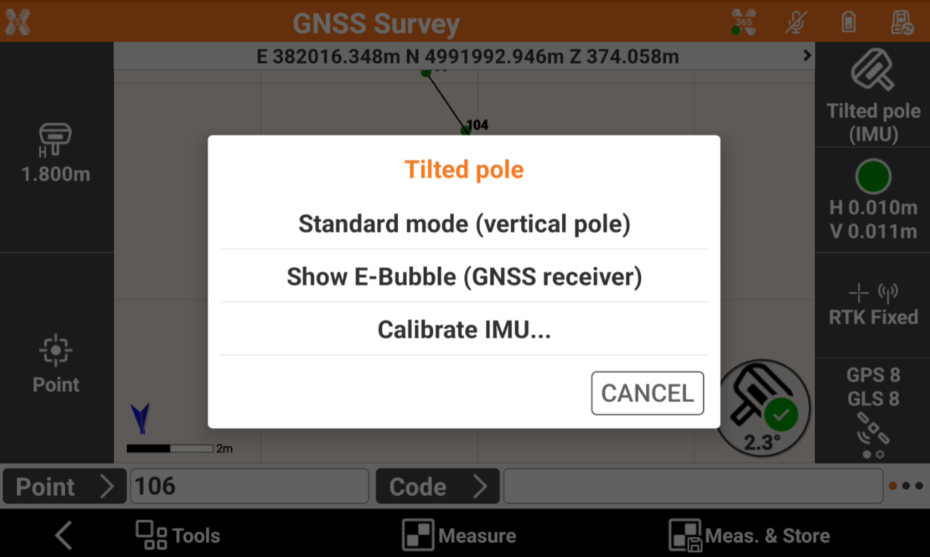
The procedure requires to shake the pole back and forth for 8 seconds.
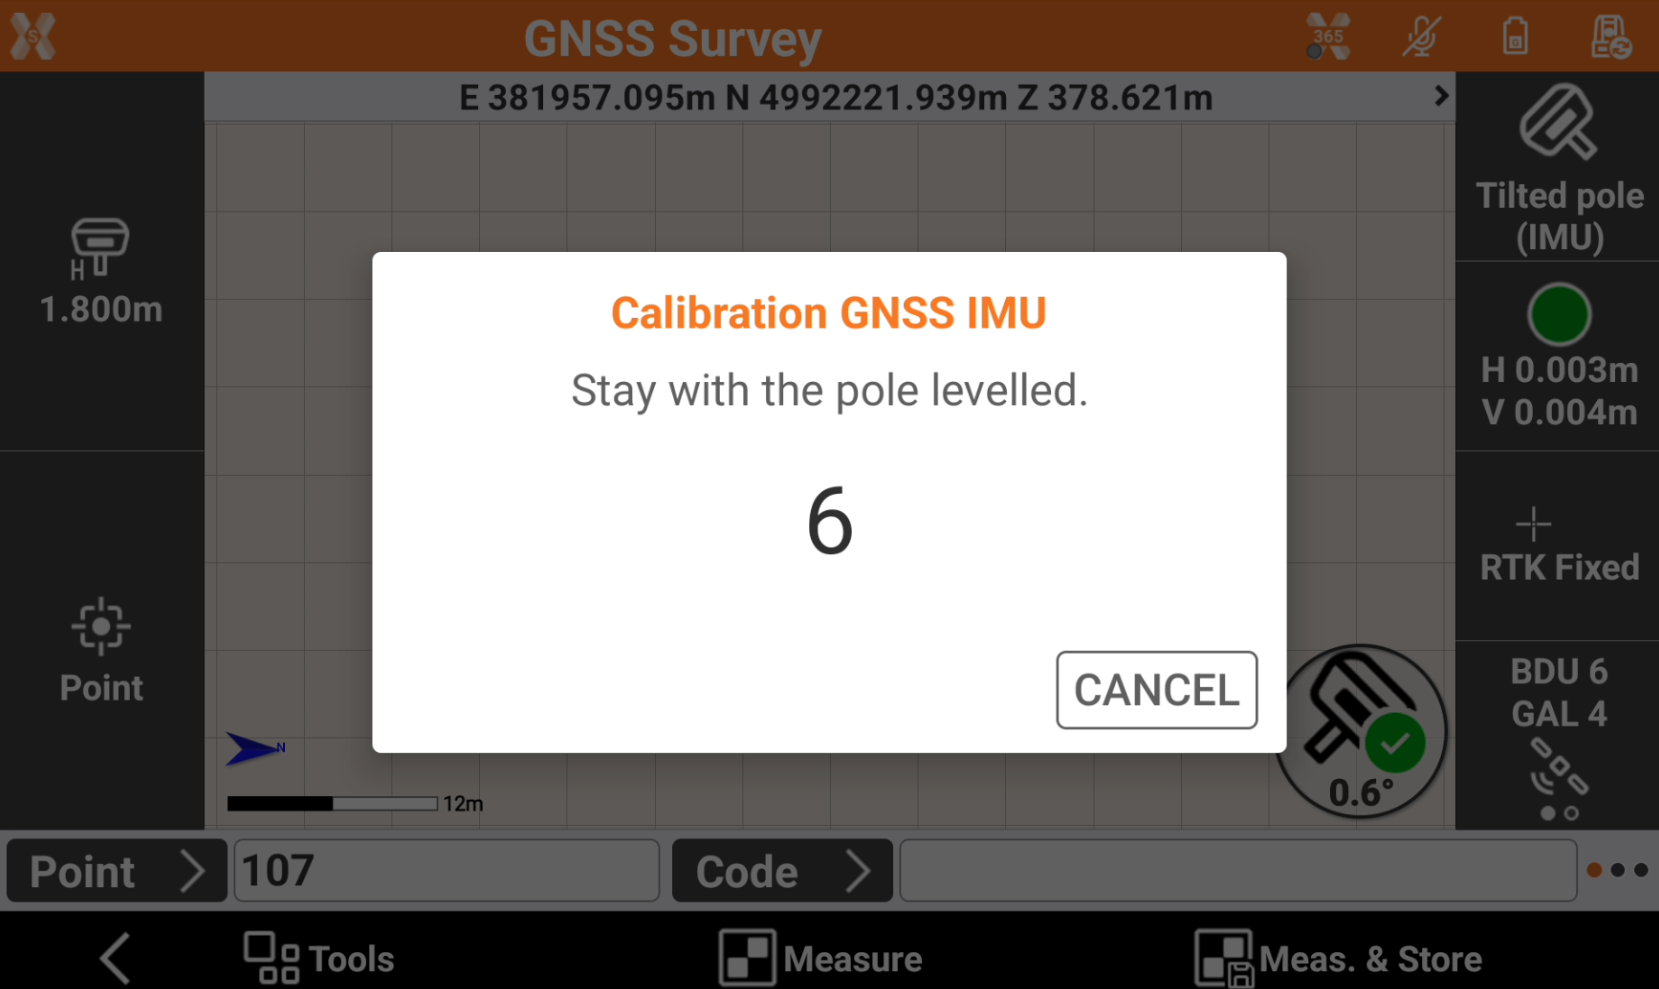
When done, level the pole and press Continue. Stay with the pole leveled for 8 seconds.
When done, without moving the pole tip, rotate 90°. Then press Continue to repeat the previous operations in the new direction.
If the verification is successful, a Success message is visualized on-screen.
Below video shows the procedure to perform a tilt verification procedure from firmware 0.24.251102.
IMU verification procedure (firmware older than 0.24.251102)
The software offers a tilt verification procedure useful in these cases:
The user wants to confirm the tilt measurement accuracy under current installation.
A different pole is used on the GNSS. Since the straightness of the pole is critical to tilt measurements we recommend the tilt verification procedure.
The IMU verification procedure is not used to inizialize the IMU.
To start the procedure wait until the IMU is inizialized. Then click on IMU icon and select Calibrate IMU.
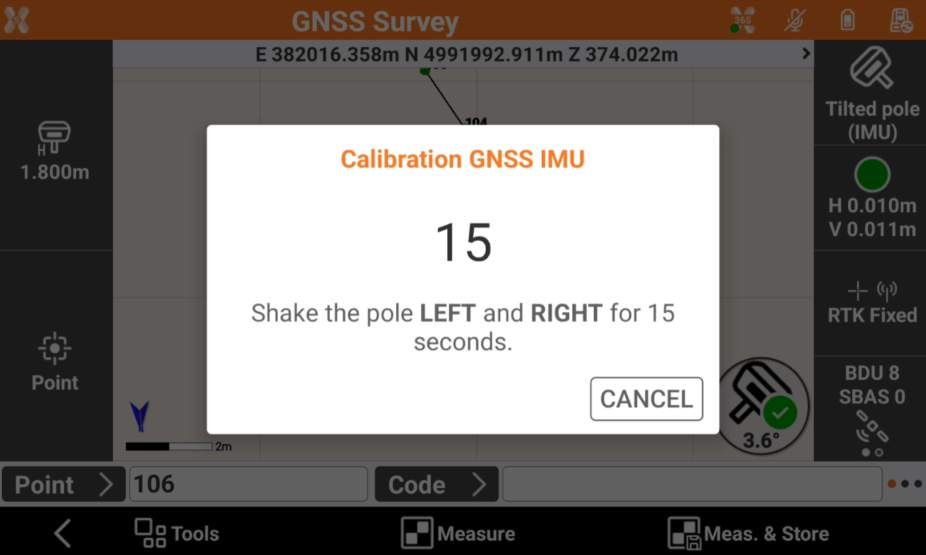
The procedure requires to measure a point with pole vertical and then shake the pole back and forth and then left and right. Follow the instructions on-screen to complete the procedure.
If the verification is successful, a Success message is visualized on-screen.