Sensor settings
Sensor Settings is used to configure the sensor settings and working mode including NMEA streaming.
Working mode
The Working mode page allows to configure the GNSS receiver.
If working with X-PAD software the configuration has to be done using the field controller.
This page can be however useful to perform configurations without using X-PAD software, for example to record raw data, to configure the receiver as base and start the base, to stream out NMEA data.
Click Settings.
Click Sensor Settings and select Working mode.
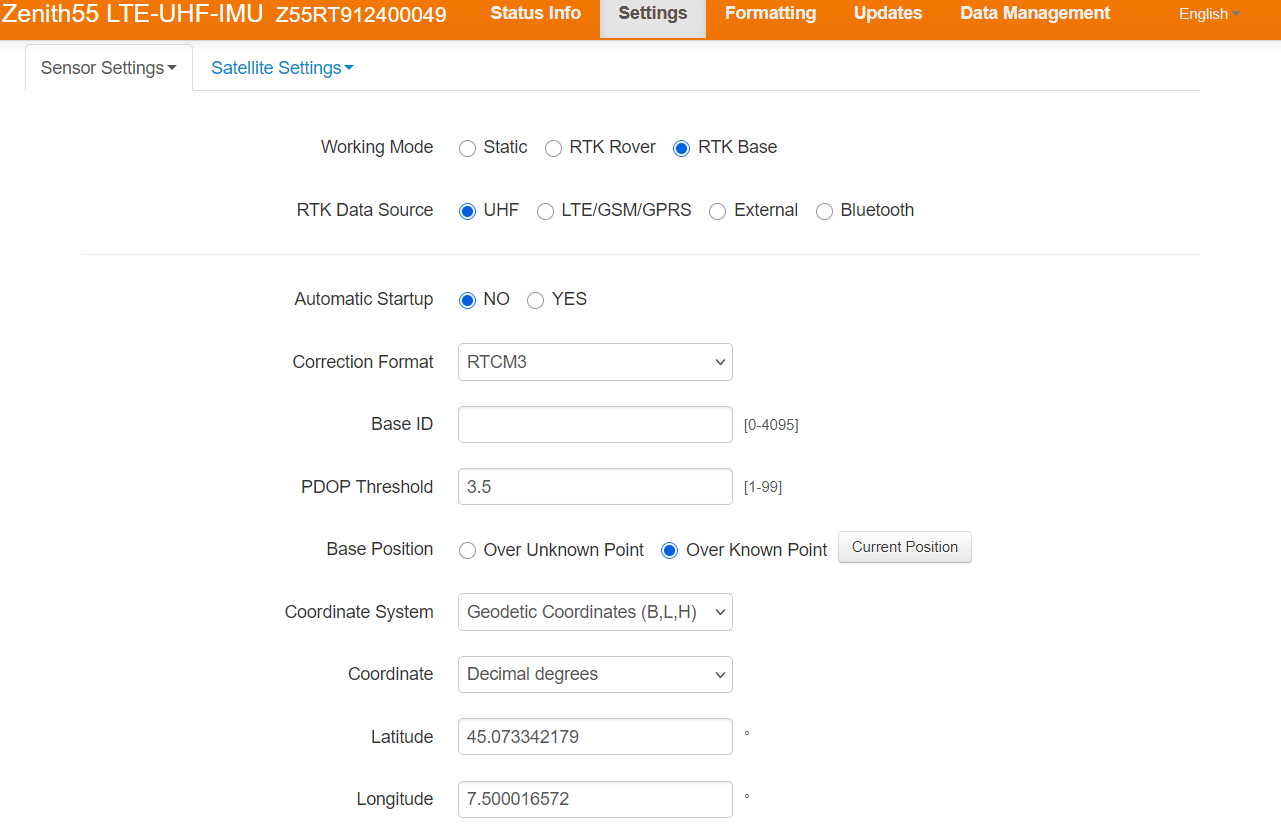
The page allows to configure the GNSS receiver and select the working mode.
The available Working modes are:
Static: the receiver turns off all datalinks. This profile allows to configure the receiver without RTK corrections and to record raw data for post processing.
RTK Rover: the receiver is configured to work as rover.
RTK Base: the receiver is configured to work as base.
If the mode is rover or base it is possible to select the RTK Data Source:
UHF: the receiver works using the internal radio.
LTE/GSM/GPRS: the receiver works using the internal modem.
External: the corrections are received/sent using the external port. For example this is the configuration to use when the receiver works as base with an external radio.
Bluetooth: the corrections are receiver/sent using bluetooth.
Depending on the Working mode and RTK Data Source selected, the page allows to configure all the parameters.
To meet country radio licence requirements, the internal UHF radio must be set before use to legally allowed local frequencies as defined by local or governmental authorities. Use of forbidden frequencies may lead to prosecution and penalties.
The internal radio can be configured with a channel, protocol type, and channel spacing. Various required frequencies can be entered into the channel table and assigned to a specific channel number.
When selecting UHF as the RTK Data Source and clicking on ‘Advanced UHF Settings’, a password is required to enter to configure the various required frequencies into the channel table, the spacing, the transmission power and the transmission protocol.
Please check with your distributore on how to change these values.
NMEA Streaming
NMEA Streaming page allows to stream out the NMEA messages on the serial port.
The NMEA Streaming can also be started from X-PAD Ultimate software.
Click Settings.
Click Sensor Settings and select NMEA Streaming.
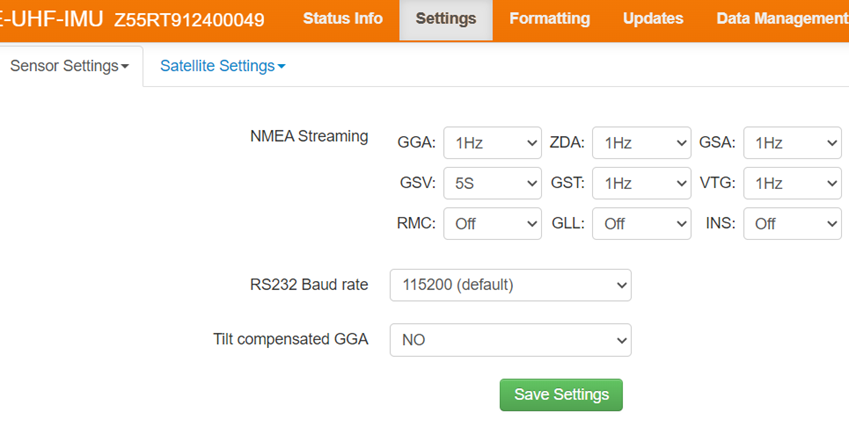
NMEA Streaming: to select the messages to stream and the rate for each message.
RS232 Baud rate: the data streaming baud rate.
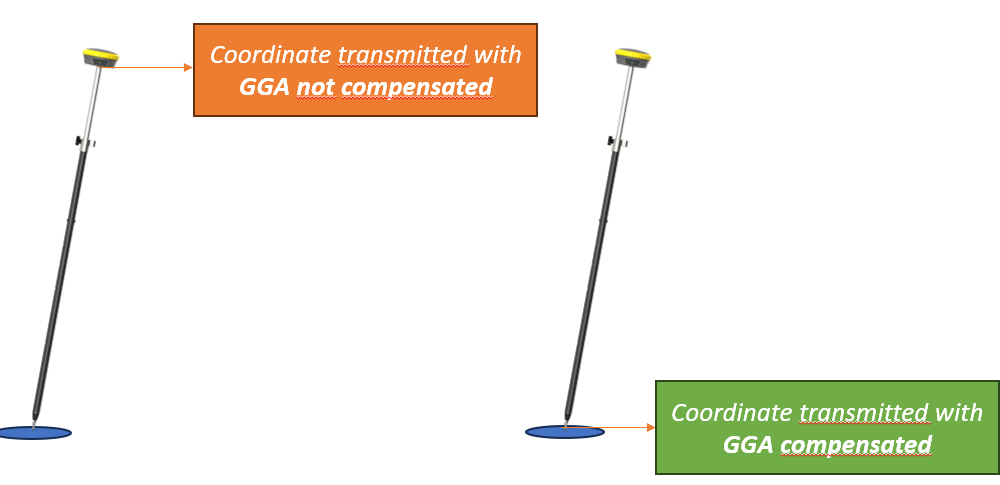
Tilt compensated GGA: if enabled the GGA message is compensated by the tilt. This is particularly useful when the GGA is streamed out to 3th party devices such as georadar so that position is better calculated with pole tilted. When option is activated the GGA position is compensated by GNSS receiver pole height and pole tilt. (Option available from firmware 0.24.251102)
Save/Upload Configuration
The page Save/Upload Configuration is used to save and upload a saved receiver configuration.
Click Settings.
Click Sensor Settings and select Save/Upload Configuration.
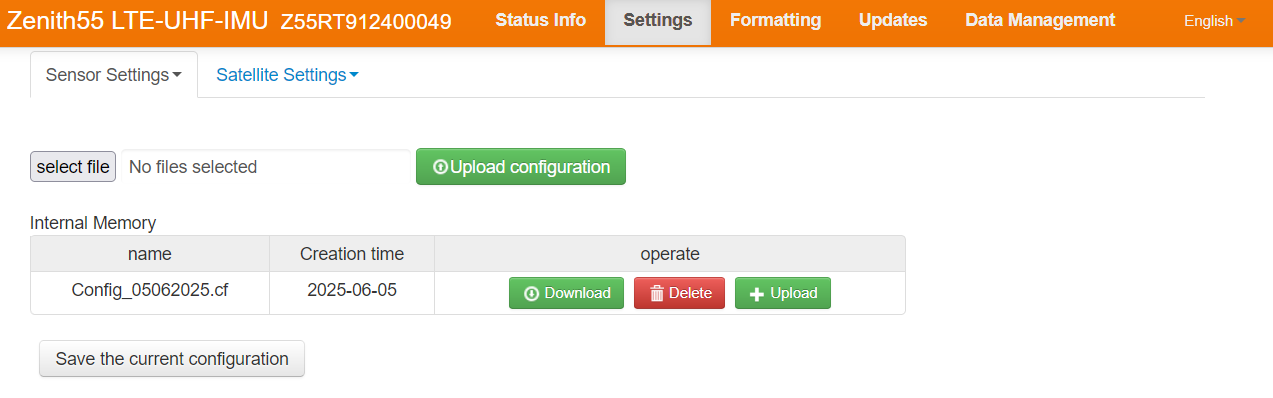
Click Upload configuration to load a configuration from a saved file from PC.
Click Save the current configuration to save in the internal memory the current receiver configuration with a name.
The Internal Memory table shows the configuration files stored in the receiver internal memory.
Click Download to download to PC a configuration file saved in the internal memory.
Click Delete to delete a configuration file from internal memory.
Click Upload to upload the configuration saved in the internal memory.
General settings
The page General settings allows to edit some general settings for the receiver.
Click Settings.
Click Sensor Settings and select General Settings.

Time Zone: to select the current time zone.
Default Storage: allows to select the default storage for raw data logging and other files.
Internal memory: the data is stored in the internal memory.
Micro SD-Card: the data is stored in the micro SD-Card.
WiFi hotspot-share network: enables/disables the Zenith60 PRo receiver as internet hotspot in case it has an internal SIM card. If this option is turned on, a different device can connect to Zenith60 PRo WiFi hotspot and navigate in internet.
Power on automatically when connected 5-pin cable: automatically turns on the receiver when the 5-pin cable is connected.
Power off automatically when disconnected 5-pin cable: automatically turns off the receiver when the 5-pin cable is connected.
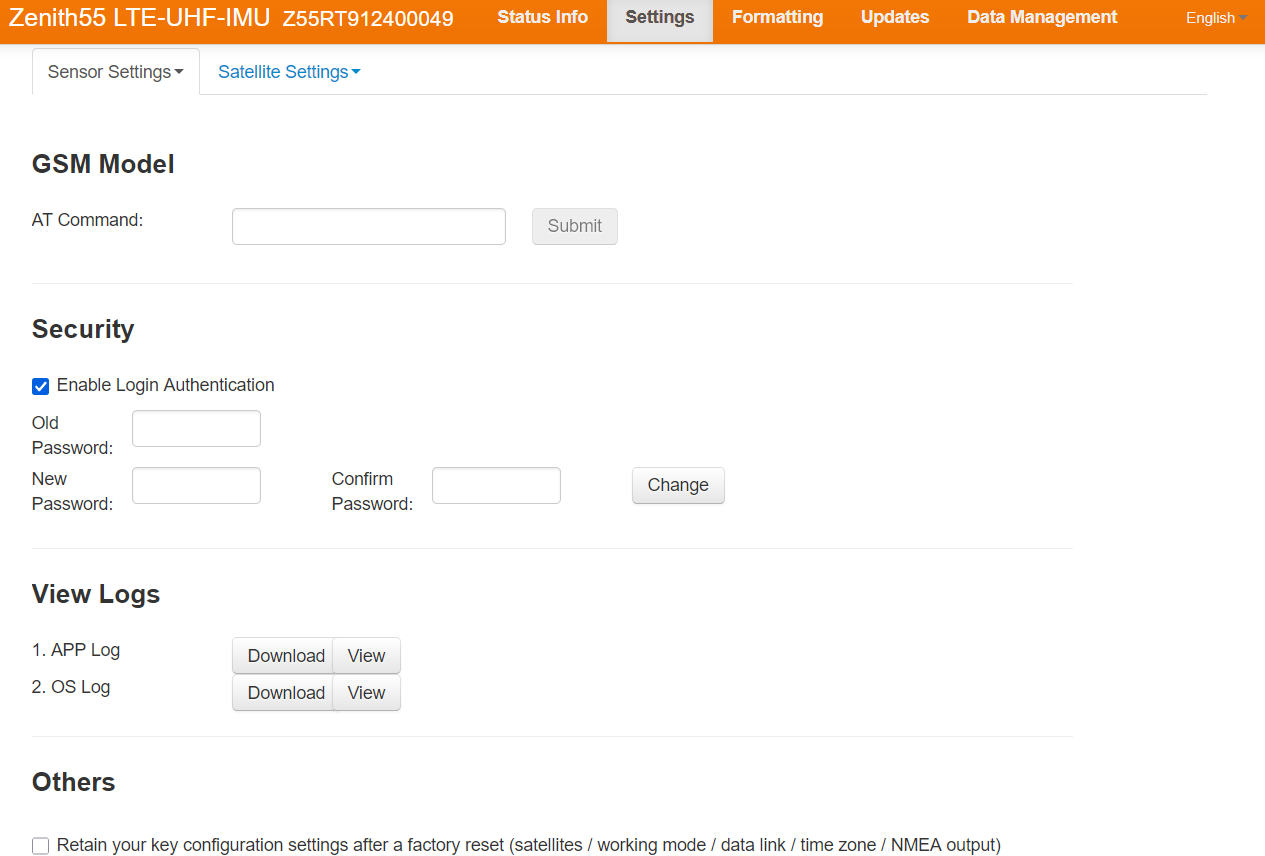
Other Settings
This page allows to change the WebManager password and download debug information.
Click Settings.
Click Sensor Settings and select Other Settings.