Clipping boxes
Clipping boxes are used to hide the elements outside the defined box. Elements which fall inside the box are displayed.
Clipping boxes can also be used to generate orthophotos of the elements inside the box.
Setting a clipping box
Click View.
Click here to create the clipping box.

Select an option:
Extents clipbox: Inserts a clipping box containing the entire drawing’s extent.
Horizontal clipbox: Inserts a clipping box with a specific reference elevation.
Vertical clipbox: Inserts a vertical clipping box by selecting two points that define the insertion direction.
The plane is saved in the Project Manager.
You can delete a clipping box directly in the Project manager.
Changing a clipping box
Select a clipping box in the graphic area
Click and drag a face to change the clipping box dimensions.
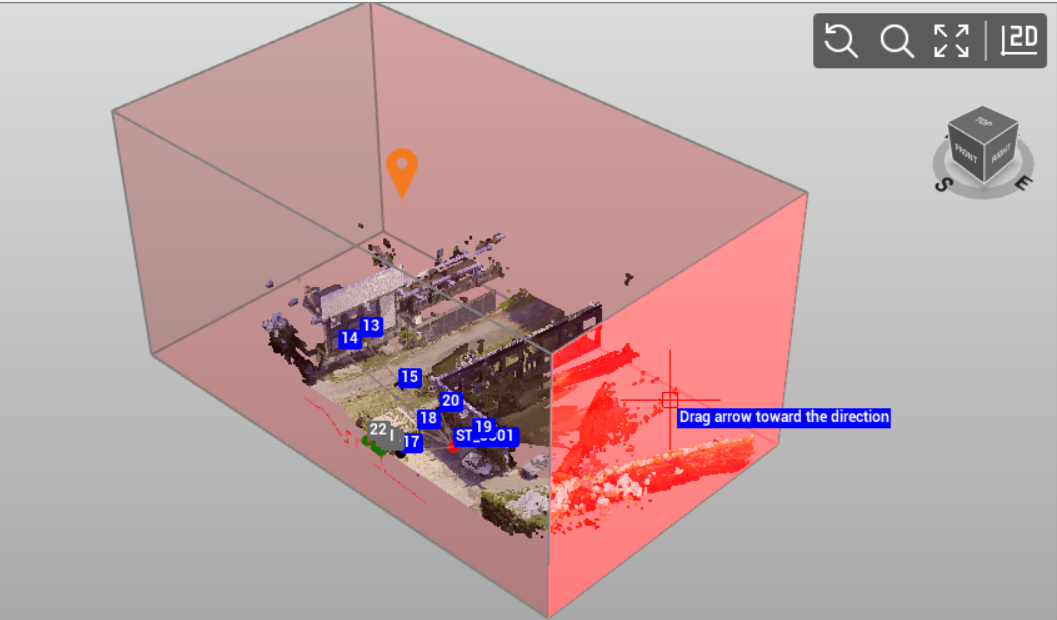
To move the clipping box along one direction, click on the clipping box and select and drag the arrows.
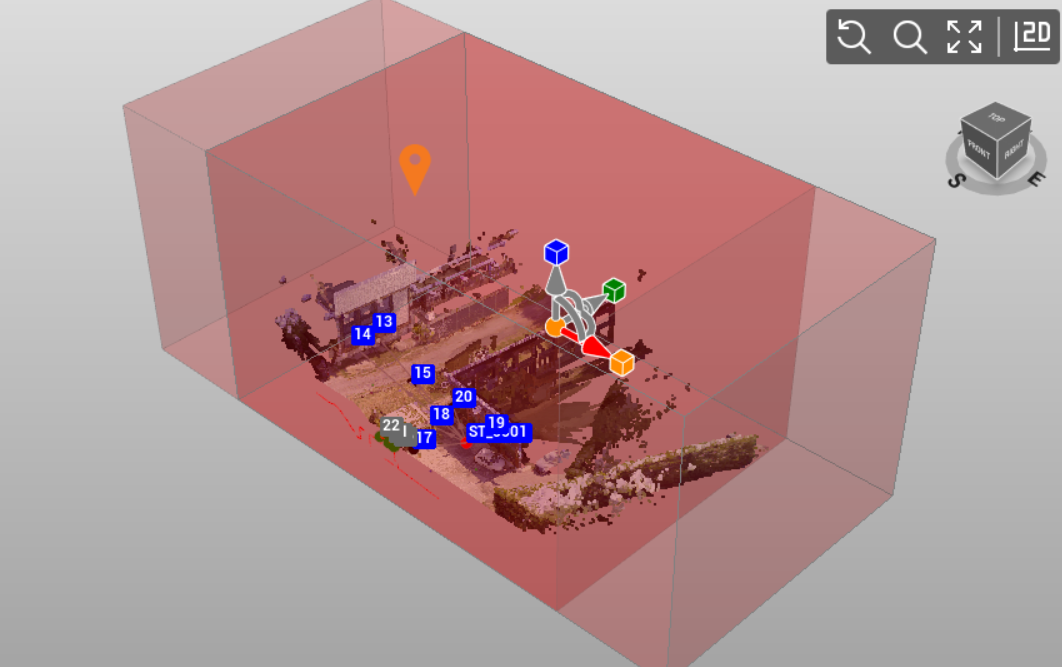
Click and drag the colored boxes to extend the clipping box along the 3 main directions.
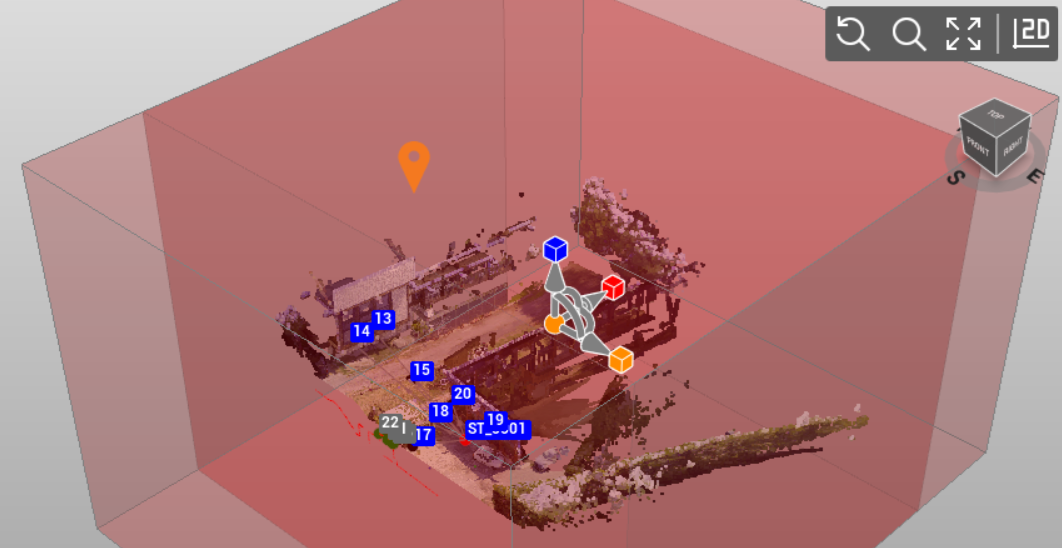
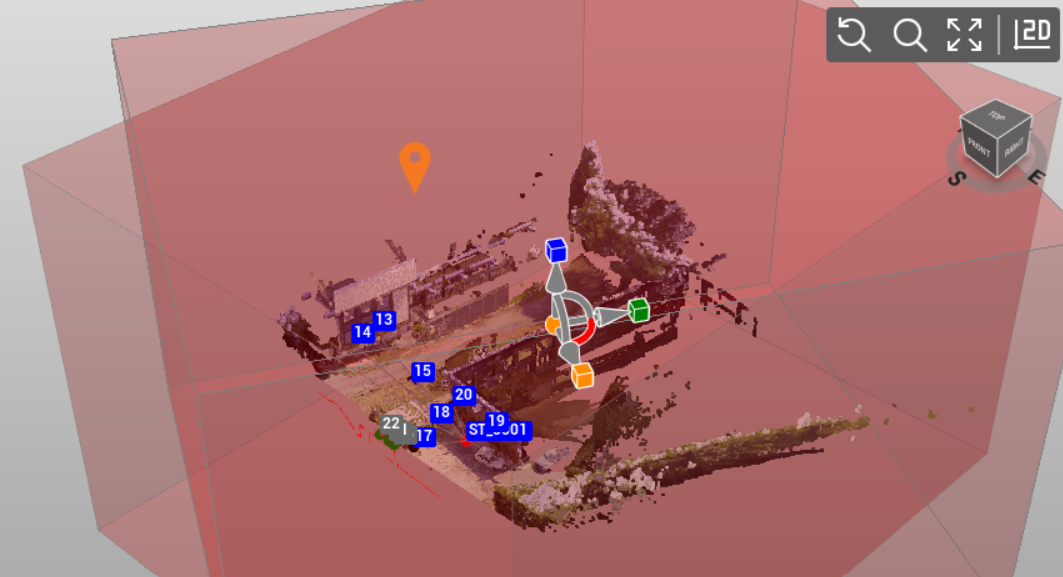
Click and drag the arcs to rotate the clipping box.
Clipping box properties
Select a clipping box to open the property table.
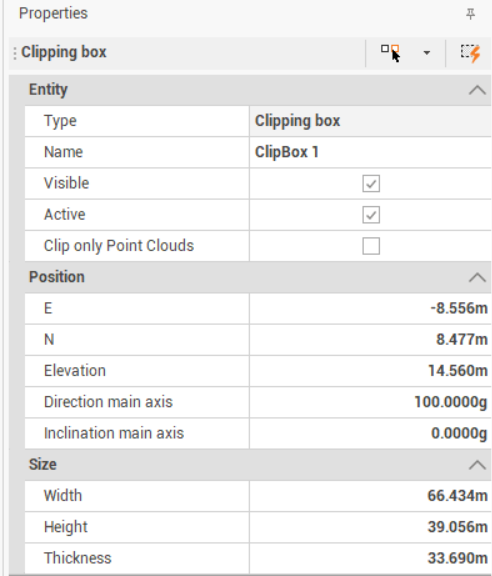
Visible: shows/hides the clipping box
Active: hides all elements outside the clipping box
Clip only Point Cloud: applies the clipping box only to point clouds
Position: the position of the clipping box. You can edit the fields to change its position.
Size: the size of the clipping box. You can edit the fields to change its size