Orientation optimization [Aerial]
The workspace of the new Orientation optimization page is organized as follow:
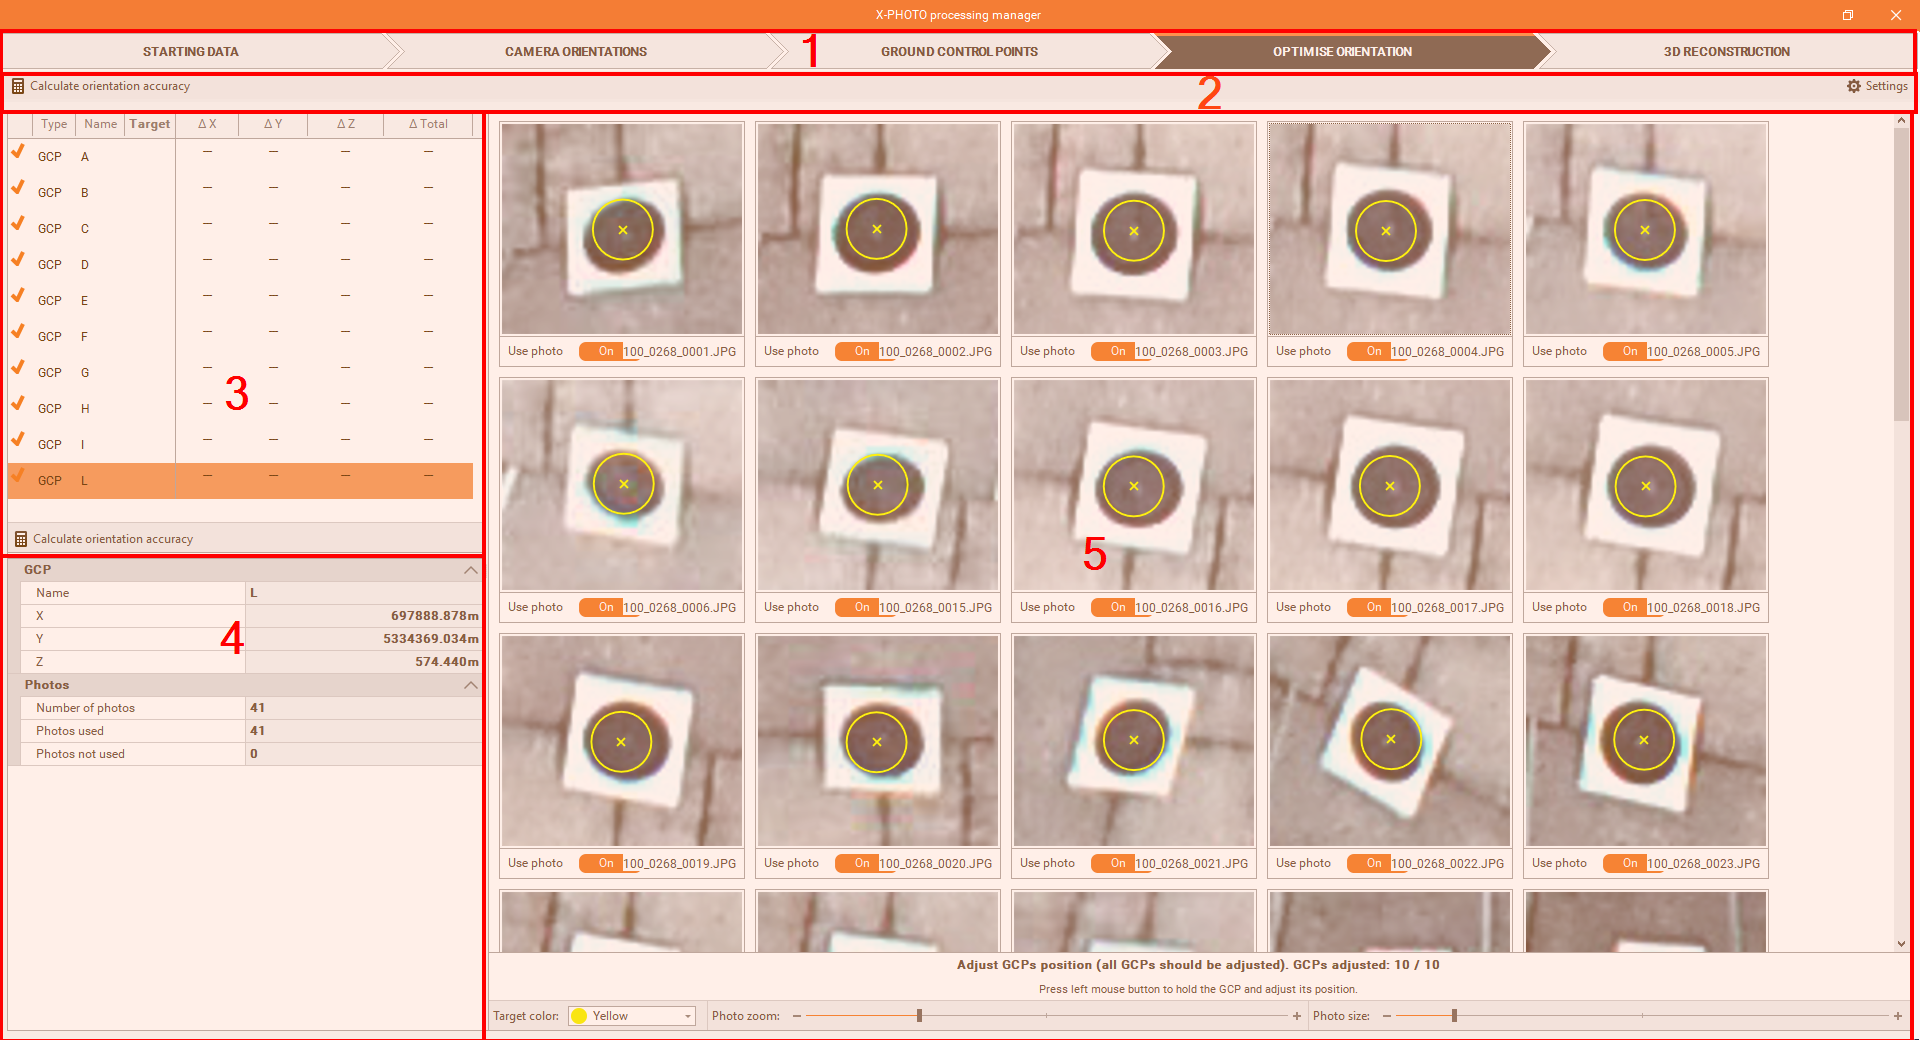
Top bar: the main menus of the X-Photo Processing manager,
Sub-Menu Bar: where you can access the related functions and settings of the current main menu,
GCP list: The complete list of the GCPs with the adjustment status,
After adjusting the position, from at least one image for each GCP, the icon on the corresponding table will change, from ![]() to
to ![]() , and this must be done for all GCPs used.
, and this must be done for all GCPs used.
GCP details: shows ID, coordinates, along with information on the photos containing the current GCP,
GCP adjustment window: to adjust markers position and improve the results of automatic target recognition.
it is possible to disable photos that are of poor quality or do not contain any targets, and exclude them from the calculation, by deselecting Use photo
 , or using right button,
the color of targets can be changed

the Photo zoom allows to change the Zoom level for each photo:

the Photo size will define the number of photos visible:

The optimization of the orientation
To start the Orientation optimization process, click on

In this step, we have to set some Ground Control Points related settings,
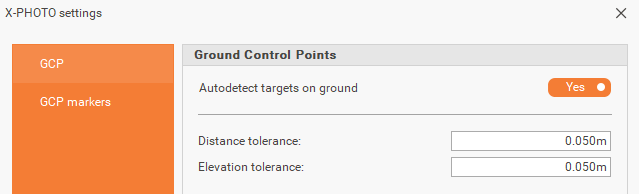
Autodetect targets on ground: to automatically detects the targets on the ground.
Distance tolerance: the distance tolerance for the ground control points.
Elevation tolerance: the elevation tolerance for the ground control points.
GCP markers: the colors of the GCP markers in the graphic view to use.
By using “Black circle marker”  , it’s possible to use Automatic GCP detection
Start the orientation optimization by clicking on OK.
After the orientation is optimized, the orientation optimization page will be displayed.
Adjust the position of all GCPs used, in at least one photo for each GCP.
Adjusting the GCPs position from at least three GCPs and using different images with different field of view is highly recommended.
Click on
 , to calculate the final accuracy of the orientation, using GCPs.
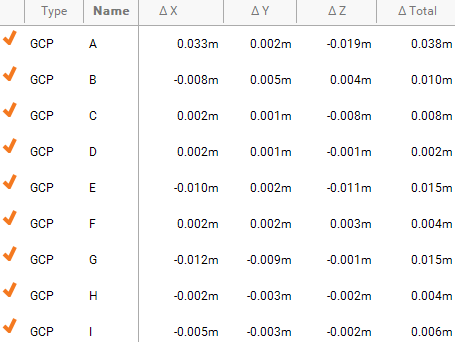
Once you’re satisfied with these first results, you can proceed to the next step.