Starting Data [Ground]
The main steps in the Starting Data page, are the following:
Import of Photos,
Import of Reference points
Selection of the Camera parameters.
The workspace of the Import page is organized as follow:
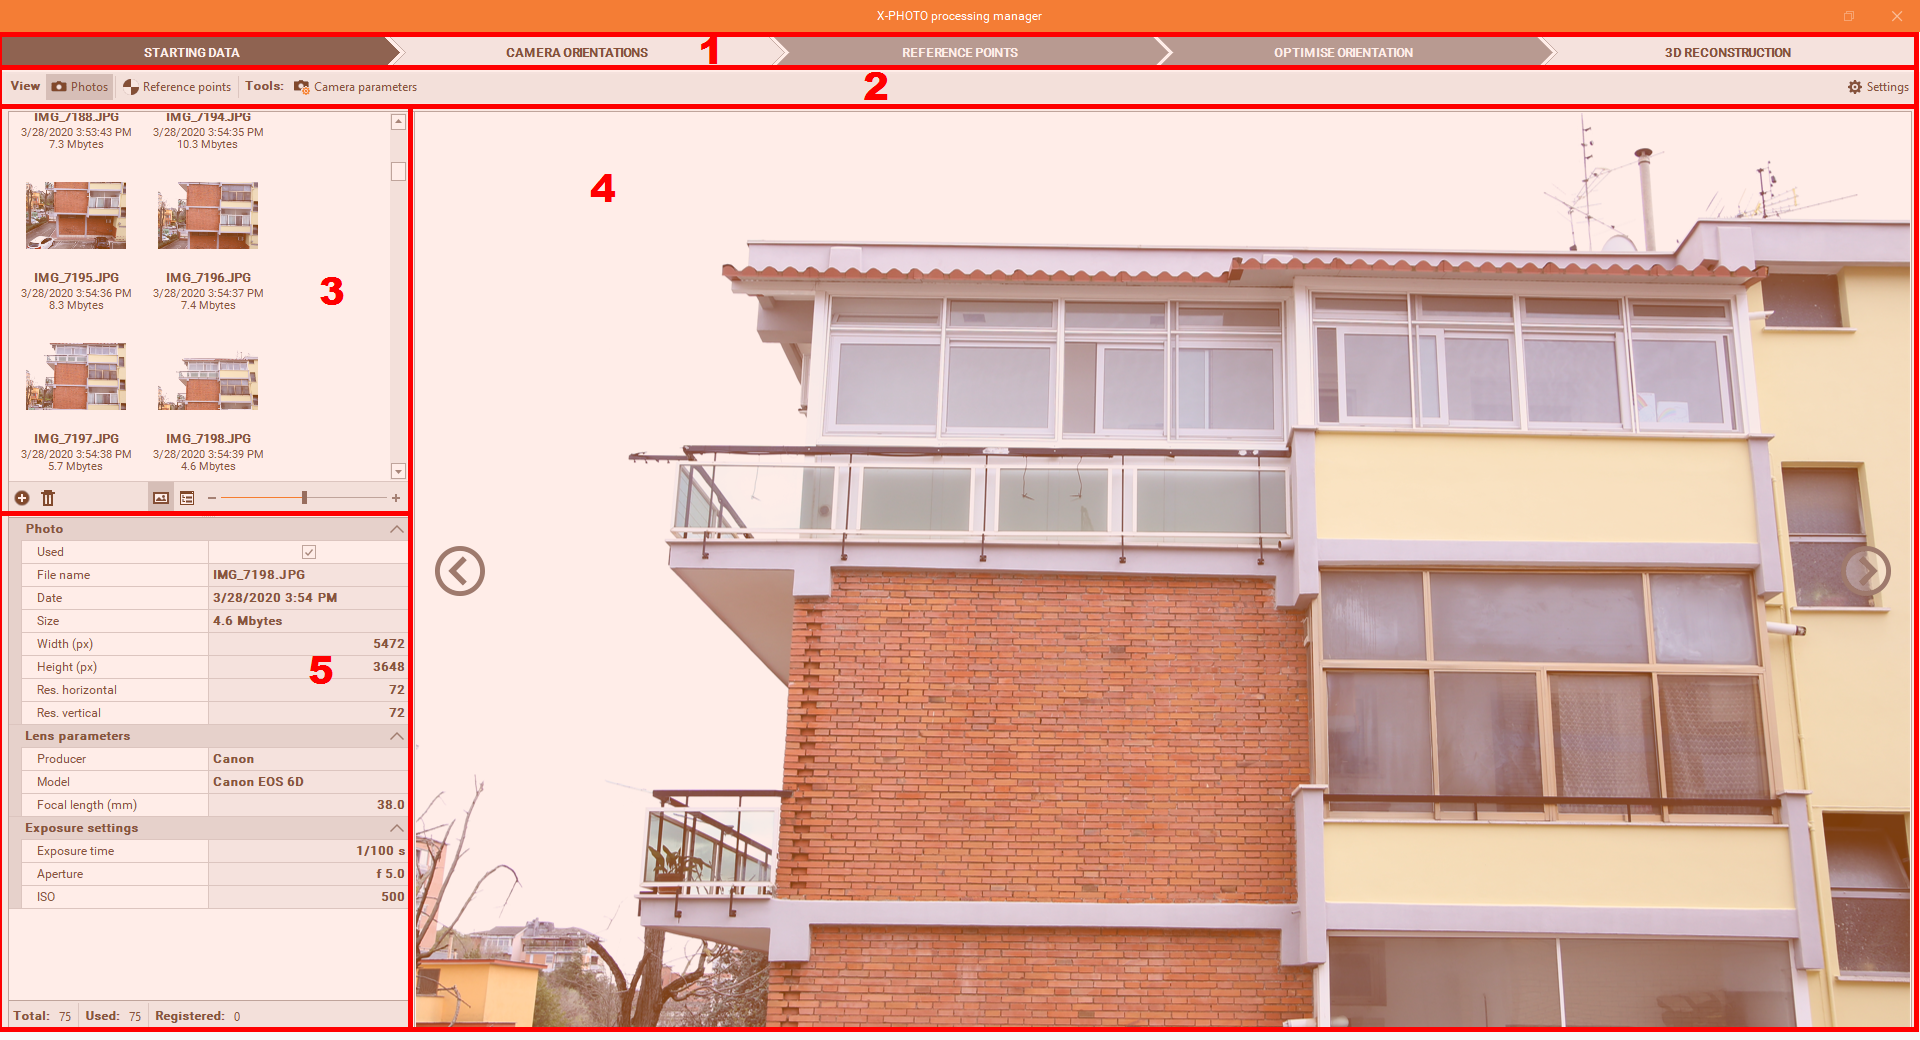
Top bar: the main menus of the X-Photo Processing manager.
Sub-Menu Bar: where you can access all the related functions of every main menu.
Photos list: The complete list of the imported photos, with the possibility to:
add new photos:

delete selected photos:

get a preview of the photos:

get details of the photos:

change the zoom of the displayed photos:

Preview of the selected Photo.
Photo metadata.
Photo import
Click Add Photos
 , locate your photos folder, and upload them.
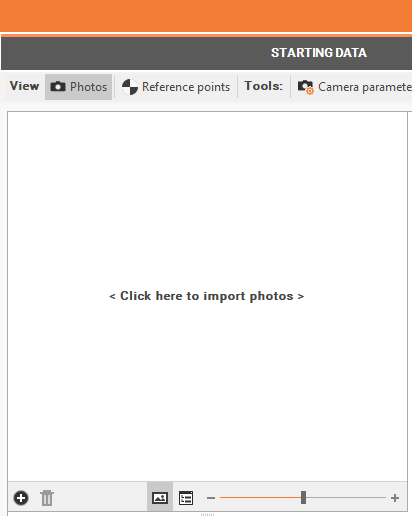
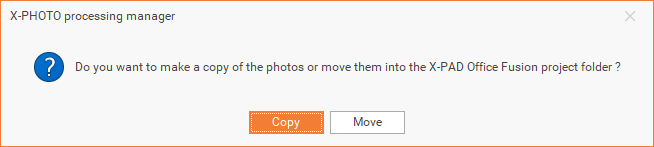
Select if you want to make a copy of the photos to import, or completely move them into the X-PAD Fusion project folder.
The Camera parameters and Navigation data might be already registered on the metadata of the photos.
Reference points import
If needed, you can import the reference points to use for the dense point cloud calculation and the other 3D results.
Click Add reference points
 , to add Reference points’ coordinates from an external file.
The supported formats are: TXT, CSV
Locate your file folder, and choose the import scheme.
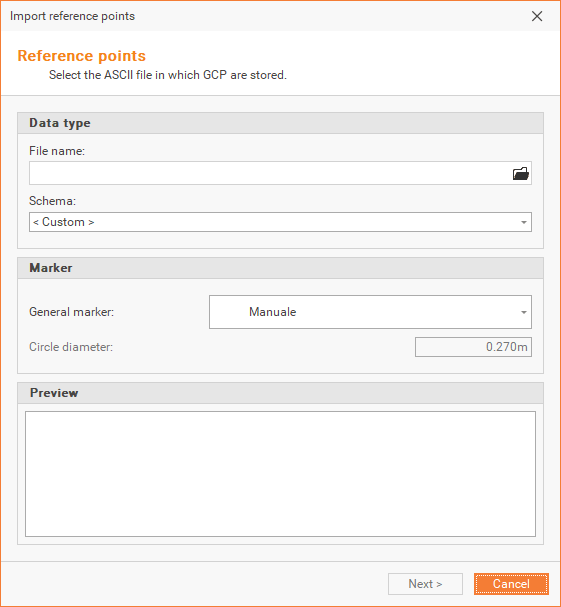
The import scheme can be customized by selecting < Custom >
For each reference point, you can select whether to use it as a Reference point, or a Check point, and the target type: Manual, Black circle and Checkboard. X-PHOTO targets are available in this folder C:\Program Files\GeoMax\X-PAD Office Fusion\Targets.
Follow all the next steps until the import of data is completed,
Click on End.
Reference points can also be imported from the current X-PAD Fusion project, by clicking on ![]()
If needed, you can delete the selected reference points, by clicking on

From the reference point list, you can change the display of coordinates between (Latitude, Longitude, Height) and (Easting, Northing, Elevation) formats, by clicking on

You can also link the visualization map to the selected reference point, by clicking on

You can choose the map visualization between some popular online mappings services and WMS servers.
Camera parameters selection
From Starting Data menu, it’s possible to select the Camera Parameters.
Click on
 , to check or change the camera parameters.
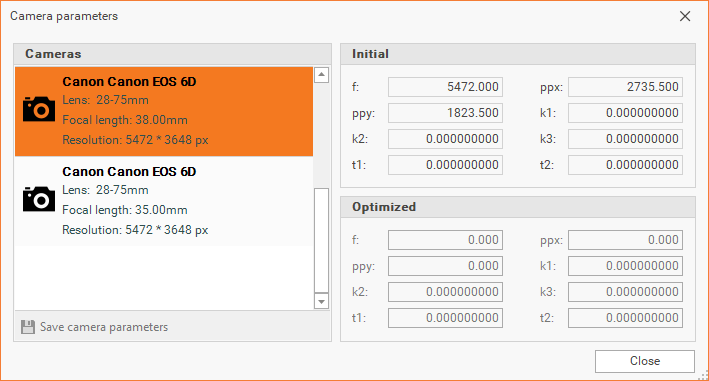
f: focal length.
ppx, ppy: principal point x and y (pixels refers to image angles).
k1, k2, k3: radial distortion.
t1, t2: tangential distortion.
After processing the project with a new camera, it will be possible to save the camera parameters.