
This function helps to generate an Orthophoto from a X-Photo session on a plane defined by an existing clipbox.
-
First, you need to create a clipping box (see Clipping boxes )
-
Once the clipbox is define click Imaging.
-
Click Orthophoto on Plane

-
Select the settings from the new proprieties panel on the right.
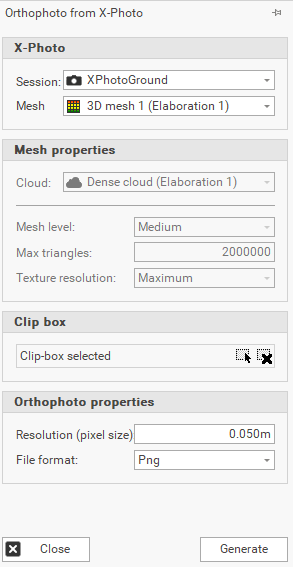
-
Session: select the X- PHOTO session available in Project Manager.
-
Mesh: mesh to use from the selected X-PHOTO session or select <new mesh>.
-
Cloud: the cloud to use to generate the mesh, in case it is selected <new mesh>.
-
Mesh level: the level quality of the mesh, in case it is selected <new mesh>.
-
Max triangles: the maximum number of triangles of the mesh, in case it is selected <new mesh>.
-
Texture resolution: the mesh texture resolution, in case it is selected <new mesh>.
-
Clip box: select the clipping box by clicking on

-
Resolution (pixel size): to set the pixel size of the orthophotos. The resolution of the generated image is larger if the size of the pixels is smaller.
-
File format: you can choose from JPG, PNG and GEOTIFF.
-
-
Click Generate to get your orthophoto.
The orthophoto is automatically saved in the Project Manager. You can delete an orthophoto with the delete command on the Project Manager.