Advanced linework

Advanced linework allows to generate lines between points based on the code of the point and the number of the line.
Two line types exist:
Active: lines currently used in survey and their drawing is not yet completed. Points that form a line are integrated. At the end it becomes a not active line.
Not active: lines measured, drawn and completed. Can again become an active line in case points must be added.
Example of a job with multiple lines
In a road survey, for example, there are two sides (left and right) and the axis of the road.
In this case, it is possible to create two lines with code road side (RS) and a line with code center line (CL).
The two lines RS, having the same code, are distinguished by the line number: the first line has number 1 and the second number 2. The codes RS and CL must have as drawing type the attribute Line. Having to do the road survey, operates as follows:
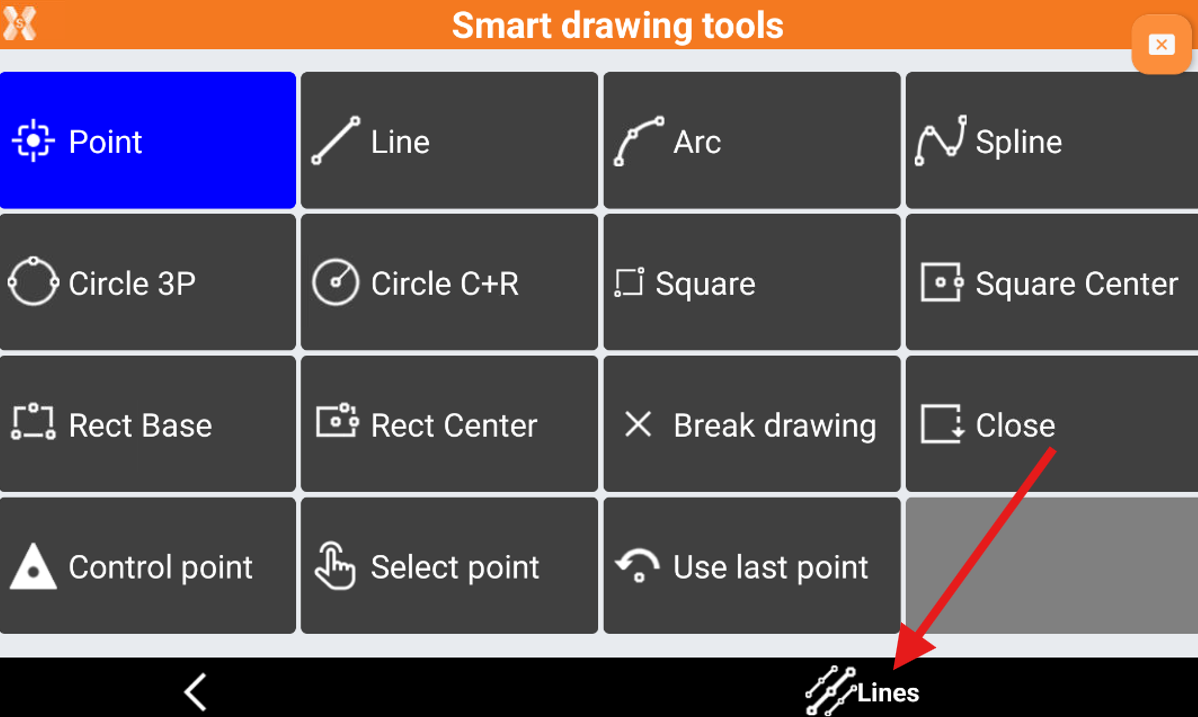
Click on Smart Drawing tool icon and select Lines or long-press the Smart Drawing tools icon.
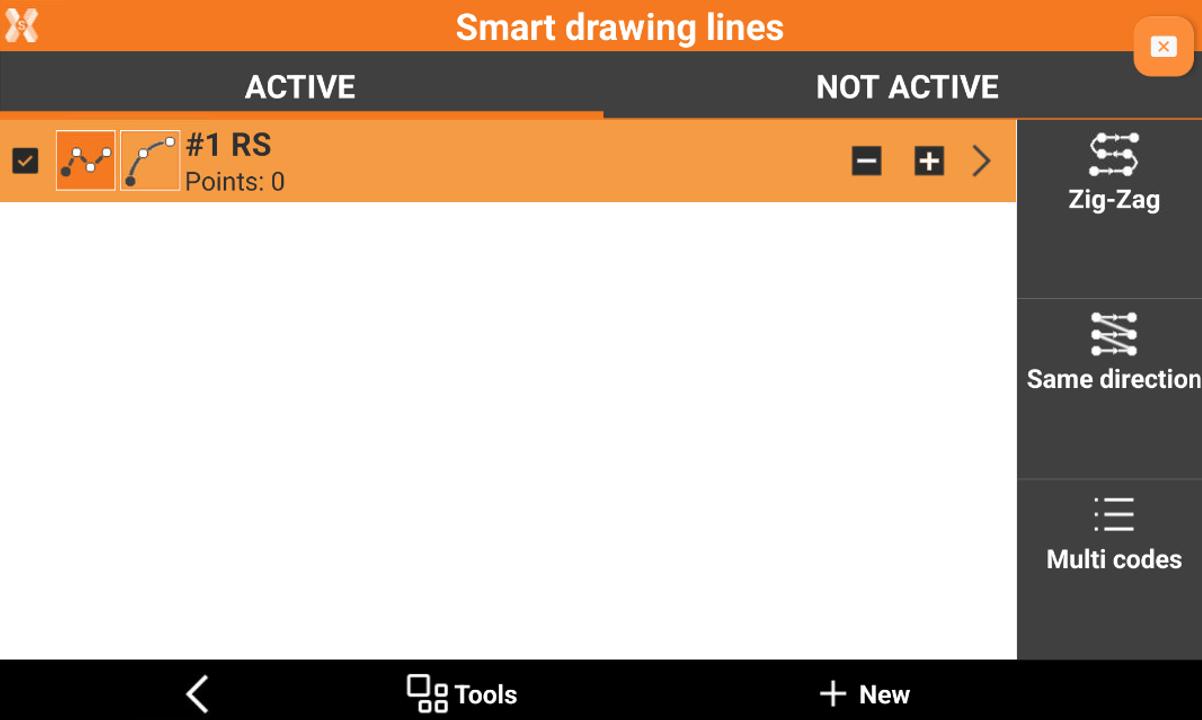
Click Add to add a line.
Select the code RS corresponding to the road side. The code must be of type Line.
The line RS with number 1 is created.
In the same way create the C/L (center line) and again another RS (road side) to create the other 2 lines.
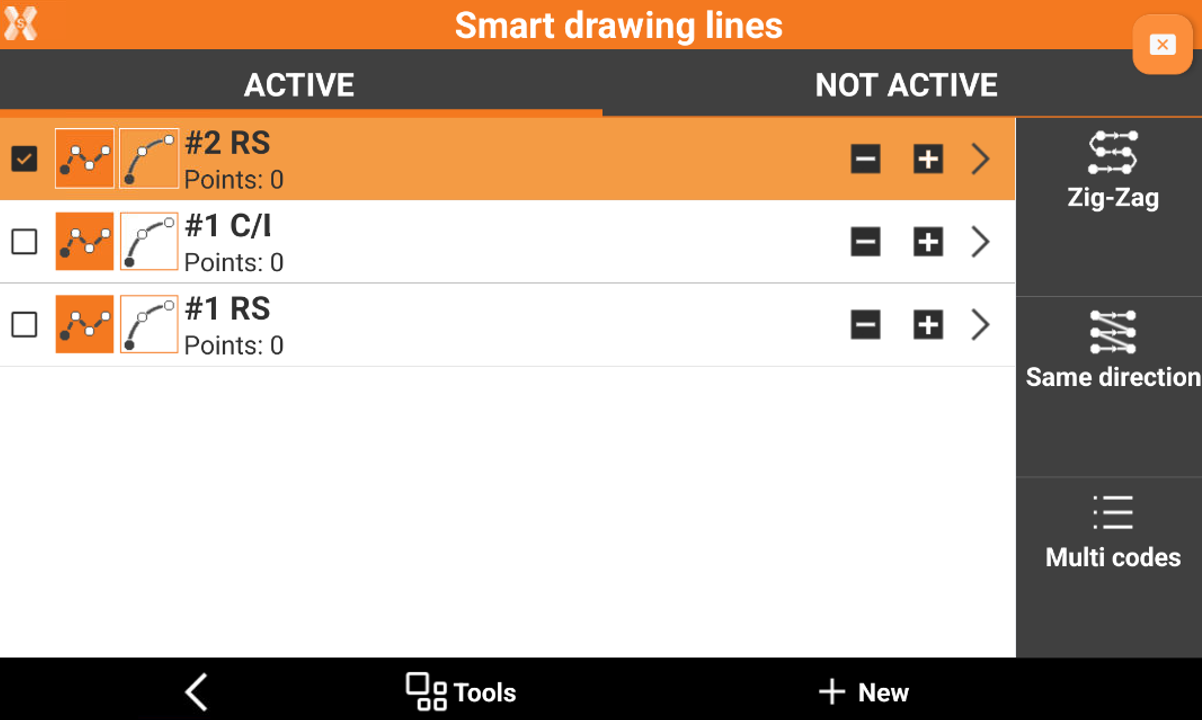
Select from the list the line from which to start: RS #1.
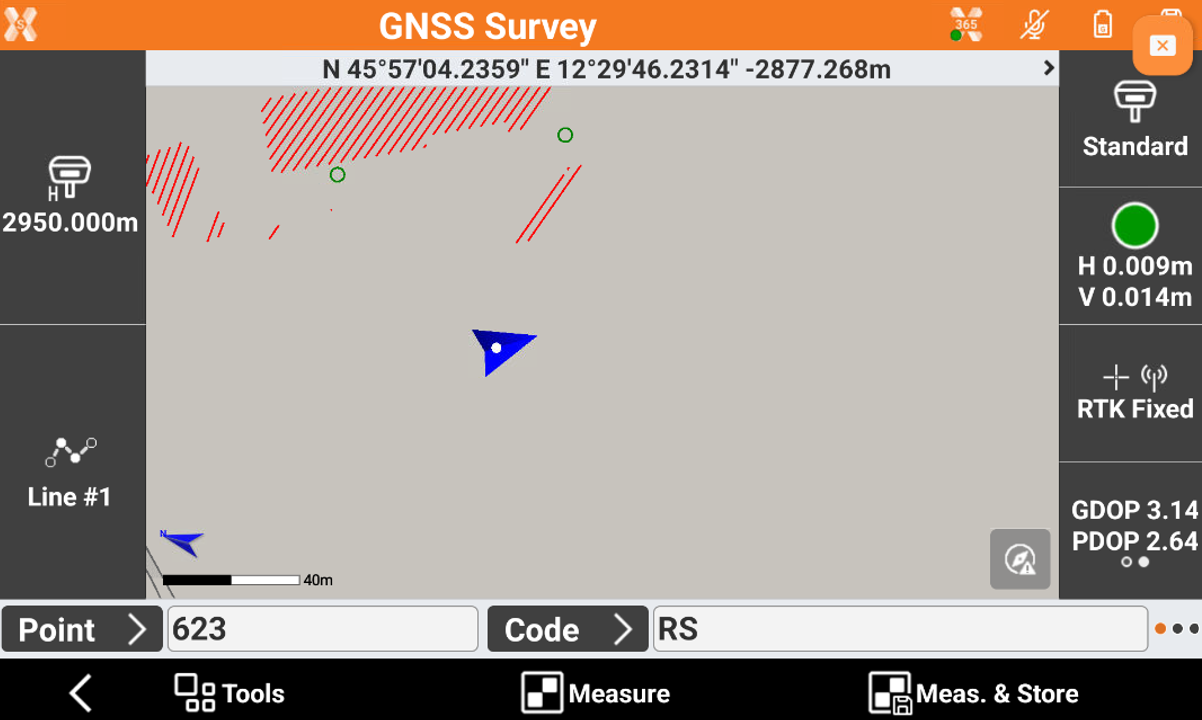
Tap Back to go back to the survey window. The current code is now RS and is reported the line number 1. Tap to measure the first point of the road side.
Tap the button Smart drawing to open the control window Smart drawing. The lines management window opens directly.
Select from the list the line of the road axis: C/L #1
Tap Back to go back to the survey window. The current code is now C/L and is reported the line number 1. Tap to measure the first point of the road axis.
Tap the button Smart drawing to open the control window Smart drawing. The lines management window opens directly.
Select from the list the second line of the road side: RS #2.
Tap to go back to the survey window. The current code is now RS and is reported the line number 2. Tap to measure the first point of the second road side. Tap to measure the second point of the second road side. The drawing of the line of the second road side appears in the graphic window.
Continue selecting the line to measure the line management window.

Add a line
From Smart drawing tools click Lines.
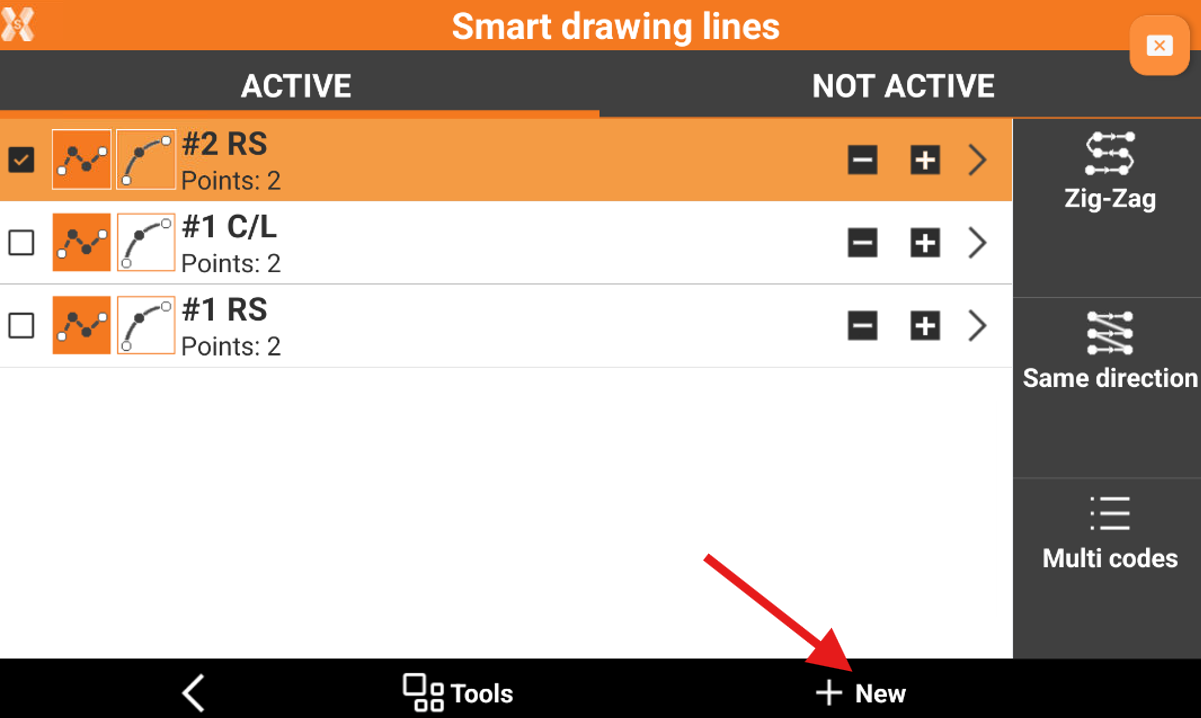
Click New to add a new line.
Specify the code to assign to the line. The code must be of type Line. The line number will be the first free number available considering the lines still present with the same code. If the code is not type Line then the software asks to transform the code type to Line.
Another way to create a new line is to insert the code directly in the points survey window. if the inserted code is of type Line, a line with that code will be automatic created..
Duplicate a line
From Smart drawing tools click Lines.
Click + to duplicate an existing line.
Select a line
From Smart drawing tools click Lines.
Select the line, that will be used for the next measure, from the list. Active line is checked.
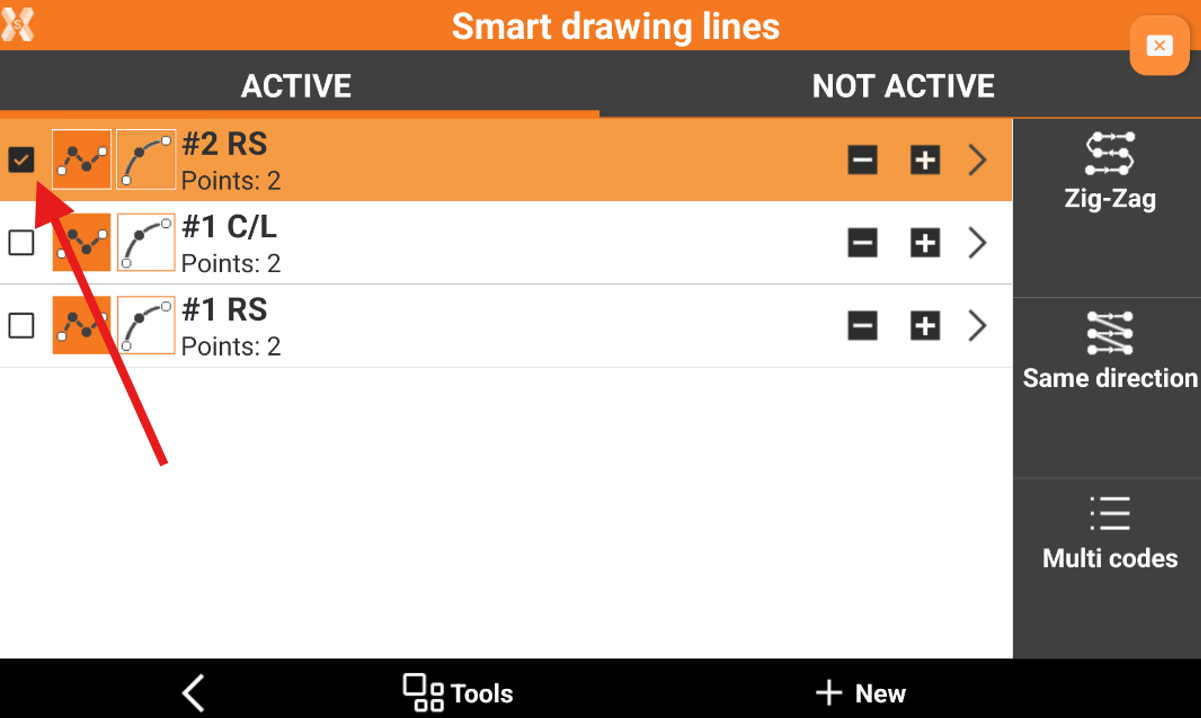
Coming back to the survey window, the code of the line is set as current code.
Another way to select a line to use for the next measurement is to select it directly from the graphic window.
End a line
When the drawing of a line is completed, it is not necessary to maintain it in the list of the active lines.
From Smart drawing tools click Lines.
Click
 for the line to deactivate.
The line is moved to the list of not active lines.
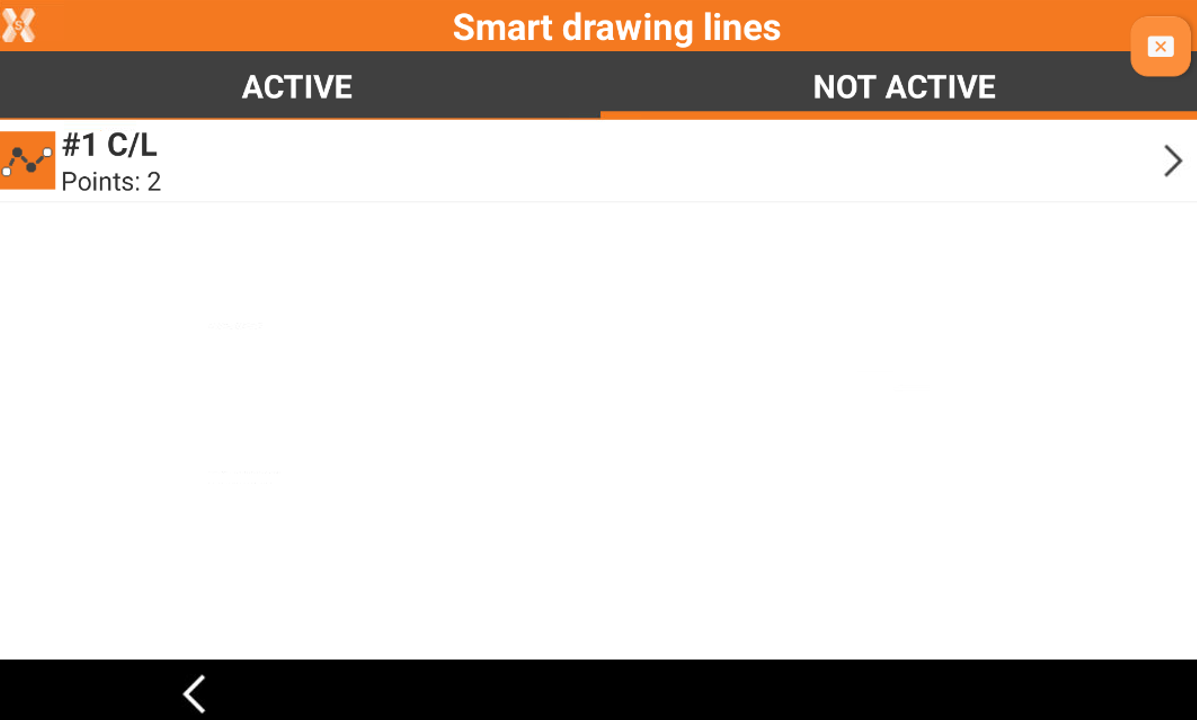
To make a not active line again active, click > on the line and select Activate.
Delete a line
From Smart drawing tools click Lines.
Click > to open the line tools.
Select Delete.

Invert a line
When a line has been selected, measured points are added always at the end of the line. In some cases it can be necessary to add the points at the beginning of the line. In this case it is necessary to invert the direction of the line before adding new points.
From Smart drawing tools click Lines.
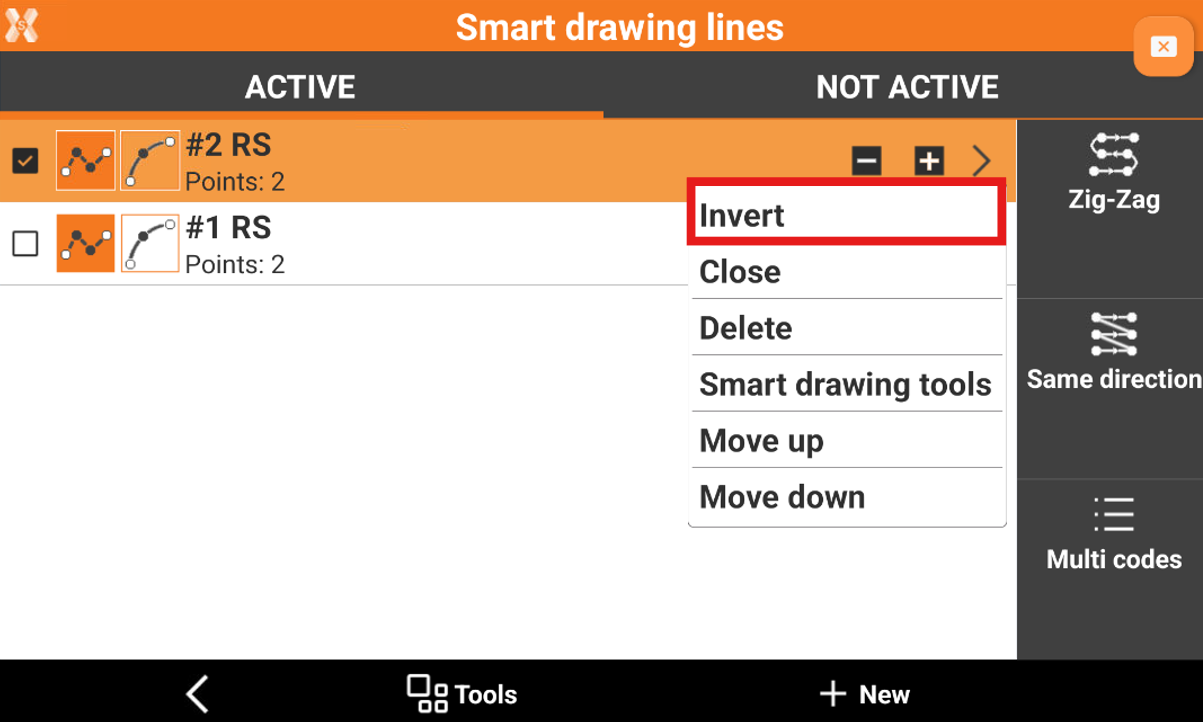
Click > to open the line tools.
Select Invert.
Close a line
If the drawing of a line must be a closed element, for example for the contour of a building, the line can be closed. The first vertex is joined with the last vertex.
From Smart drawing tools click Lines.
Click > to open the line tools.
Select Close.
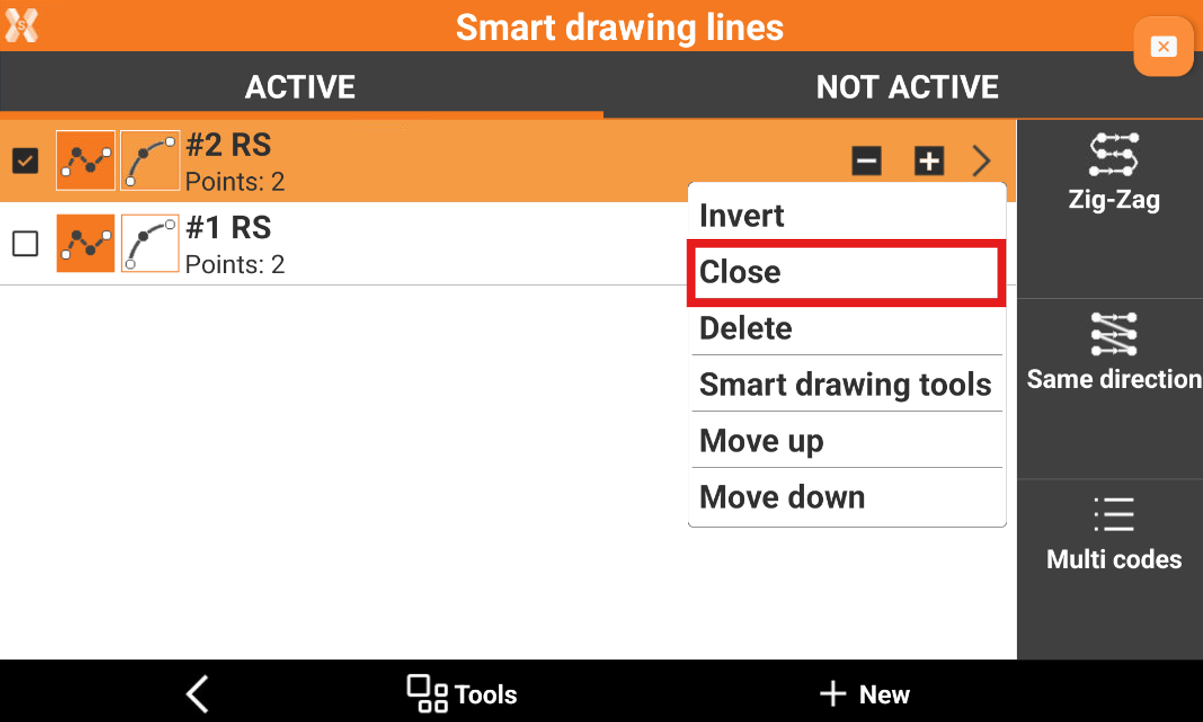
The line is moved to the list of the non active lines.
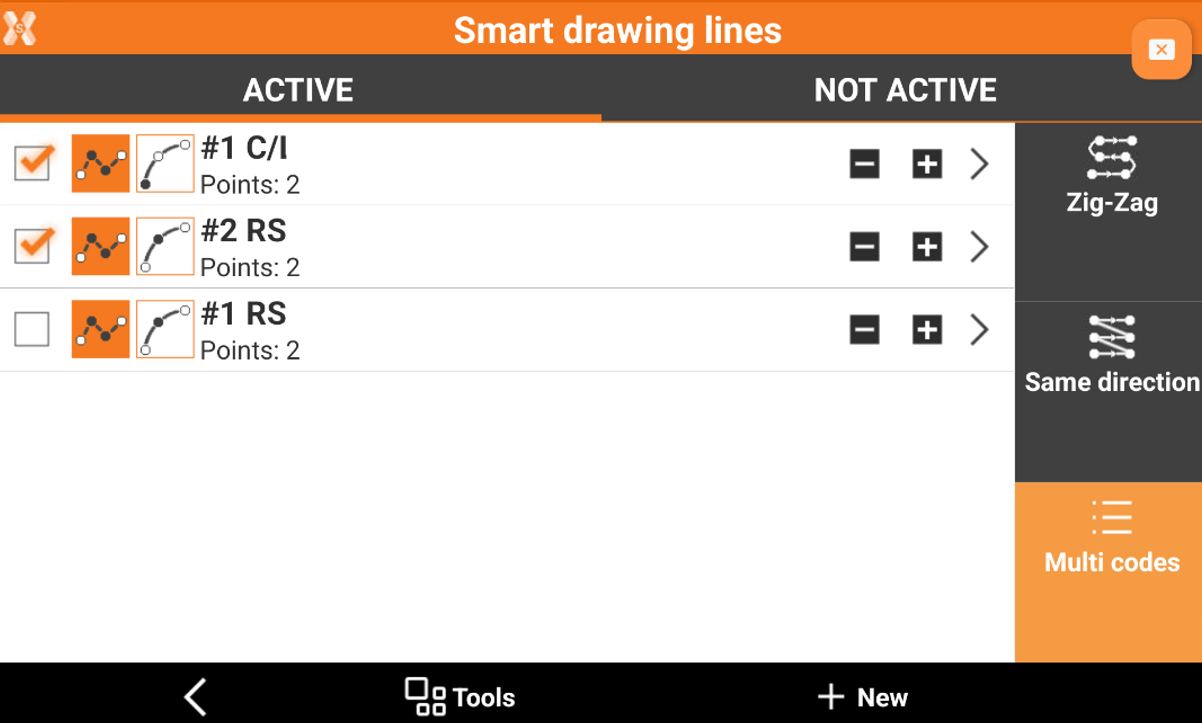
Multi codes for a line
In some cases, a measured point belongs to several open lines.
From Smart drawing tools click Lines.
Select Multi codes.
Select the lines to which the measured point must be added. the point is added to all selected lines as new vertex.
Automatic coding of a line
Automatic coding speeds up the surveying phases where elements to measure occur regularly.
This is for example the case in a road survey where the side elements and the axis must be measured.
For these cases, define a list of lines to measure in the correct order and activate the Zig-Zag mode or Same direction mode.
When one of these modes is active, it is no more necessary to select the line to draw but the system suggests the line automatically based on the defined order.
From Smart drawing tools click Lines.
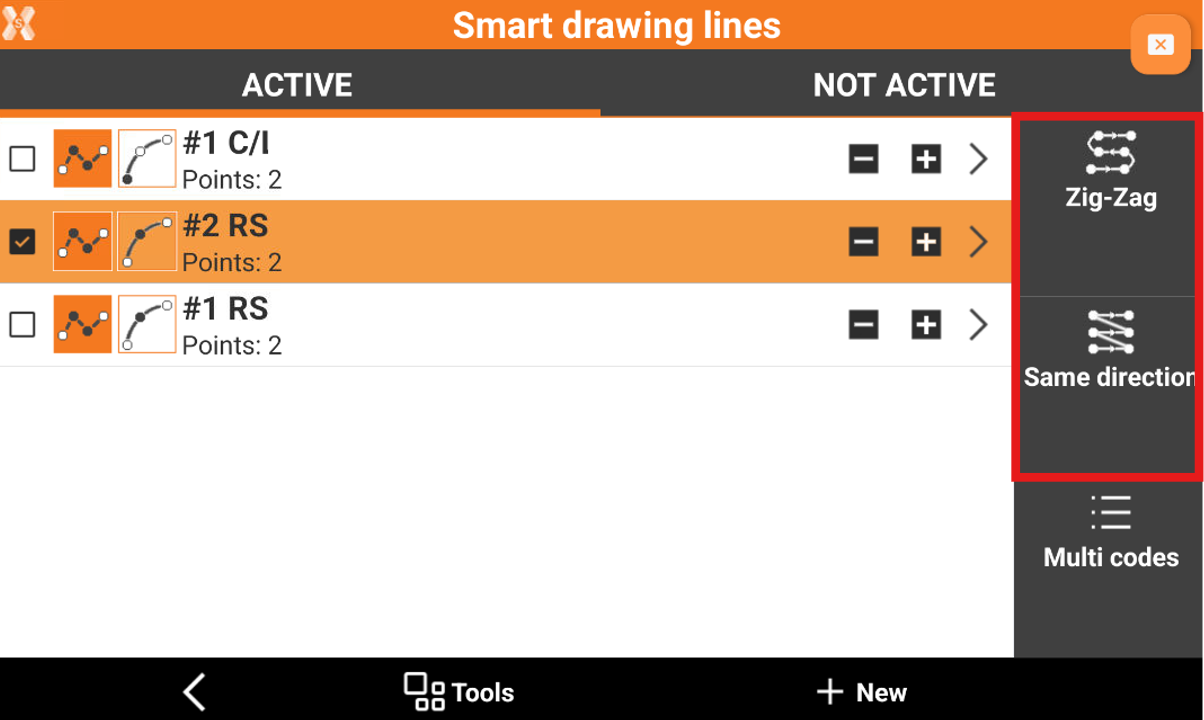
Zig-Zag: survey must be executed from left to right and then from right to left and then again from left to right.
Same direction: survey must be executed always from left to right or always from right to left.
To change the order of codes when working with automatic coding, click on > for the code, and select Move up or Move down.
The code of the first line in the list is suggested.
Measure the first point. The code of the second line in the list is suggested.
Continue the procedure.
To stop the sequence, skip a code and pass to the next or pause the system because before proceeding it is necessary to measure other single points not included in the sequence use the commands available in the Smart drawing lines page.
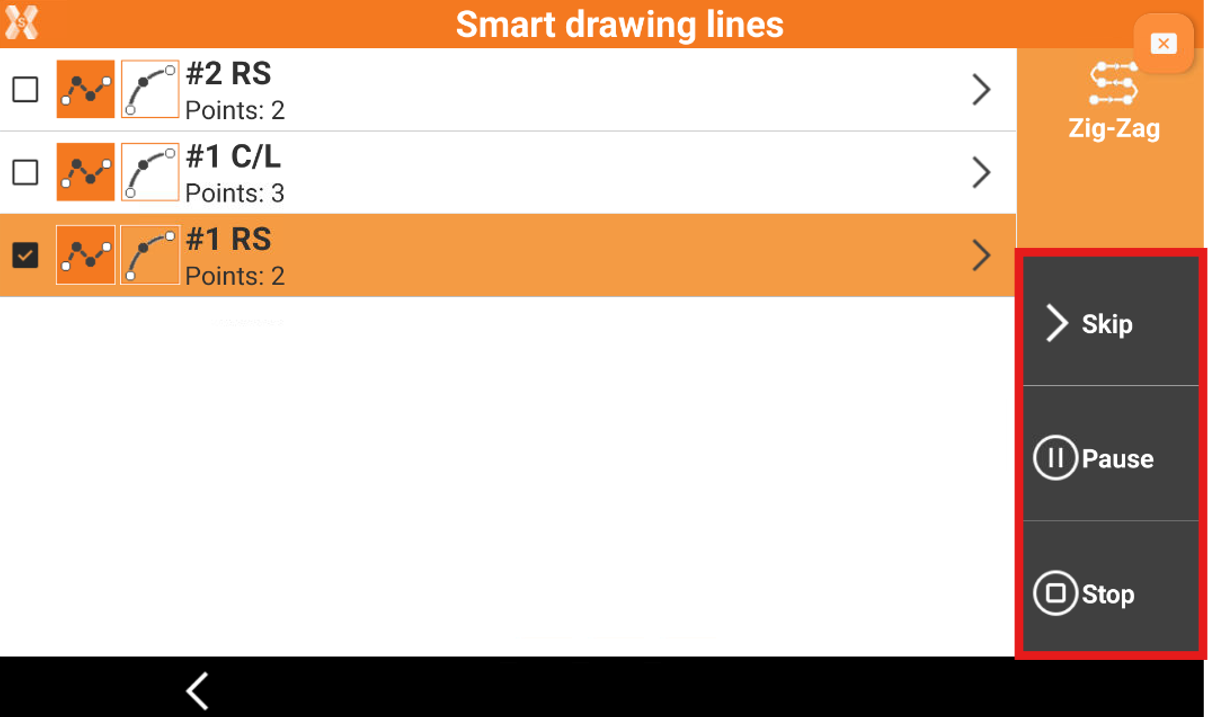
Skip: skips the current code and moves to the following code.
Pause: pauses the automatic coding.
Stop: stops the automatic coding.
Use the smart drawing tools when working with advanced linework
While working with Advanced linework, to measure the points with Smart Drawing Tools there are two ways:
Open the Smart drawing lines page. Click on > icon and select Smart drawing tools.
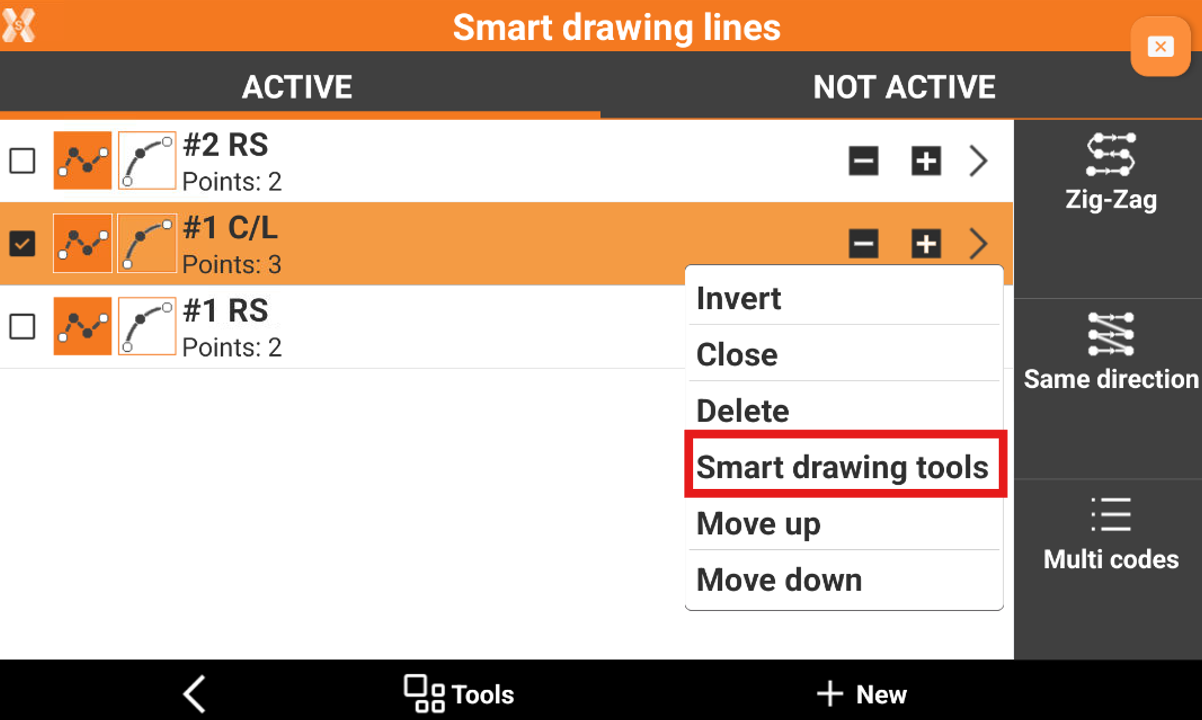
Deselect all the lines. If no lines are selected then the software proposes the Smart Drawing Tools commands.