Auto Measuring settings
 + AUTOMEASURING
The auto measuring procedure has several parameters and options that are fully customizable.
To save the settings, a USB pen drive has to be inserted in the controller after Save has been pressed.
Change the settings.
Click Save.
Enter a USB pen drive as requested by the software to safety save the settings.
Click Settings.
Parameters and options are organised in pages.
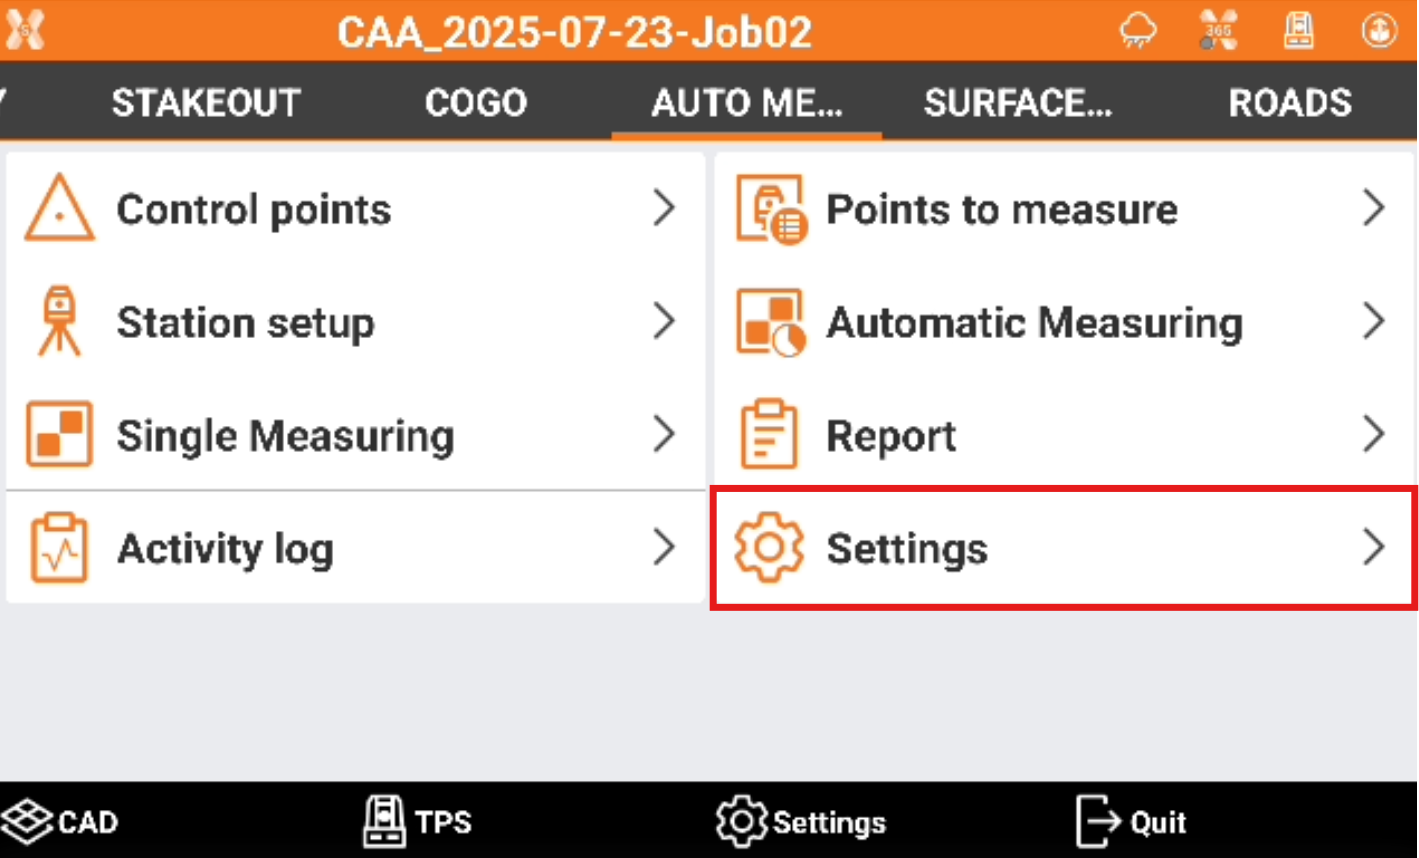
TPS page
The page allows to define how the automatic measurement is performed.
Distance tolerance: maximum horizontal distance between current position and the position of the point to measure. If the distance between the current position and the position measured is more than the tolerance, the software notifies. The tolerance for each point can also be customized individually.
Elevation tolerance: maximum acceptable difference between the current elevation and the elevation of the point to measure. If the difference of elevation is more than the tolerance, the software notifies. The tolerance for each point can also be customized individually.
Save measurements on external files: save data to a file other than the job file to avoid that too much data is saved to the current job. This is recommended to be enabled in case the session will be done for long time measuring multiple targets.
Session number: sets the session ID number.
Face1 & Face2: measure the position of a point in both faces and calculates the average.
ATR searching mode: sets the auto-collimation state of the prism. It is possible to set the area for the automatic prism collimation. In case prisms are close it is recommended to use a fine searching mode.
Measurements per point: number of measurements to perform per point.
Search point from last position: if enabled search the point to measure not based on the original coordinate but on the latest measured coordinate.
Measure rate: defines the interval of time between the measuring sessions.
Never: automatic measuring procedure is never executed
Every 15 minutes
Every 30 minutes
Hourly
Every 2 hours
Every 4 hours
Every 8 hours
1 time a day
2 times a day
Reference time: Reference time of starting of measuring session. Example: Reference time: 8:00 Frequency of sending data: Hourly The sessions starts at 8:00 o’clock, then hourly at 9:00, 10:00, etc.
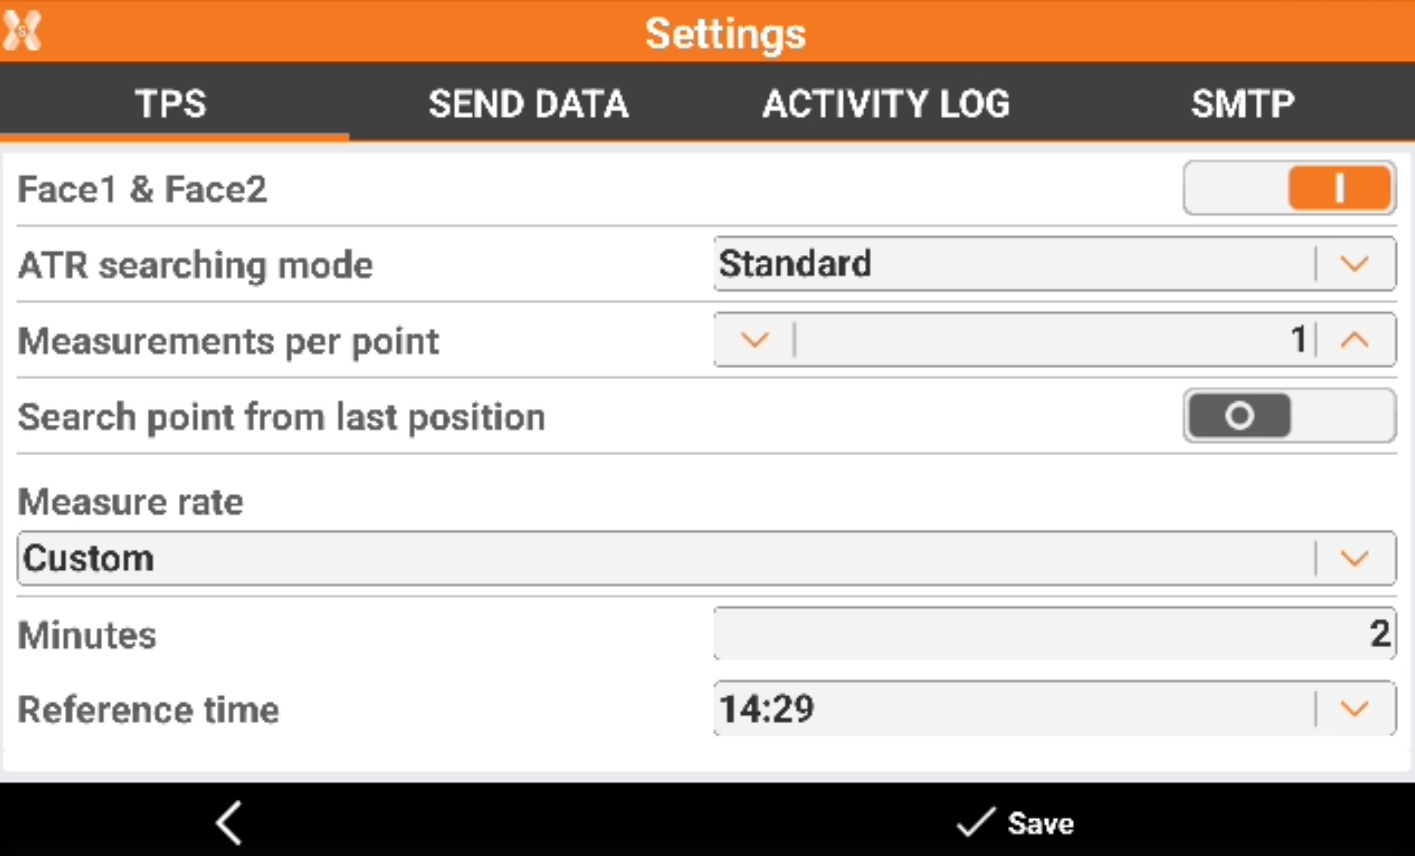
Send data page
The page allows to configure how to send the data to office.
Format: set the format for exporting the session results. The software generates and sends the files of the report to destinations (e-mail, FTP) automatically. It is possible to use available formats or create a new format in the Auto Measuring report.
Sessions to export: select between exporting all sessions or only the last session.
X-PAD 365: enables the automatic loading of reports to X-PAD365 storage area. Allows to select the X-PAD365 cloud folder. A Professional or Enterprise X- PAD 365 license is required.
FTP Server 1/FTP Server 2: send the post-processing files to an FTP area. Click Setting icon to define the FTP host, user and password.
E-mail notification: sends the measurement notifications to an e-mail address.
Attach data: available if e-mail notifications are turned on. Attach a post-processing file downloaded during the measuring session to the notification e-mail.
Sound notification: use sound notifications. Activates a notification by sound emitted by the controller when a measurement is out of the tolerance. Sounds Select the sound to use. Tap to play an example of the sound.
Activity log page
Allows to define if the detailed application activity log, recording all software steps during the monitoring, is sent.
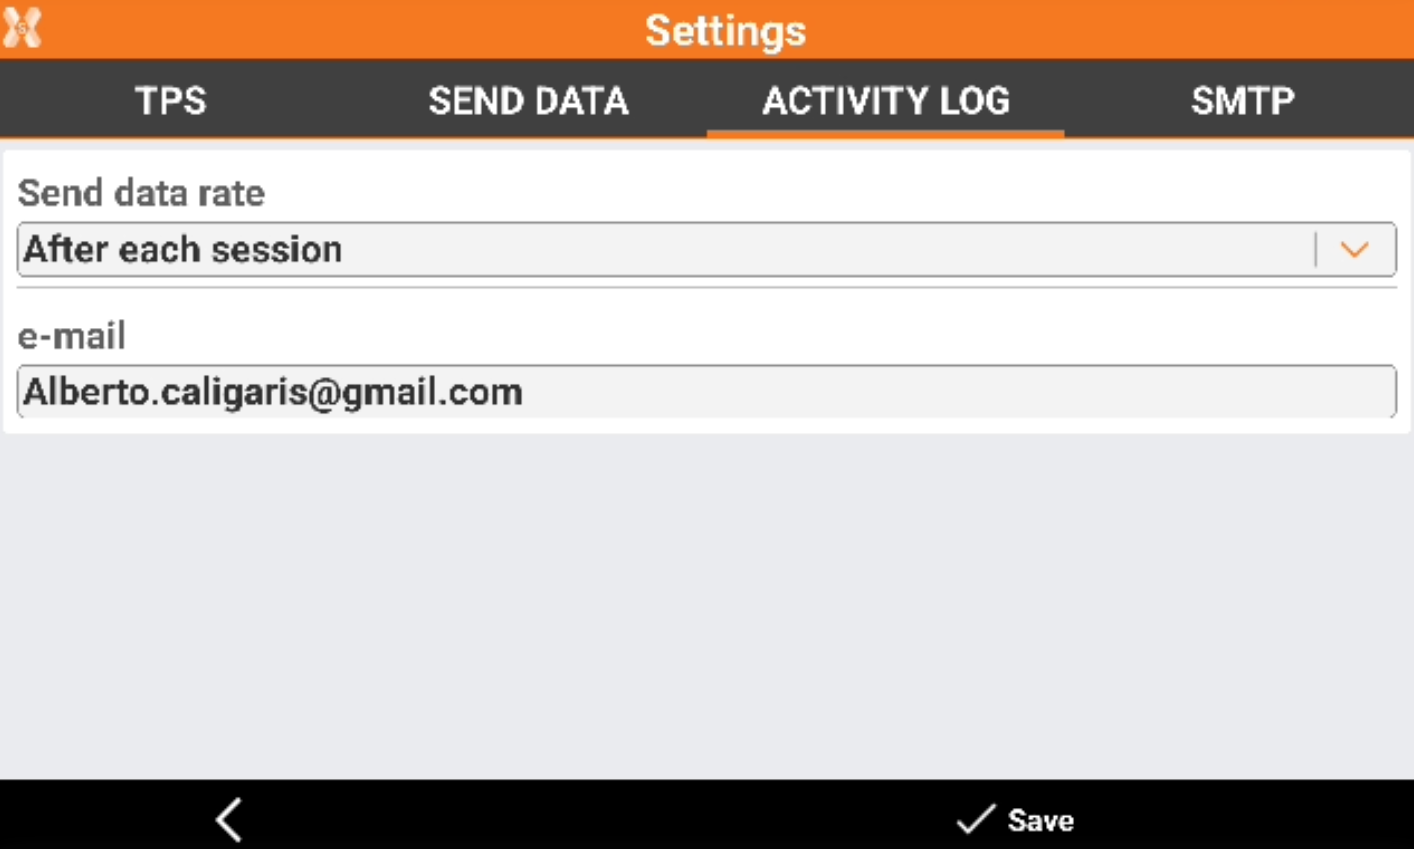
Send data rate: frequency of sending of the measuring activity log to a certain e-mail box.
Never: activity log is never sent.
After each session: at the end of every session, the activity log is sent to the e-mail.
1 time a day: the activity log is sent only once per day at 12:00 o’clock.
E-mail: e-mail address for sending the activity logs.
SMTP page
Allows to define the configuration of the SMTP for sending out emails.
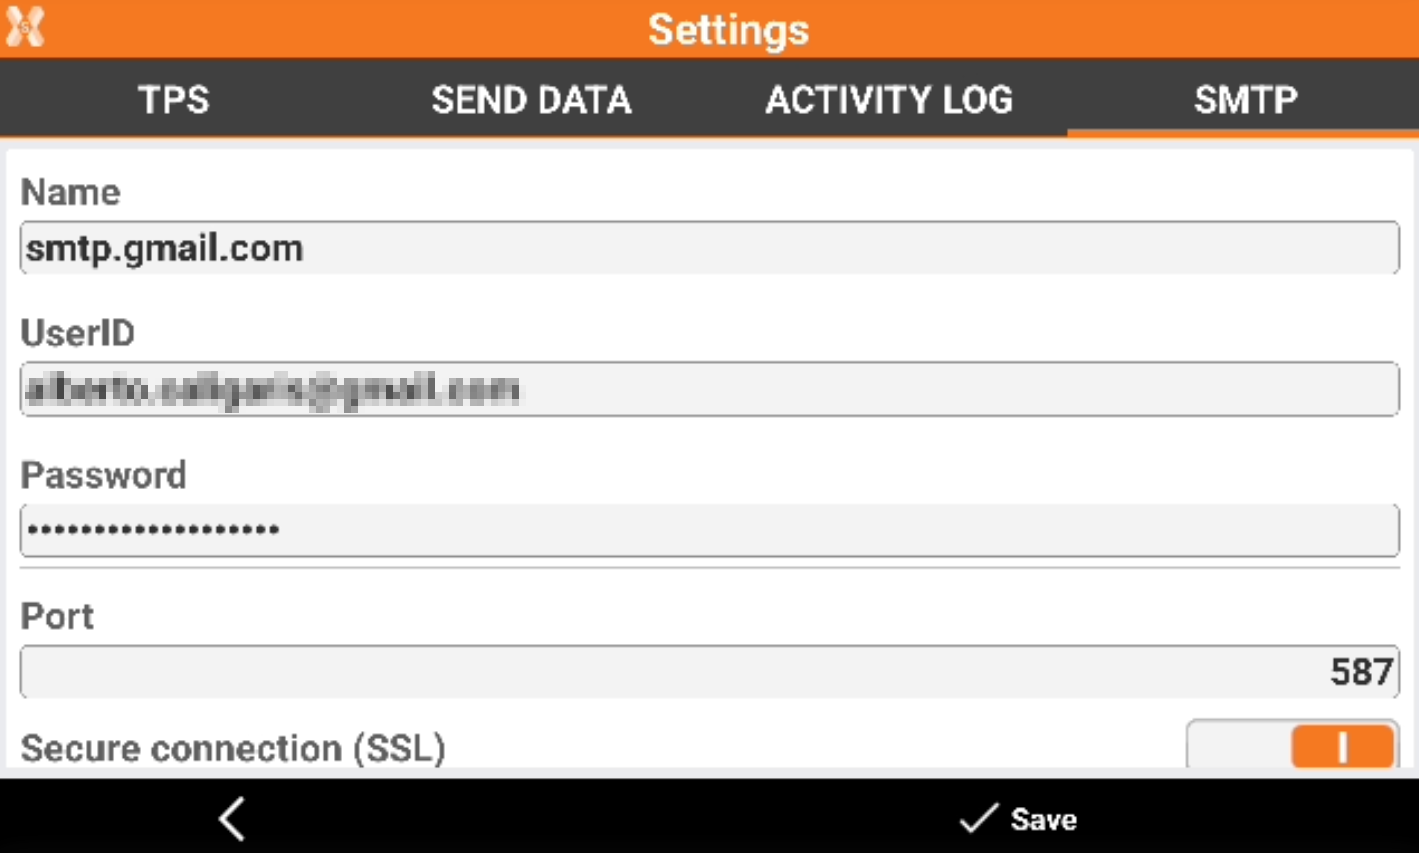
Name: name of the SMTP server for sending the e-mail.
UserID: user to login to the SMTP server.
Password: password to login to the SMTP server.
Port: port to be used for the SMTP server.
Secure connection: enables the SSL connection.
Configure GMAIL to be used in X- PAD Auto Measuring
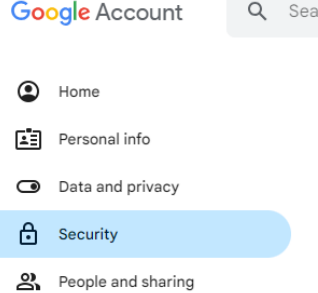
The first step is to create an App password in GMAIL.
Login in gmail account and open Security page.
In order to create app password, it is mandatory to create a 2-step verification using one of the usable methods. Activate the 2-step verification.

After the 2-step verification has been enabled, click 2-step verification.
In the 2-step verification page scroll down the page in the App password field.
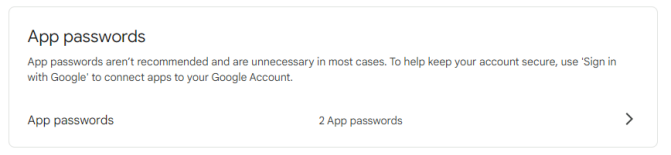
Click App passwords.
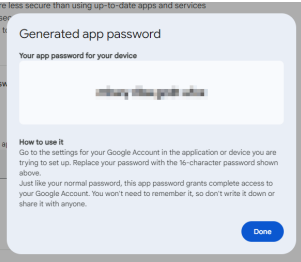
Enter the application name and click Create to create a new password for X-PAD.
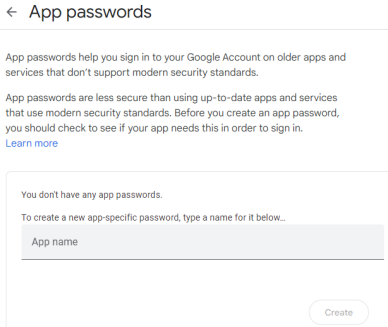
This is the password to enter in X-PAD. Note that has to be entered as it is visualized.
Open the Automeasuring settings and open the SMTP settings.
Name: smtp.gmail.com
UserID: the gmail account name
Password: the gmail app password that was created (enter it with the spaces)
Port: 587
SSL: enabled
. Start the automeasuring session with the option to send e-mail notifications.