Stakeout with GNSS receiver
 |
|  |
| 
To stakeout a point or geometry with a GNSS receiver open the corresponding function.
Stakeout procedure
Follow the indications until the stakeout page is opened.
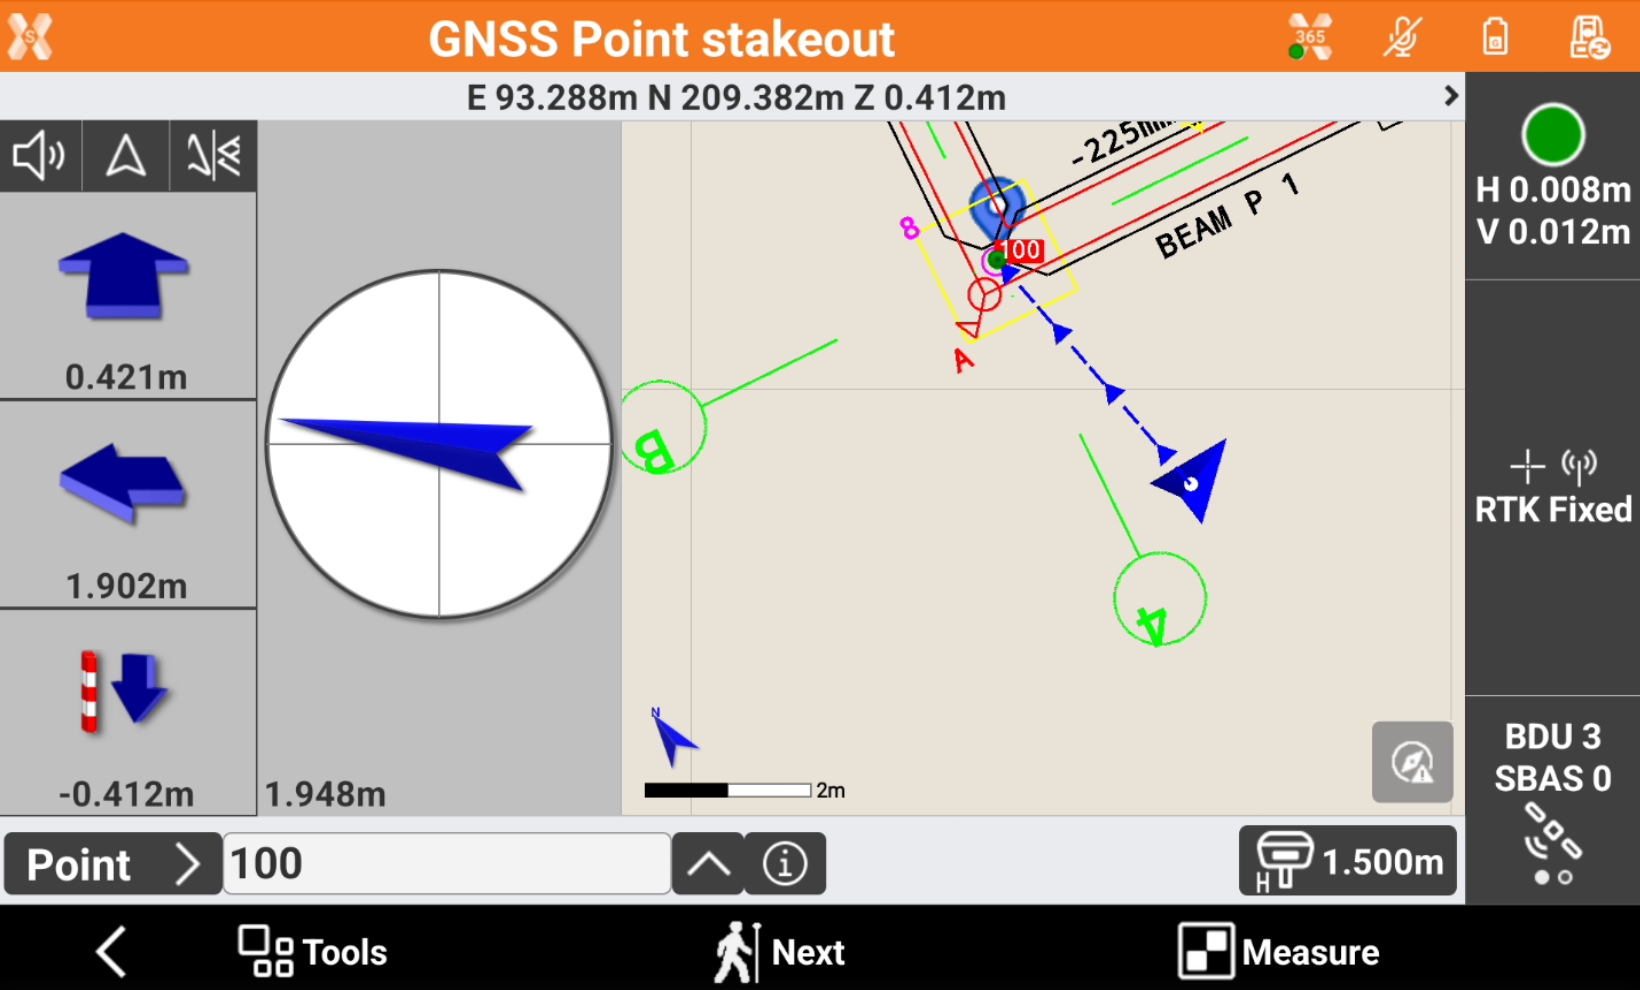
The left panel shows the indications to the coordinate to stakeout referred to the selected Stakeout reference for GNSS receivers.
Depending on the View mode selected, the interface shows the compass with the direction or the CAD view or both.
Approaching the point, the compass view changes to offer a better view to precisely stakeout the point and the CAD view automatically increase the zoom level.
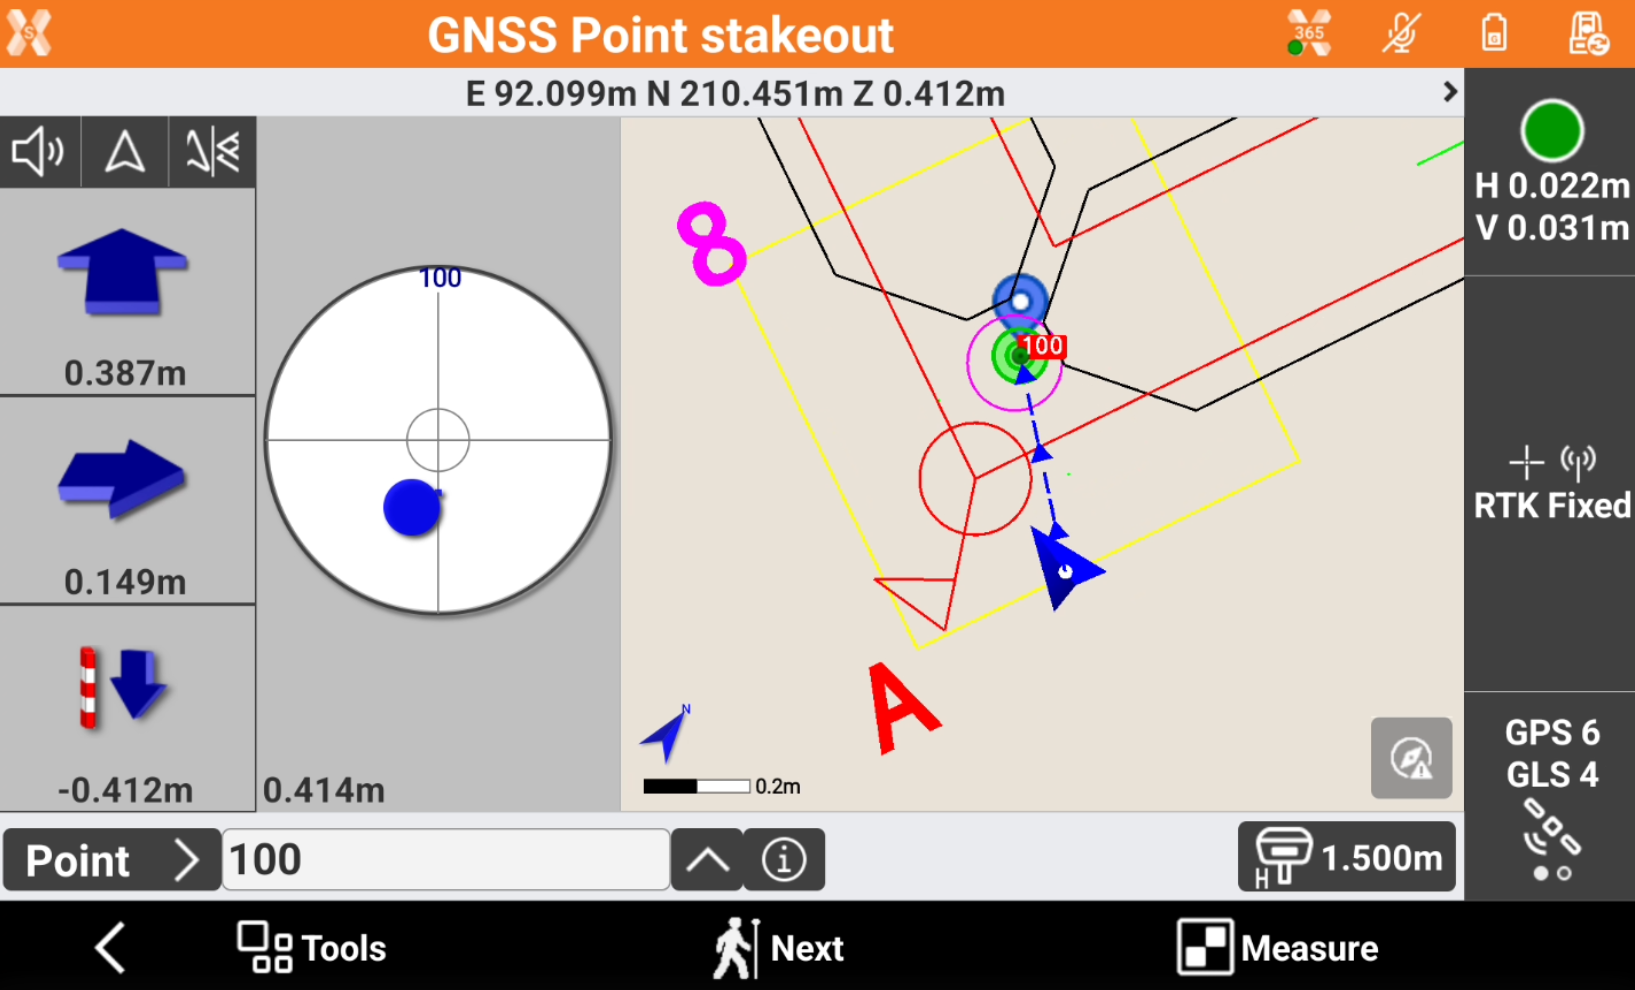
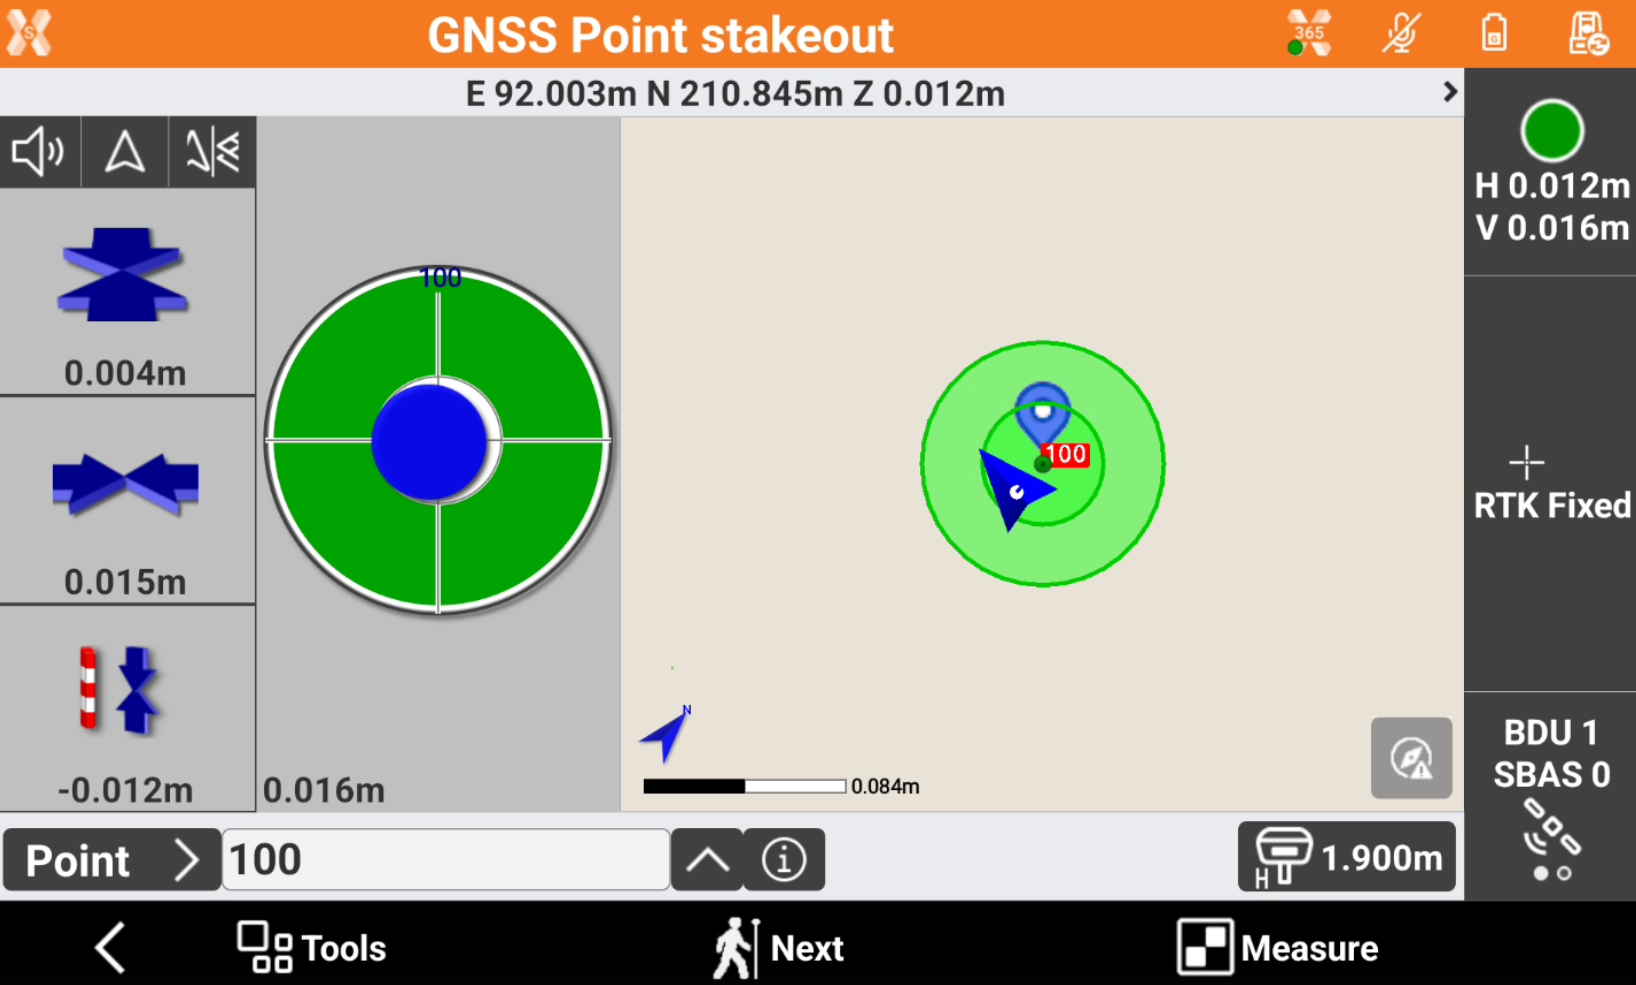
If the stakeout distance is within the defined tolerance the compass view is in green.
Record the stakeout measurement
Press Measure to record the stakeout measurement and display the Stakeout results.
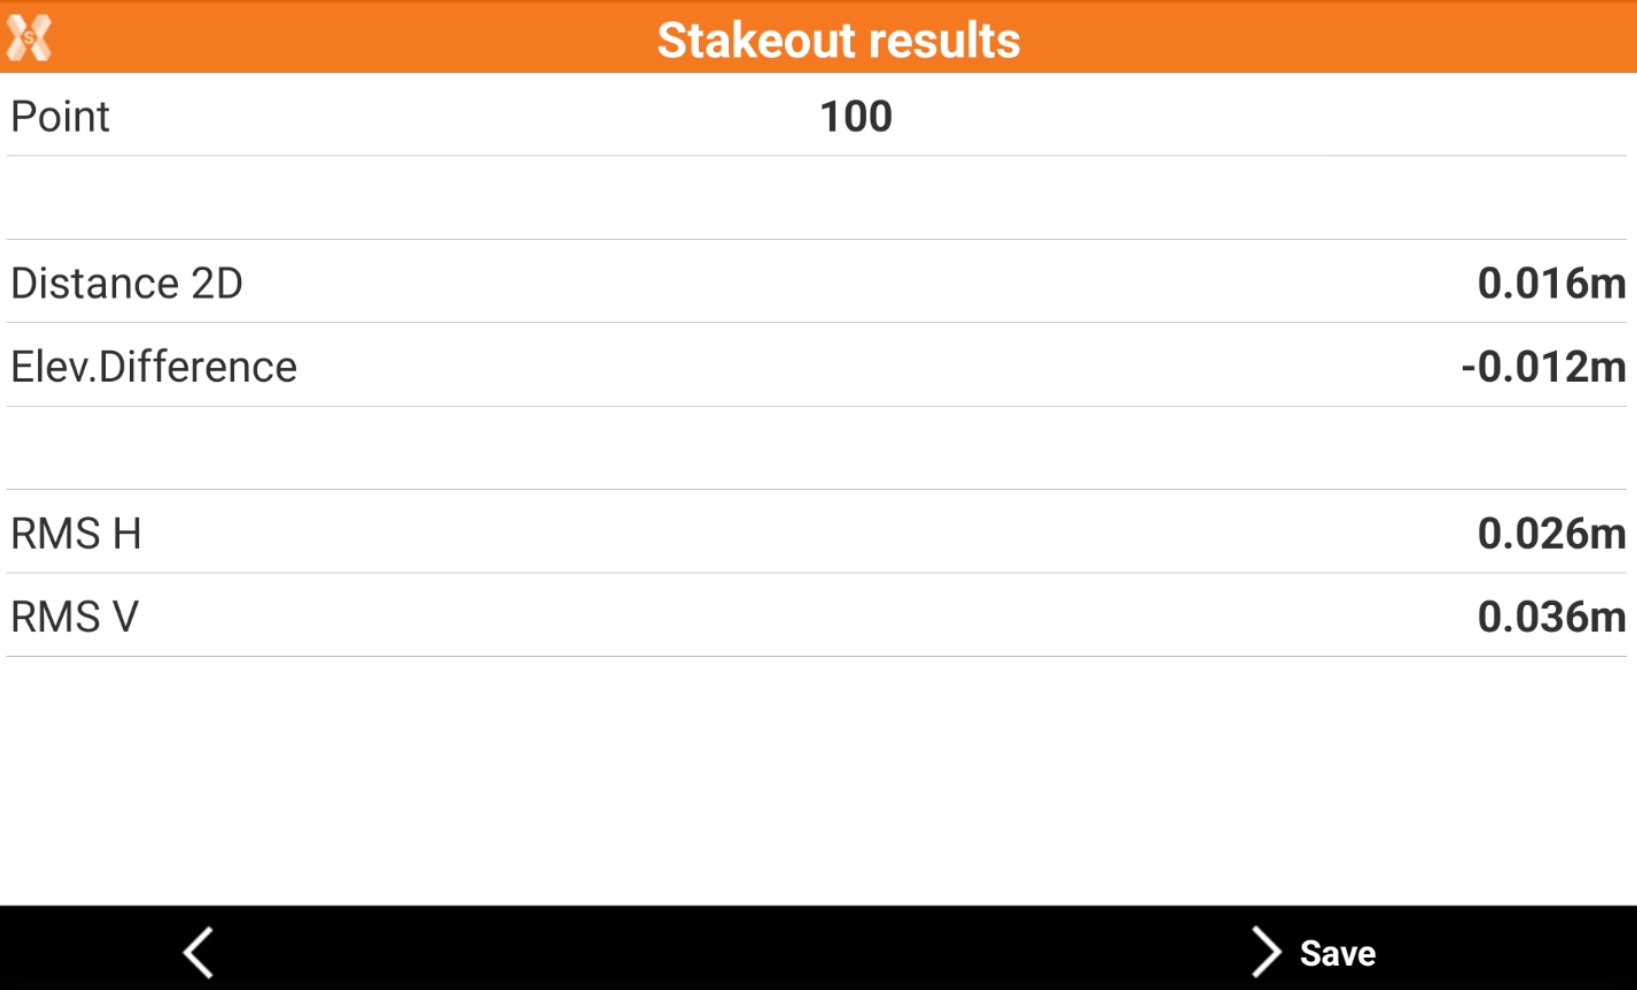
Press Save to proceed to save the point.
Data page
The Data page shows the main point information.
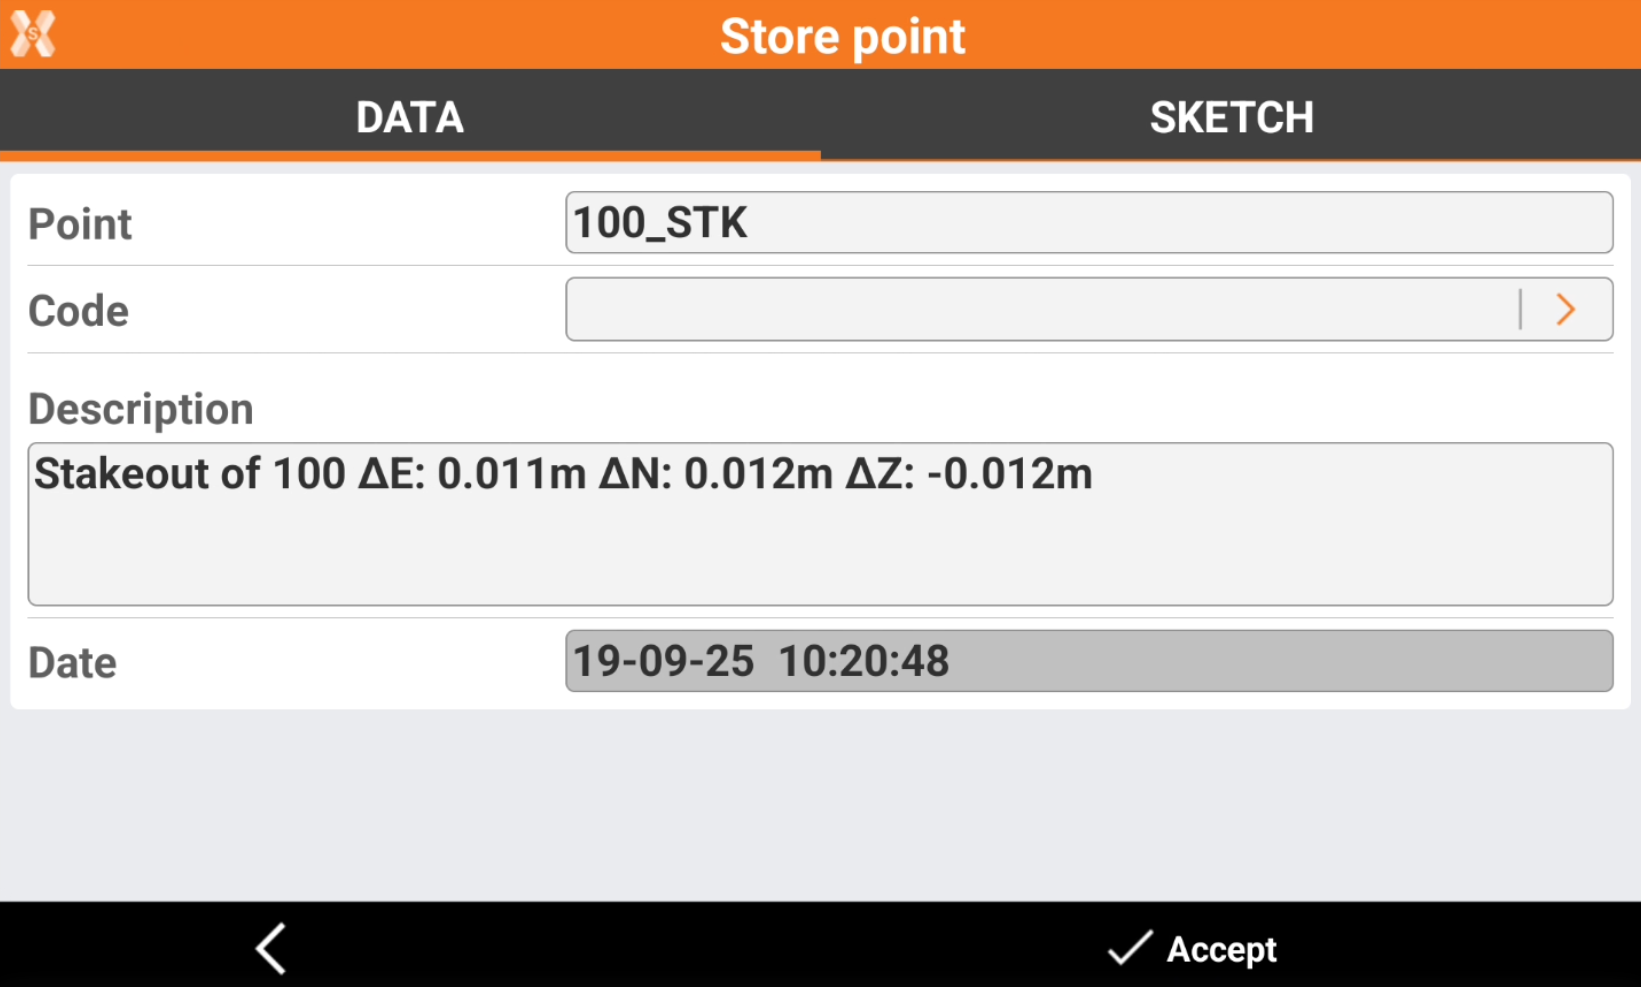
Point: name of the point to store.
Code: code assigned to the point.
Description: extended description associated to the stakeout. The software automatically writes the main stakeout information.
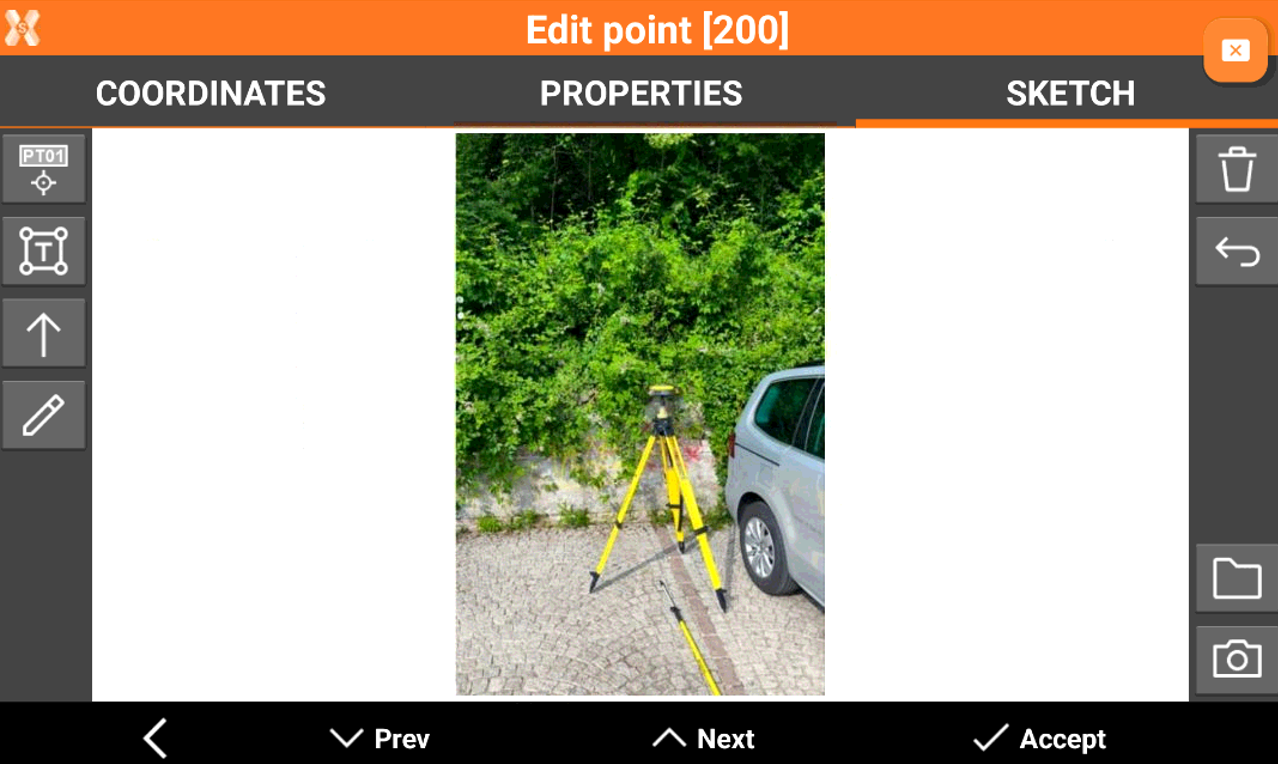
Sketch page
Sketch page allows to view the photo assigned to a point, load or take a new photo or draw on the image to have a picture of the topographic point.
 : creates a text box with point name, coordinates and codes on the picture. Select and drag
  to move the text box.
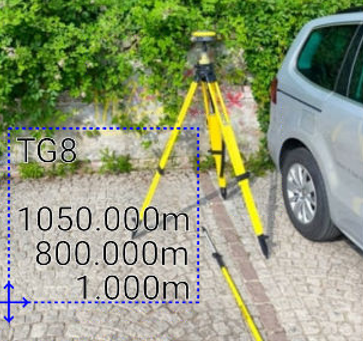
 : creates a text box with free text. Select and drag to move the text box.
 : creates an arrow. Select and drag to move the arrow. Click on to change icon to rotation
  to rotate the arrow.
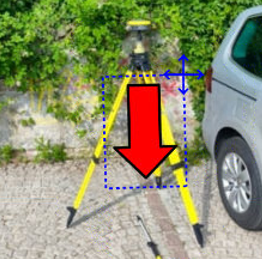
 : enables the free drawing mode.
 : deletes sketch and photo.
  : restores original content
  : loads a photo from the controller internal memory. The image must be in the Images folder and has to be in .jpg or .jpeg format.
 : starts the application allowing to shoot a photo and save it.