Configuration with X-PAD software
Configure and operate the Zenith06 using the X-PAD Ultimate field software running on a field controller being connected via Bluetooth.
For more details on how to use the X-PAD Ultimate field software, please refer to its User Manual.
In this guide we will see the basic steps on how to create a rover profile for the Zenith06 Pro in X-PAD Ultimate software.
In X-PAD Ultimate software click Settings.
Select GNSS & Total stations to open the list of the profiles.
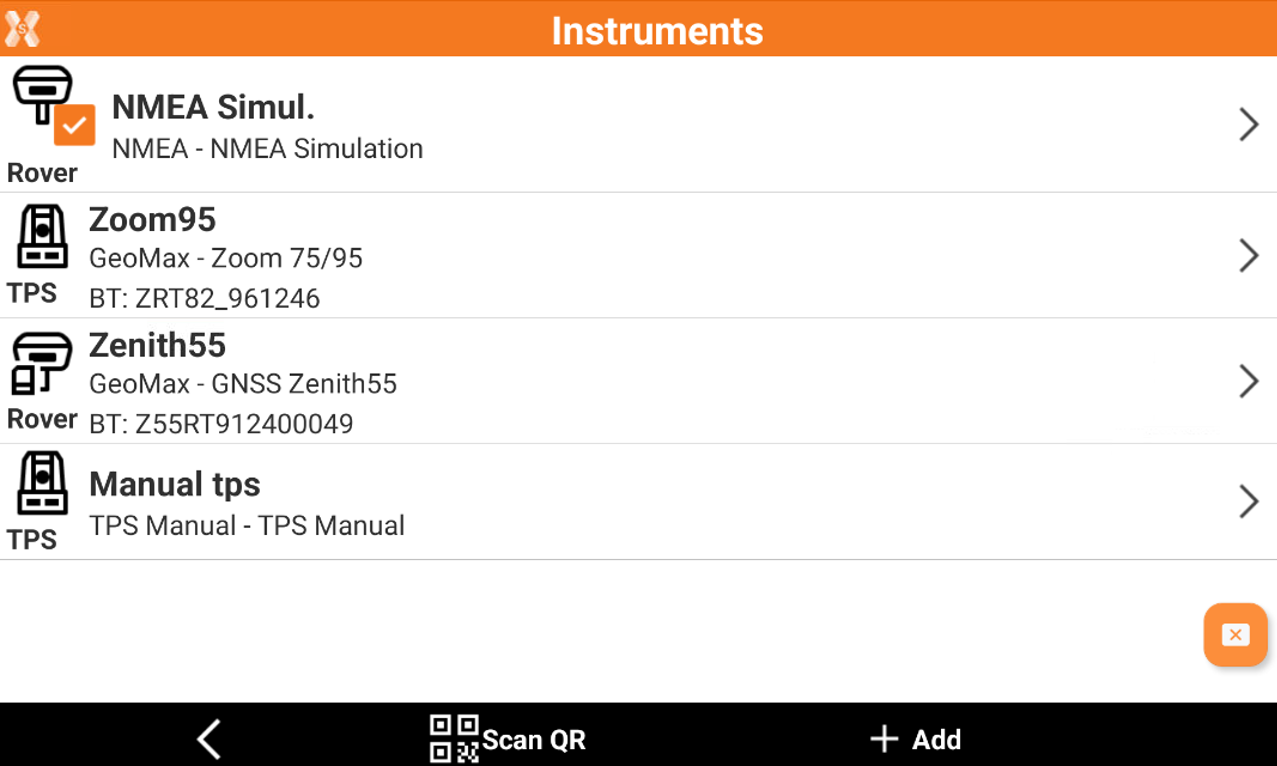
Click Add to create a new profile.
Enter the Profile information:
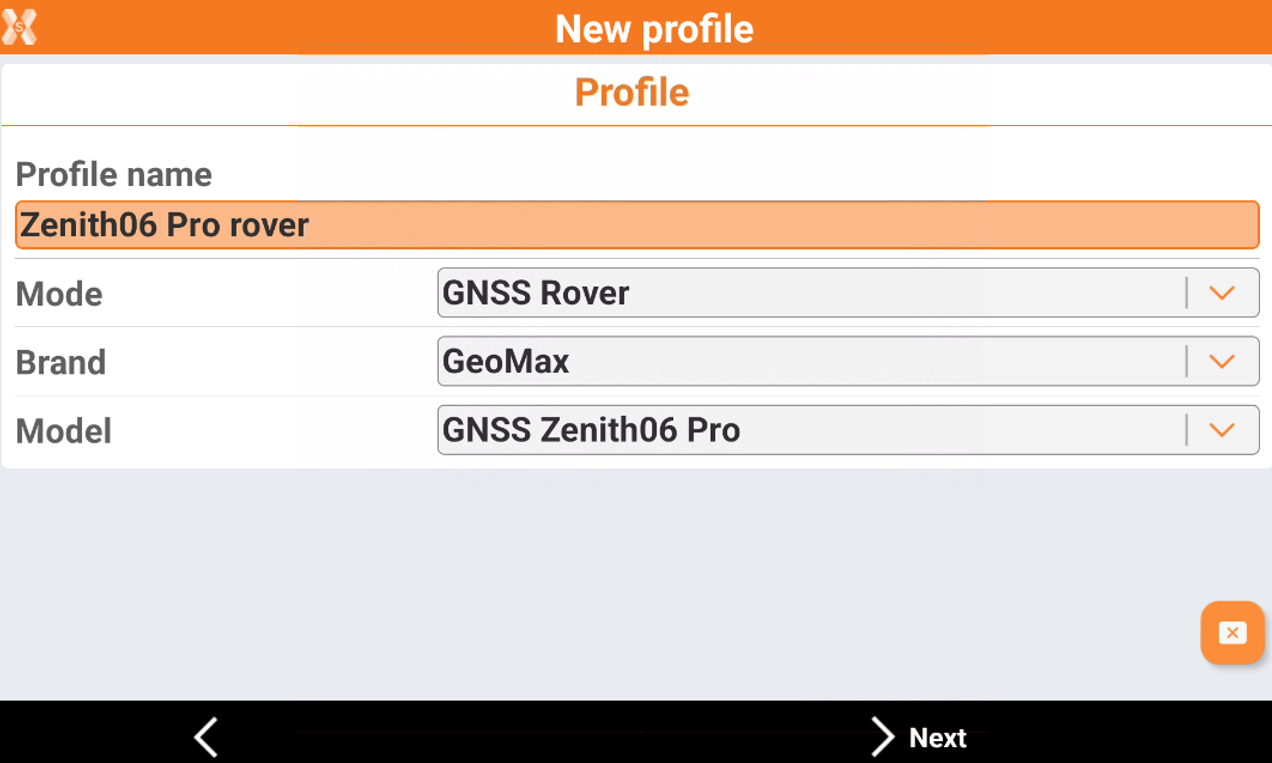
Mode: select the working mode. Zenith06 Pro can only work as Rover.
Brand: select GeoMax.
Model: select GNSS Zenith06 Pro.
Click Next.
The Device page allows to search and connect the receiver using Bluetooth.
Click Add device to search the Zenith06 Pro. The BT address for the Zenith06 Pro is its serial number.
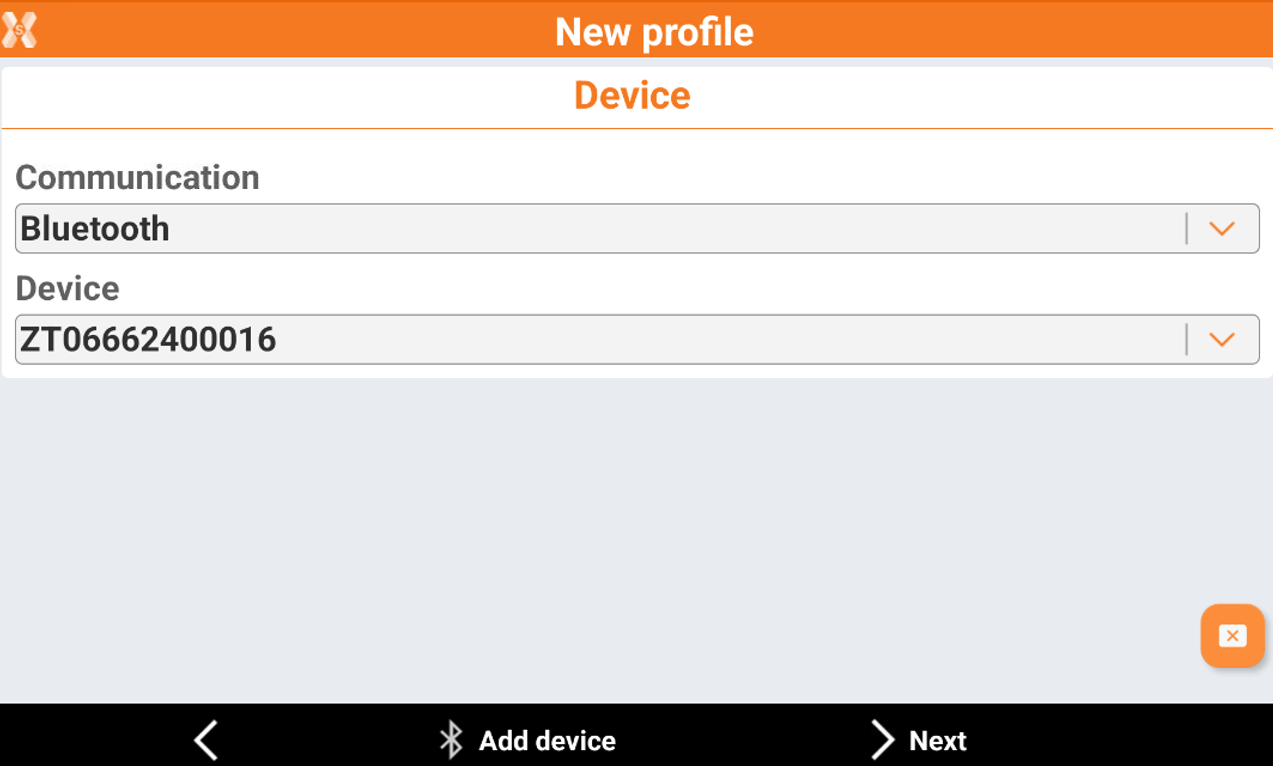
Click Next.
In the RTK page we have to select the working mode:
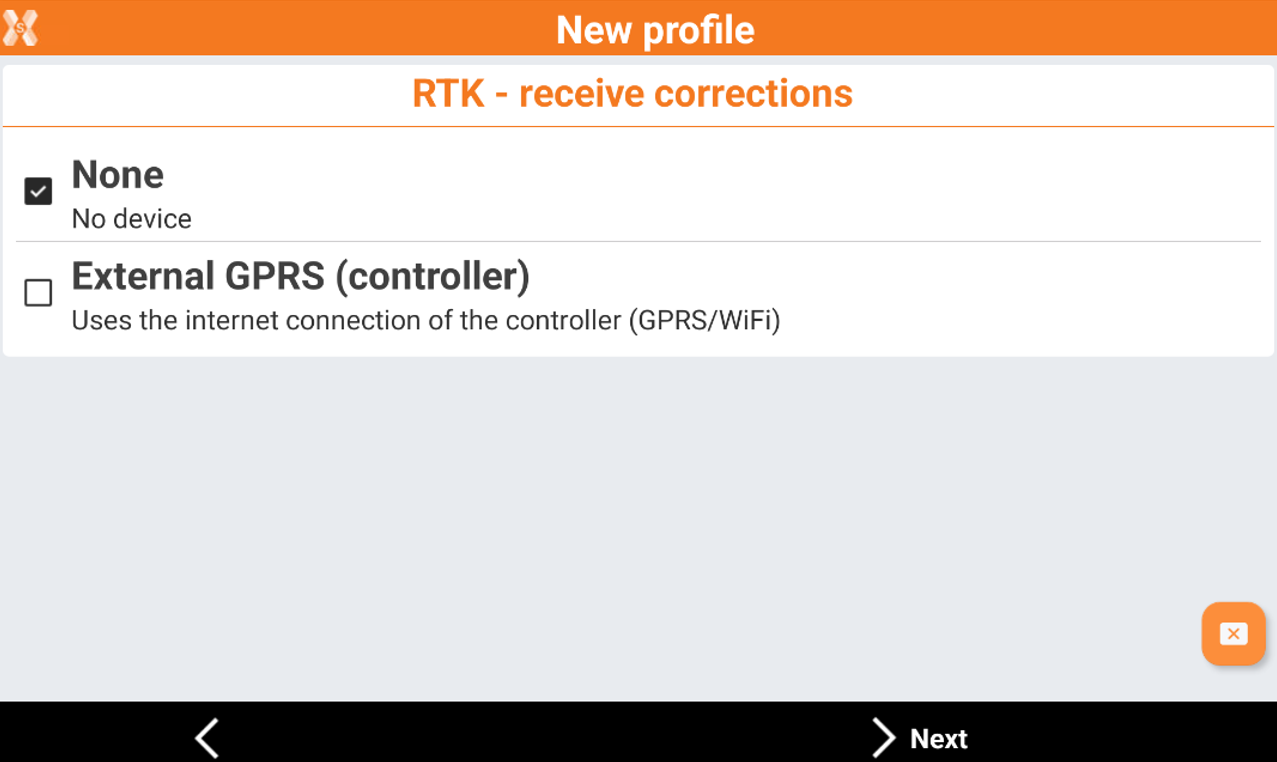
None: the receiver is configured to not receive RTK corrections.
External GPRS (controller): the receiver is configured to receive RTK corrections using internet from the field controller.
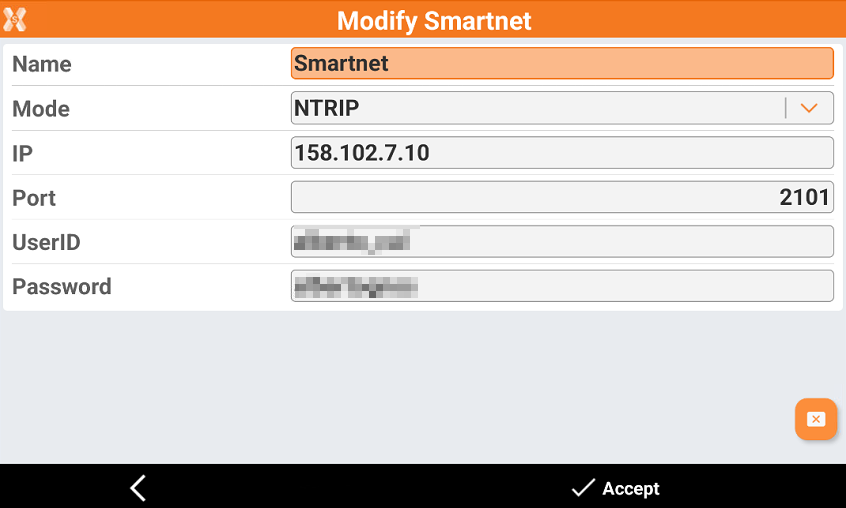
If External GPRS has been select, we must enter the information regarding the server providing the RTK corrections.
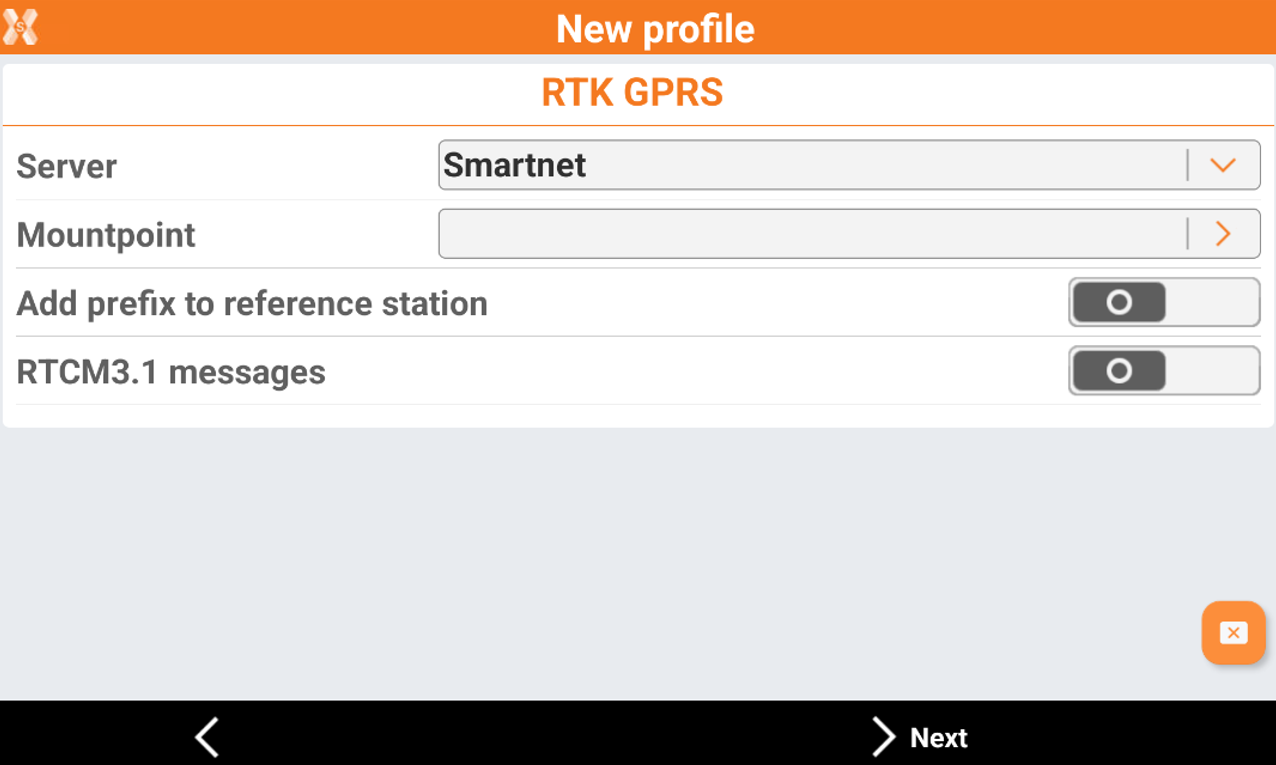
Server: enter here the NTRIP server information. To create a new server click on the orange arrow and select NTRIP servers…
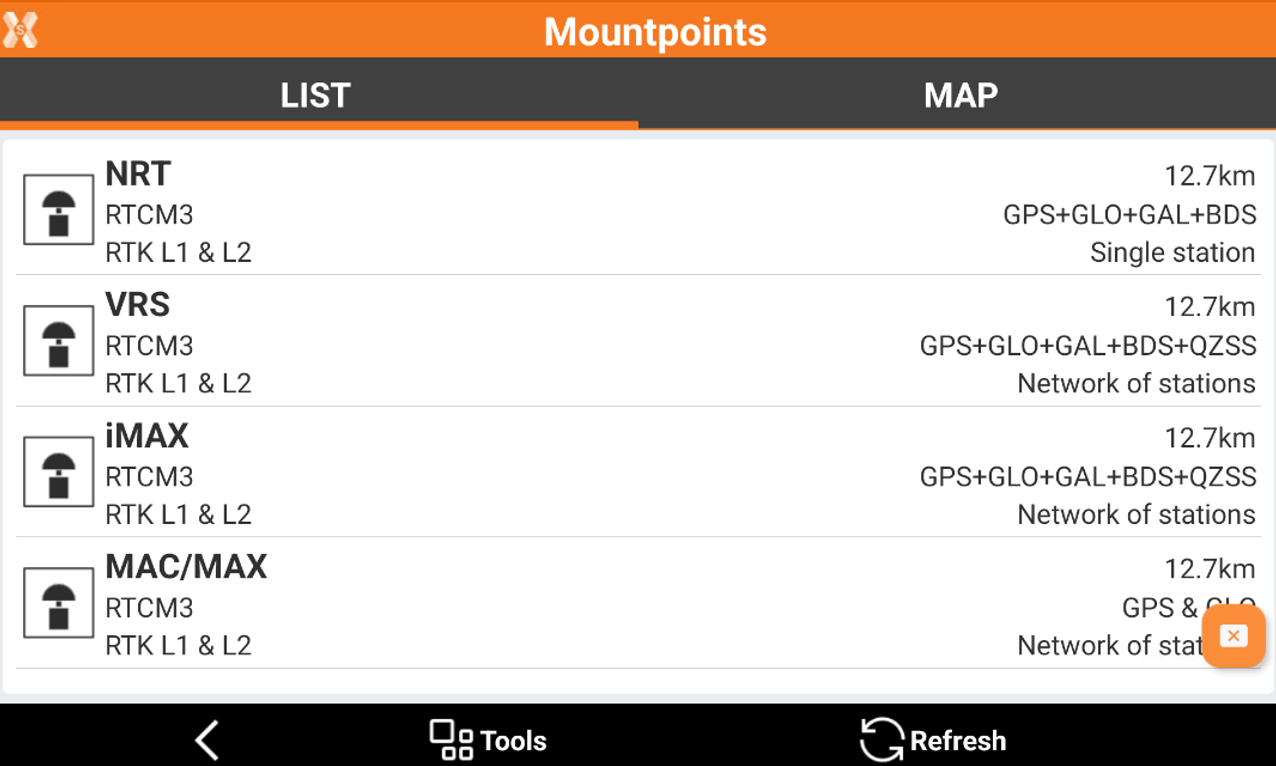
Mountpoint: allows to search and select the mountpoint to use. To retrieve the mountpoint list click on the orange arrow and select Refresh.
Add prefix to reference station: allows to enter a prefix to reference station points.
RTCM3.1 messages: enables the reading and use of coordinate system messages in the RTCM3 streaming if supported from the selected network.
Click Next.
In the Parameters page it is possible to set some receiver parameters:
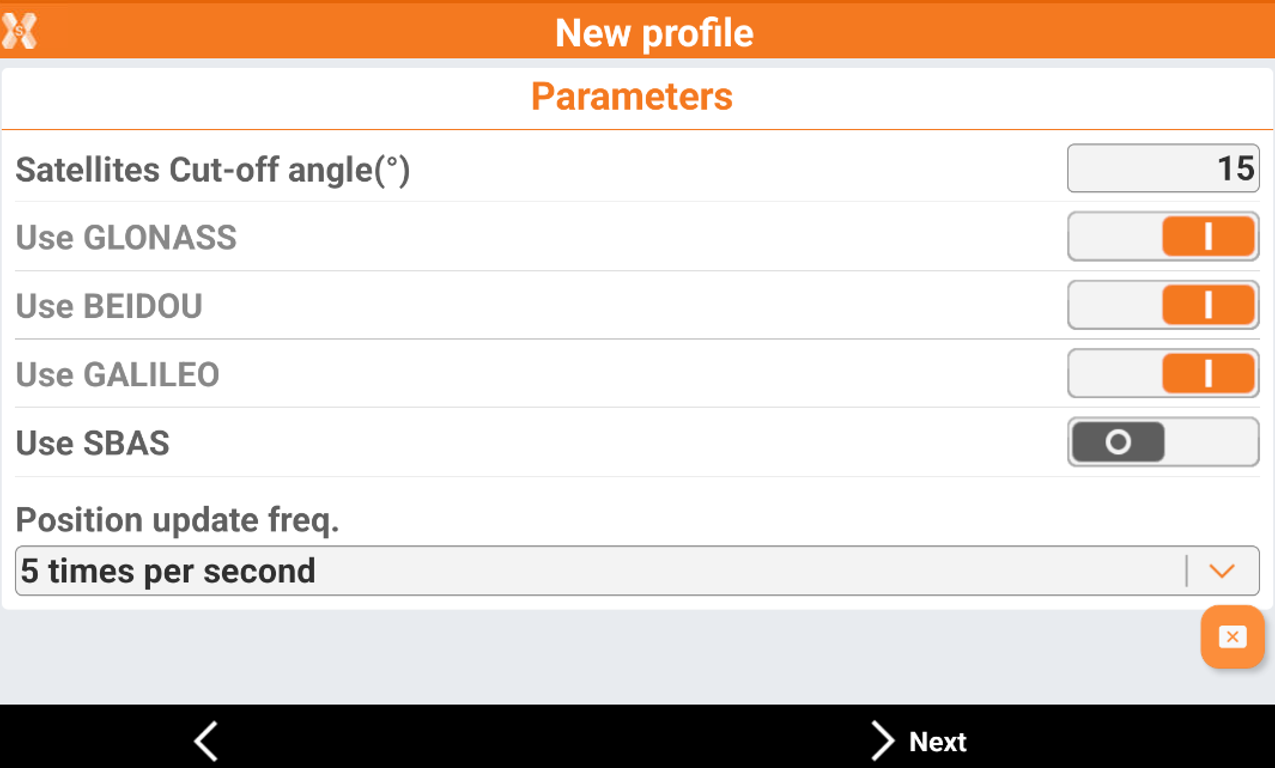
Satellites cut-off angle: allows to select the tracking satellites cut-off angle.
Use SBAS: enables the tracking of SBAS satellites
Position update freq: allows to select the position update (1sec, 5Hz, 10Hz).
Click Next.
In the Antenna page we can define how is configured the antenna.
Model:
On pole - (vertical): the receiver is over a GNSS pole, installed with the pole mount.
Horizontal: the receiver works horizontally.
Height: to define the pole height.
Click Next to complete the receiver configuration.
Now the receiver is ready to work! Check the X-PAD portal for more information on how to use the GNSS receiver or check our video tutorials.