
-
This command allows to insert a raster map in the CAD window:
-
Click Imaging.
-
Click Add.

-
Select the path of the Raster map to import.
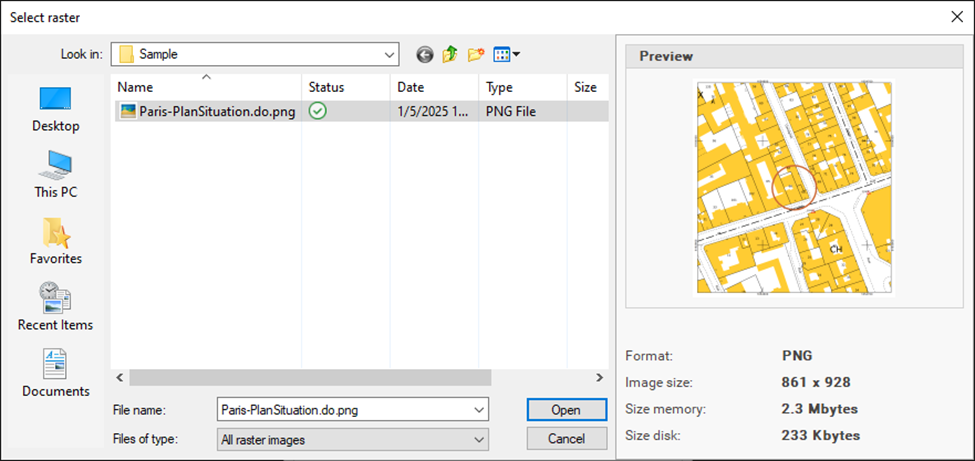
X-PAD Office Fusion supports these following raster image formats: JPG, JPEG, JP2, TIF, ECW, PNG, BMP, and PDF.
-
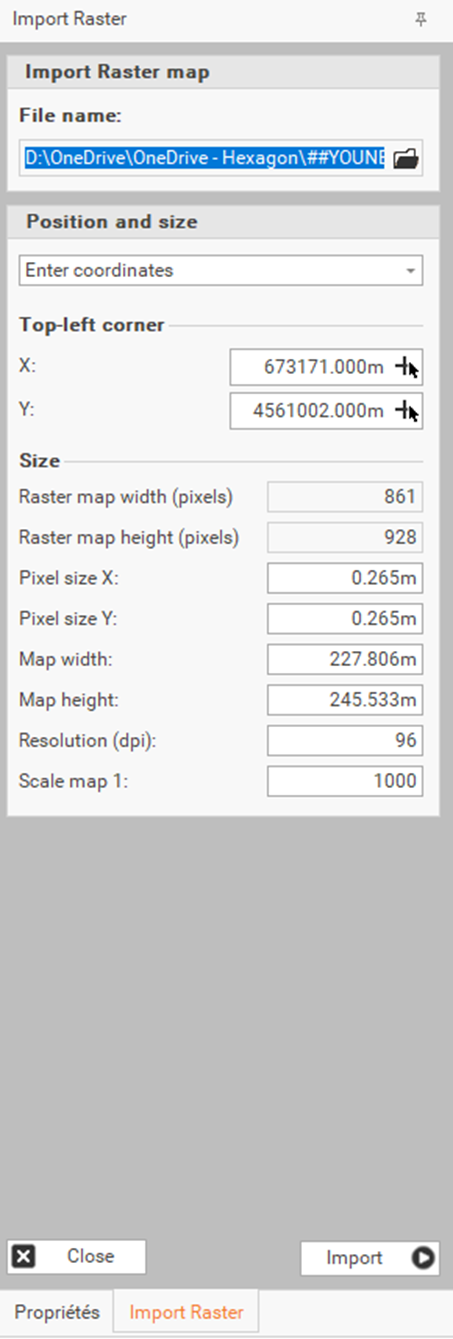
The command activates the options panel on the right that shows the following parameters:
-
File name: shows the name and location of the selected file.
-
Enter coordinates: allows to specify coordinates in the CAD window for inserting the image.
-
World file– Grid coords: if the image is already georeferenced, this option allows you to use the image's world file, which contains information about its position, rotation, and dimensions.
-
X: allows to specify the X-coordinate for inserting the image. Clicking the icon

-
Y: allows to specify the Y-coordinate for inserting the image. Clicking the icon
-
Raster map width (pixels): displays the width of the raster map in pixels.
-
Raster map height (pixels): displays the height of the raster map in pixels.
-
Pixel size X: if the image is not georeferenced, this option allows you to set the pixel size in meters along the X axis of the image.
-
Pixel size Y: if the image is not georeferenced, this option allows you to set the pixel size in meters along the Y axis of the image.
-
Map width: if the image is not georeferenced, this option allows you to enter the width of the image in meters.
-
Map height: if the image is not georeferenced, this option allows you to enter the height of the image in meters.
-
Resolution (dpi): shows resolution (dot per inch) image.
-
Scale map 1: allows to set the scale of the image if it is not georeferenced.
-
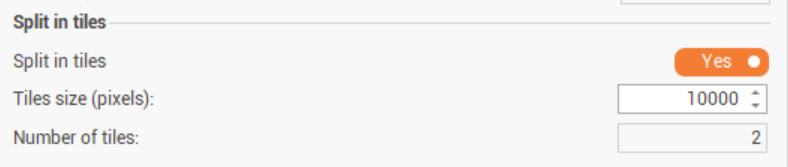
Split in tiles: allows to split the image in smaller tiles. This option is available if imported image has size > 10000 pixel.
-
Tiles size (pixels): if Split in tiles is enabled, this allows to specify the size of each tile.
-
Number of tiles: if Split in tiles is enabled, this field shows the number of tiles in which the image is divided, depending on entered Tiles size.
-
Import: applies the set parameters and imports the image.
-
Close: ends the command.
-
-
The imported image appears in the Project Manager under the Raster Maps category.
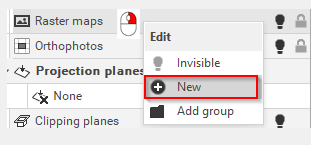
A new raster map can also be added directly from the Project Manager:
It is possible to change the visualization of the raster map, changing the Z value in the Properties, for example to display the measured data over the raster map.