Alignment and offset
 |
|  |
| 
Calculates the position of a point by an alignment defined by two reference points.
A guided procedure allows the definition of the two reference points, the measurement of the distance and position referring to the alignment and checking the desired solution. The requested data relate to two reference point.
Open the GPS Measure mode page.
Select Alignment Offset.

The software opens the Hidden point page.
Select or measure the Reference point (A) and Reference point (B) that defines the alignment.
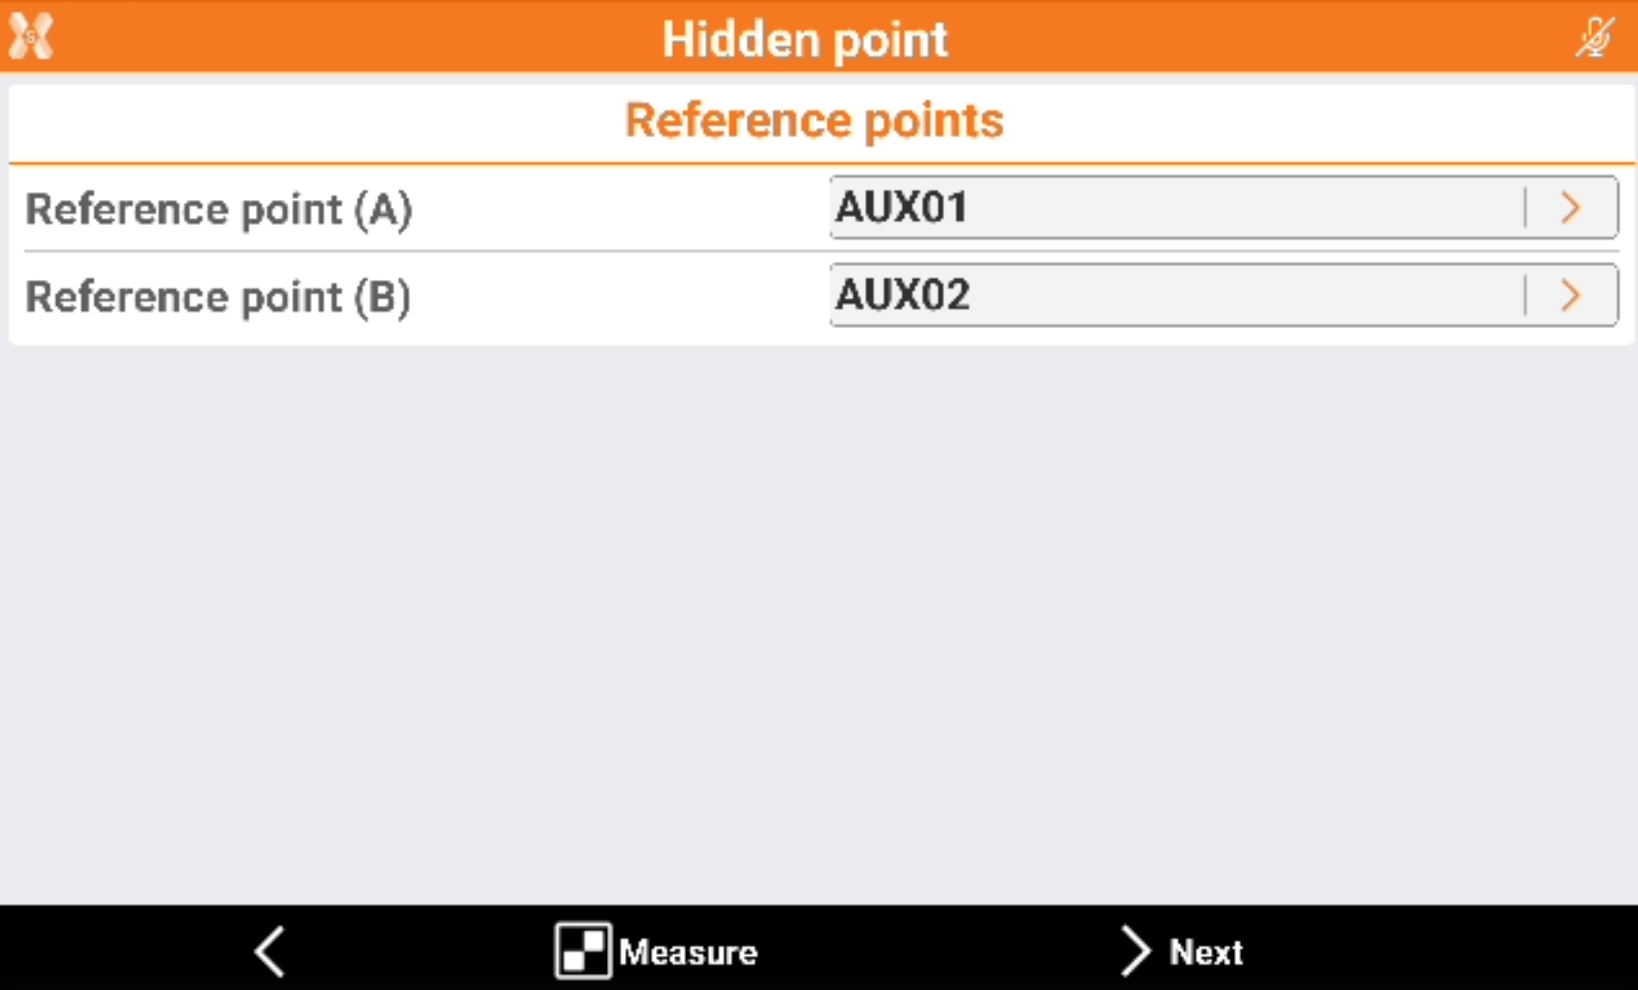
Reference point (A): specify the name of the first reference point. Type in the name or select it from the graphic window or the table. Tap if the reference point has not been measured yet. Press Measure to measure the reference point (A).
Reference point (B): specify the name of the first reference point. Type in the name or select it from the graphic window or the table. Tap if the reference point has not been measured yet. Press Measure to measure the reference point (B).
Click Next to proceed with the guided procedure.
Enter the information of distance and offset from the second or first reference point).
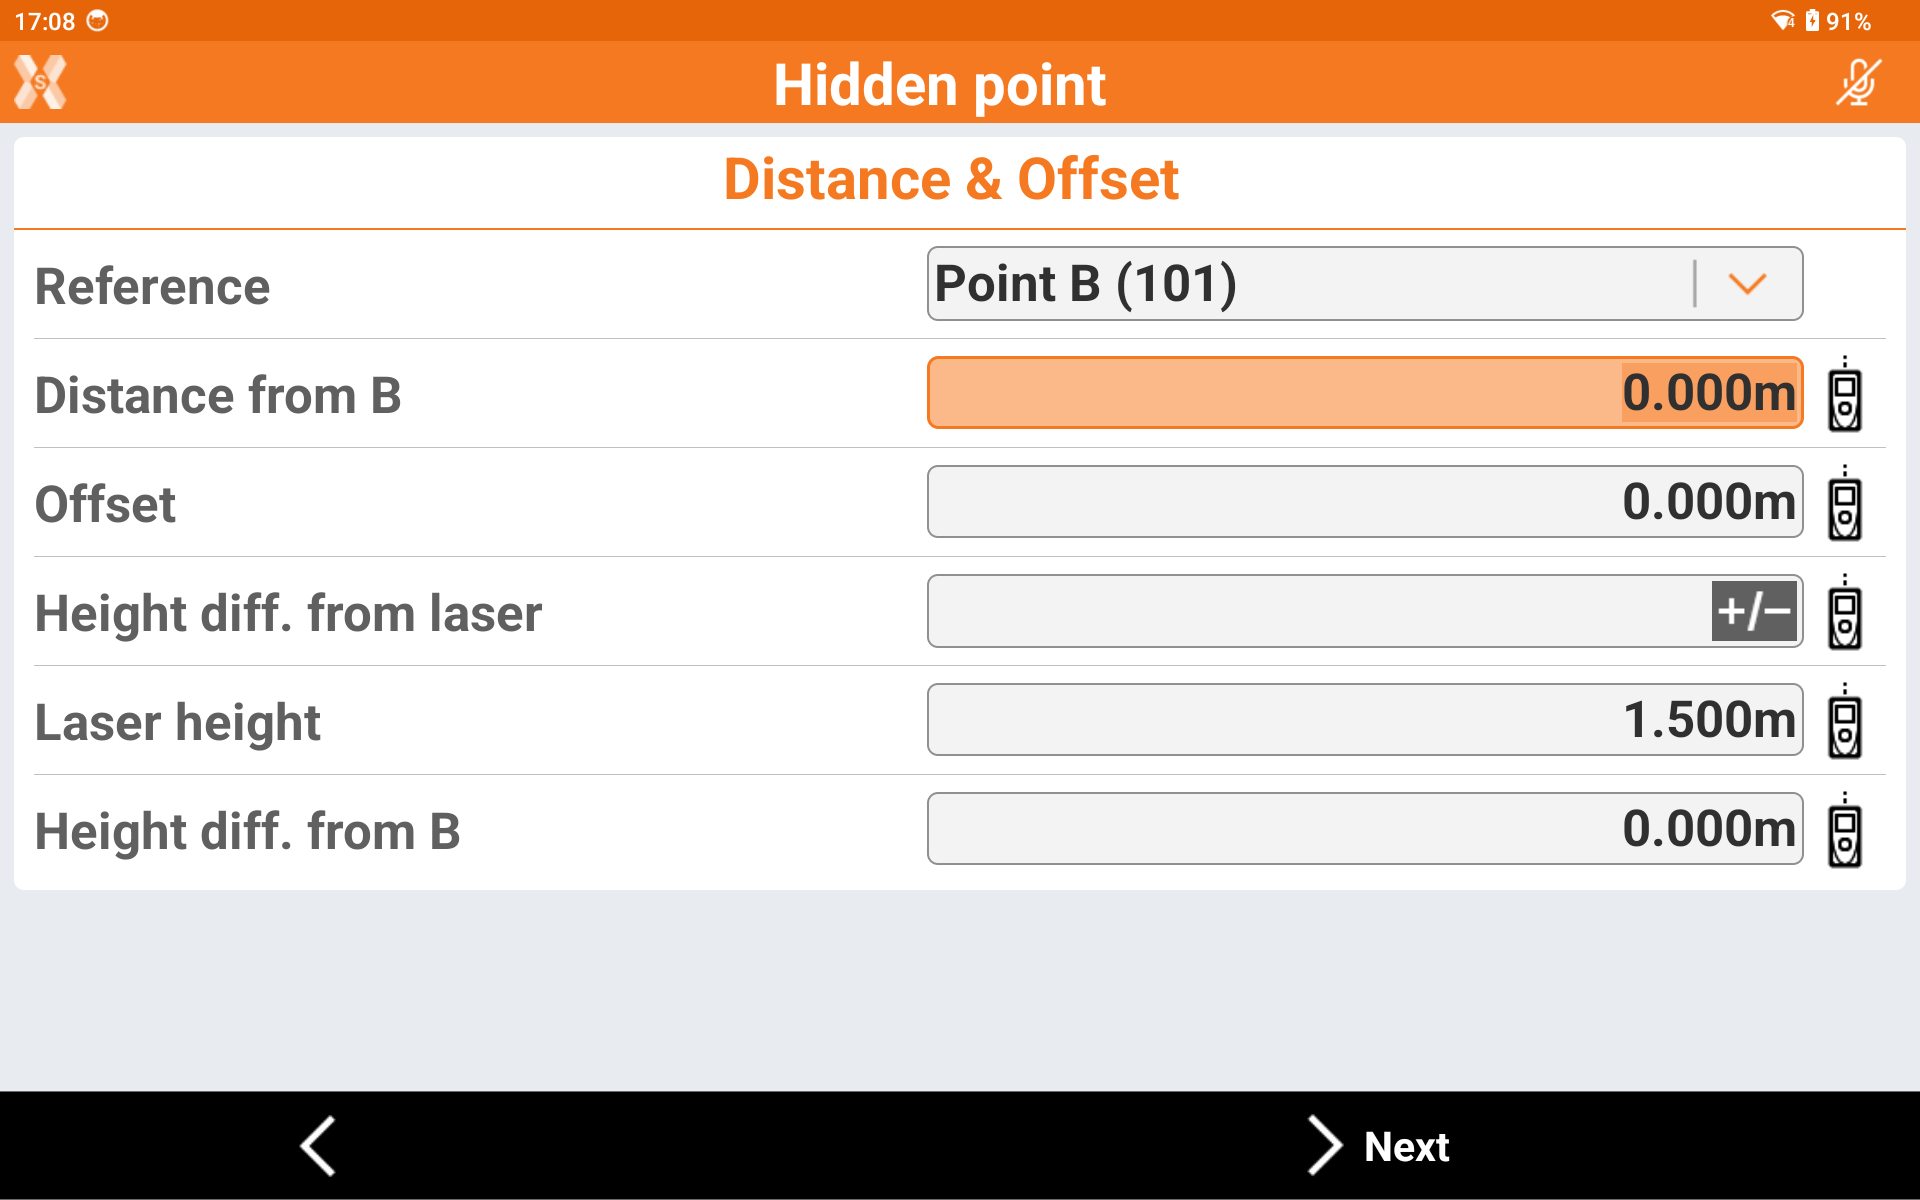
Reference: reference distance along the alignment can be referred to starting point (A) or ending point (B).
Distance from: distance along the alignment, and referred to point A or B, of the projection of the point to measure.
Offset: distance of the point to measure in reference to the defined alignment. The position of the point referring to the alignment (left or right) is decided after in the graphic window.
Height diff. from: elevation difference between the point to measure and the reference point A or B.
Laser height: elevation of the laser Disto from the ground. Used to determinate the exact value of the slope from the reference point.
Height diff. from laser: height difference measured from a laser distance meter, using the specific laser distance meter function that calculates the vertical distance (requires a compatible laser distance meter connected).
Distance can be measured with a Disto. See Creating a profile for laser distance meter.
Tap Next to calculate the two reference points and the two possible solutions. Right or left of the alignment.
Choose the desired solution: Click in the part to which the solution RIGHT or LEFT belongs. The solution that will be used is shown in red.
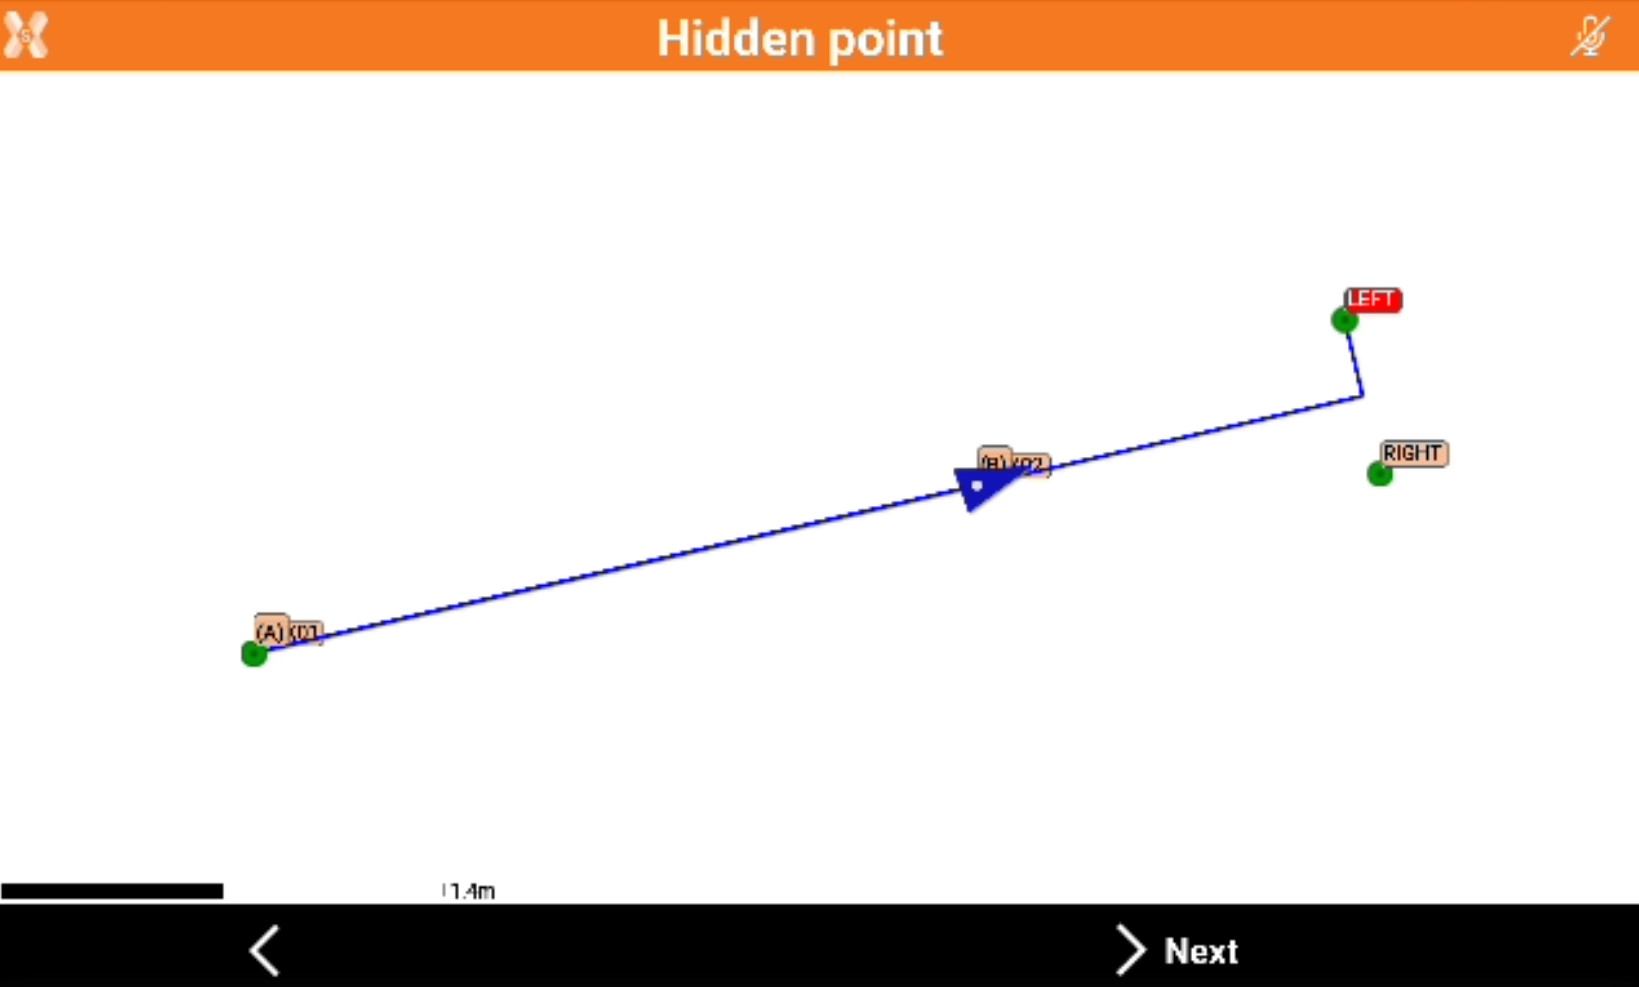
Tap Next to proceed with the guided procedure.
Confirm the data on the pages listed below this table.
Continue to measure other hidden points or return to the main measuring window.