Import a codes library
 |
|  |
| 
A codes library can be imported from an external file in different formats.
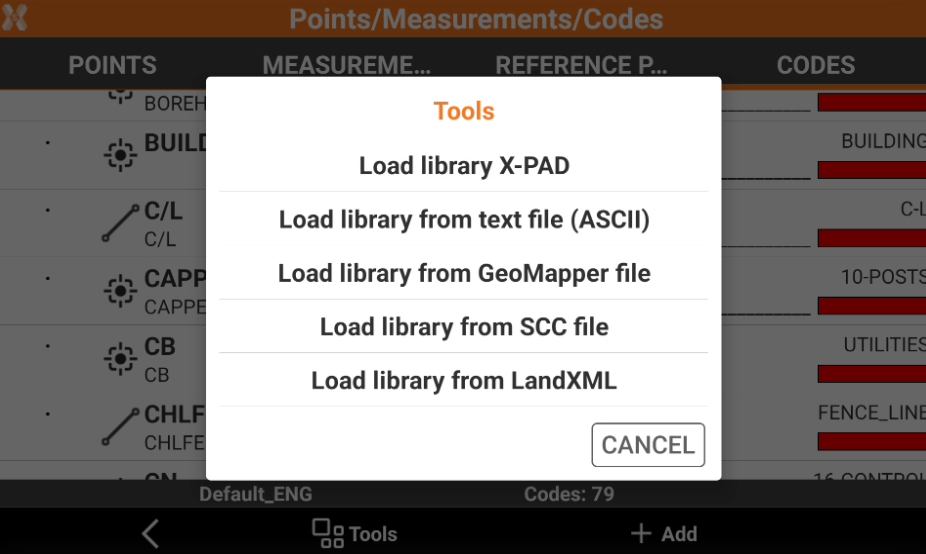
Click Job.
Click Points/Measurements/Codes.
Open the Codes tab.
Click Tools and select Load library. Select the format to import.
Import a code list from X-PAD file
This option allows to import a code library in X-PAD format (xml).
Select Load library X-PAD.
Select the X-PAD library from the list of available codes library in X-PAD/_Data/Codes folder.
It is possible to manage the code library and export in X-PAD format using Office Fusion.
Import a code list from ASCII file
This option allows to import a code library from an ASCII text file.
Select Load library from text file (ASCII).
This selection opens a new window.
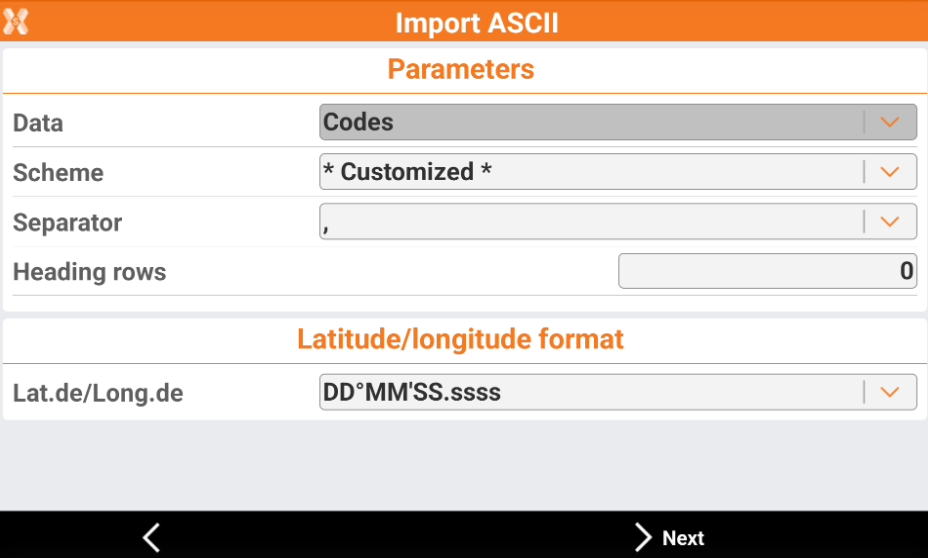
Scheme: the importation scheme, select Customized or select one of the saved schemes.
Separator: set the separation character.
Heading rows: set the number of lines composing the header of the file and that have hence not to be imported.
Decide which fields are present in the file and in which order. Select a field to enable/disable or click Down or Up to change the order. Click Next.
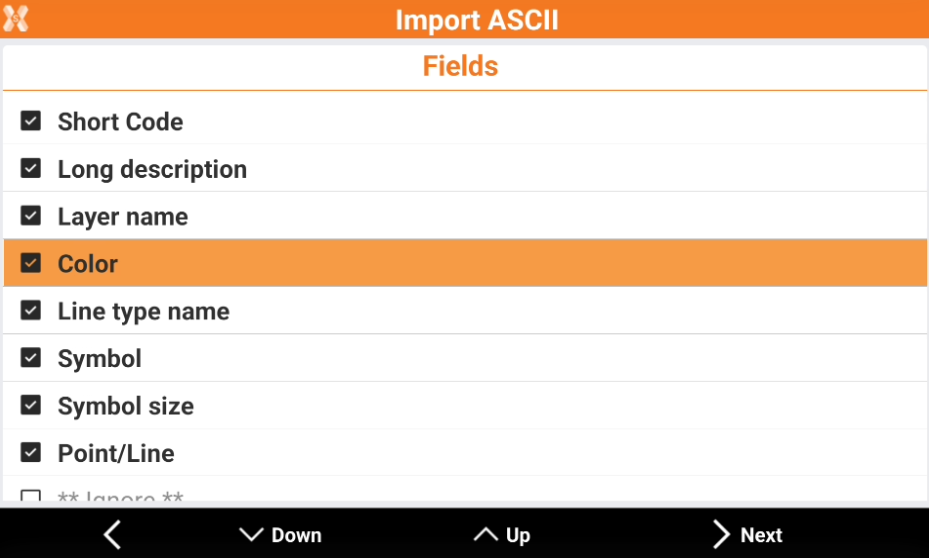
Short code: the name of the code.
Long description: the description of the code.
Layer name: the name of the layer.
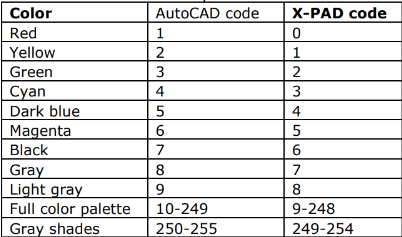
Color: the color of the layer. Has to be identifies as “AutoCAD color code” - 1.
Line type name: the name of the line type.
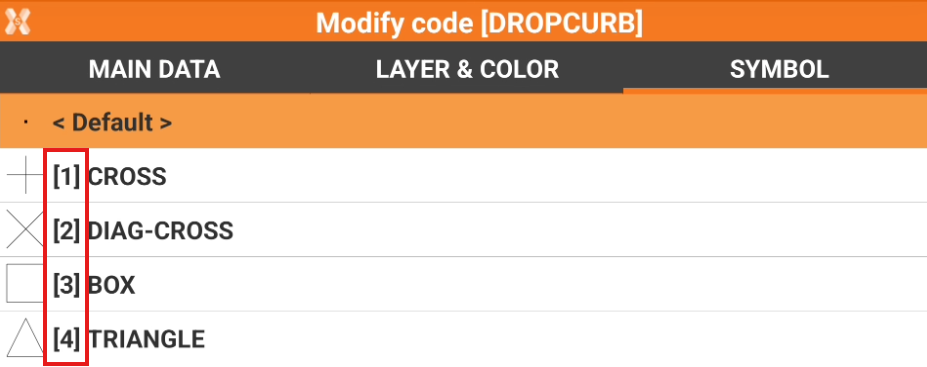
Symbol: corresponds to the number of the symbol in the symbol manager. “0” corresponds to a point.
Symbol size: the size of the symbol. If nothing is entered by default the size will be 0.1 .
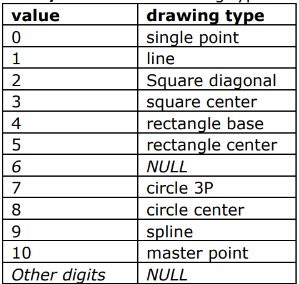
Point/line: the drawing type.
Ignore: allows to ignore this specific field.
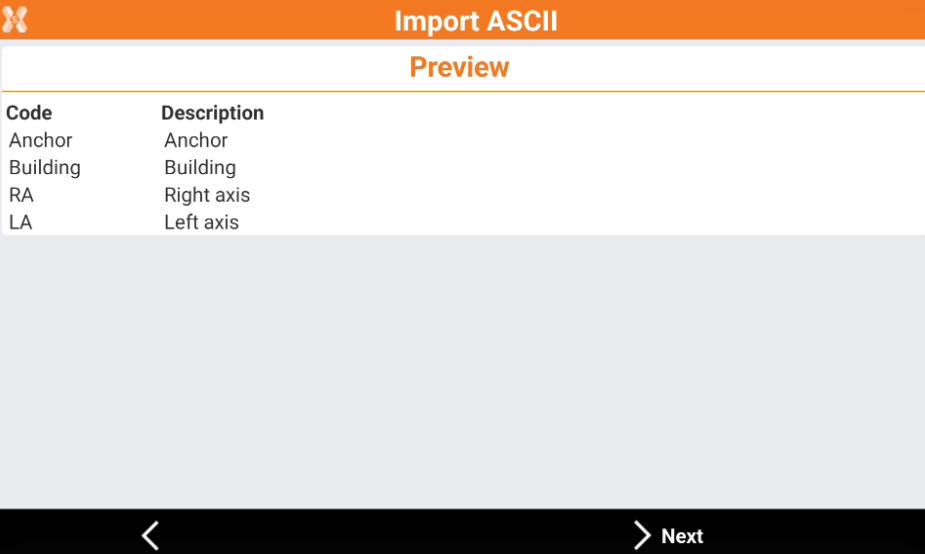
Check the import preview and click Next.
This page allows to save the importation scheme with a name to select it in future.
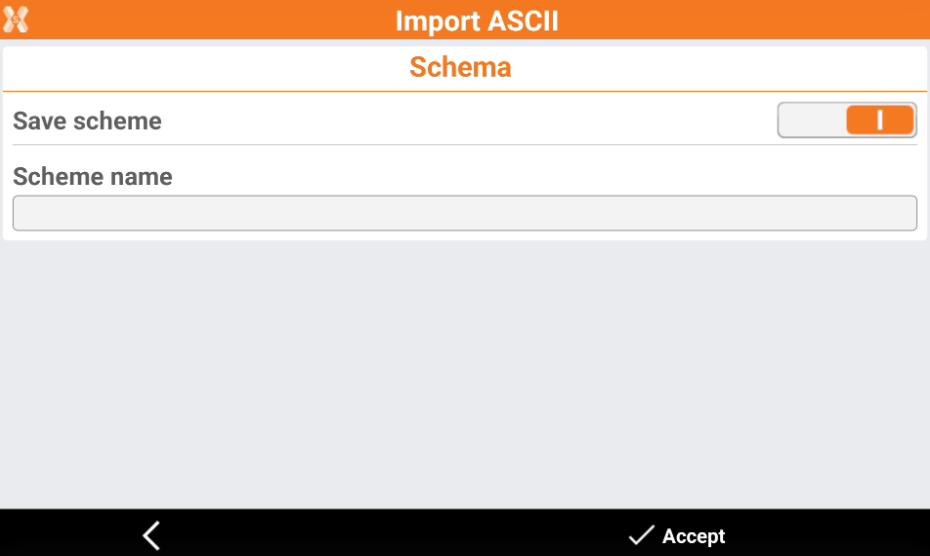
Save scheme: enables/disables the saving of the importation scheme.
Scheme name: the name to the scheme to save.
Schemes for import and export are saved as files in the directory X-PAD\_Data\Schemes. Files have *.psc extension.
Click Accept to import the codes library.
Import a code list from GeoMapper file
This option allows to import a code library in GeoMapper file format.
Select Load library from GeoMapper file.
Select the file to import the codes.
Import a code list from SCC file
This format is recommended when importing a code list including GIS features
This option allows to import a code library as SCC file.
Select Load library fromSCC file.
Select the file to import the codes.
Prepare a SCC file
The SCC file includes codes and GIS features and it is a solution to build a codelist with GIS features in an Excel file.
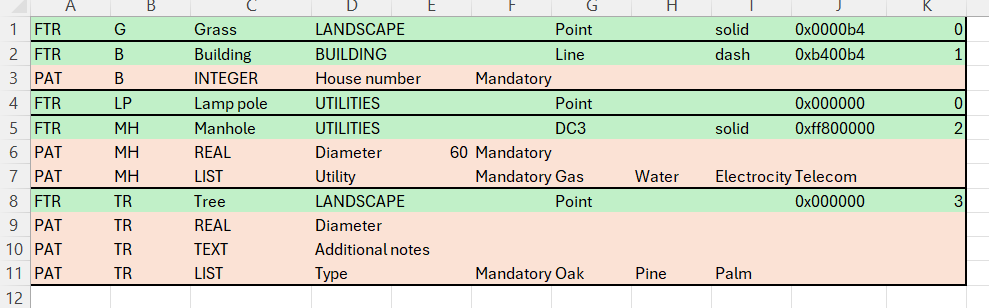
The SCC file contains different columns. A line can define a code or a GIS attribute depending if the first column value is FTR or PAT.
FTR: the line is a code. The lines contains instructions on how to create a new survey code.
PAT: the line is a GIS feature. The lines contains instructions on how to create a new GIS feature.
If the line is FTR (survey code), the column values are:
FTR.
Code ID.
Code decription.
Layer.
(empty)
(empty)
Smart drawing, according to this list.
-20250929-145131.png?inst-v=1b83c54a-c696-4ab5-b1d9-7113a0c2d94d)
(empty)
Line type.
Color for the code identified by the Hex code.
Number of associated to the code.
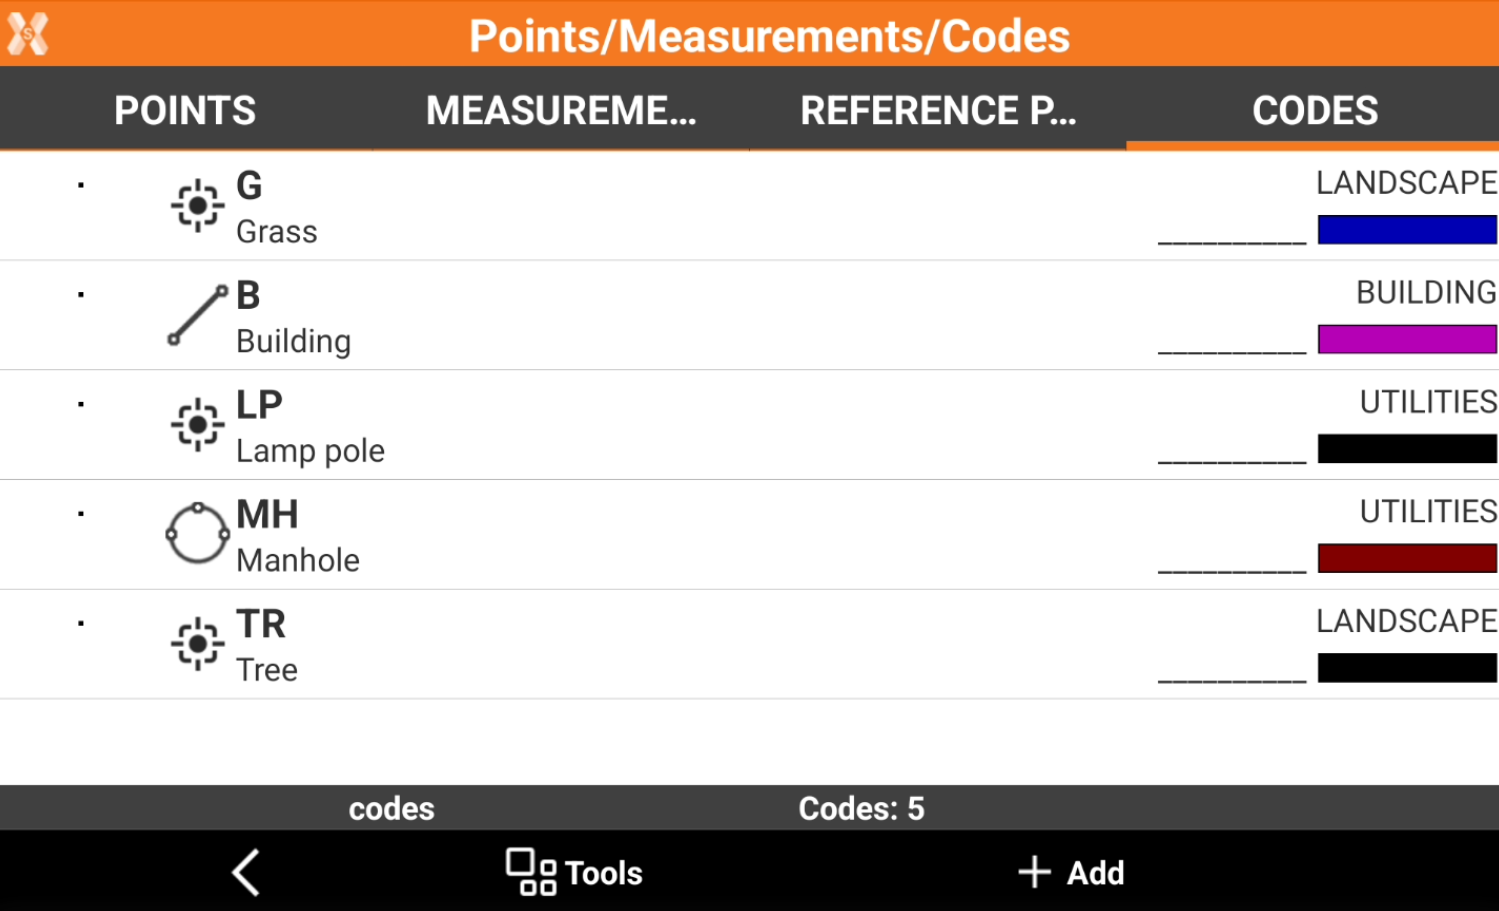
Below example shows the import of a list of 4 codes. These codes have no GIS attributes.

This is the result in the software.
If the line is PAT (GIS attribute), the column values are:
PAT.
Code to which the GIS attribute is assigned.
Attribute input type (list, real, text, integer, title, date, time).
Title of attribute.
Default entry.
Mandatory field (mandatory or empty).
Number of list options in case the type is list.
List value.
List value.
List value.
etc…
We want continue our example including GIS attributes to the defined codelist. In particular we want to add these attributes:
Building: the code includes a number attribute as house numbering (mandatory).
Manhole: the code includes a number as diameter (mandatory and 60 by default) and a list with the manhole utility (mandatory).
Tree: the code includes a number as diameter, a text as additional notes and a list with tree type (mandatory).
This example includes the previous codes with the additional GIS attributes. Download the example here: Codelist_2.csv
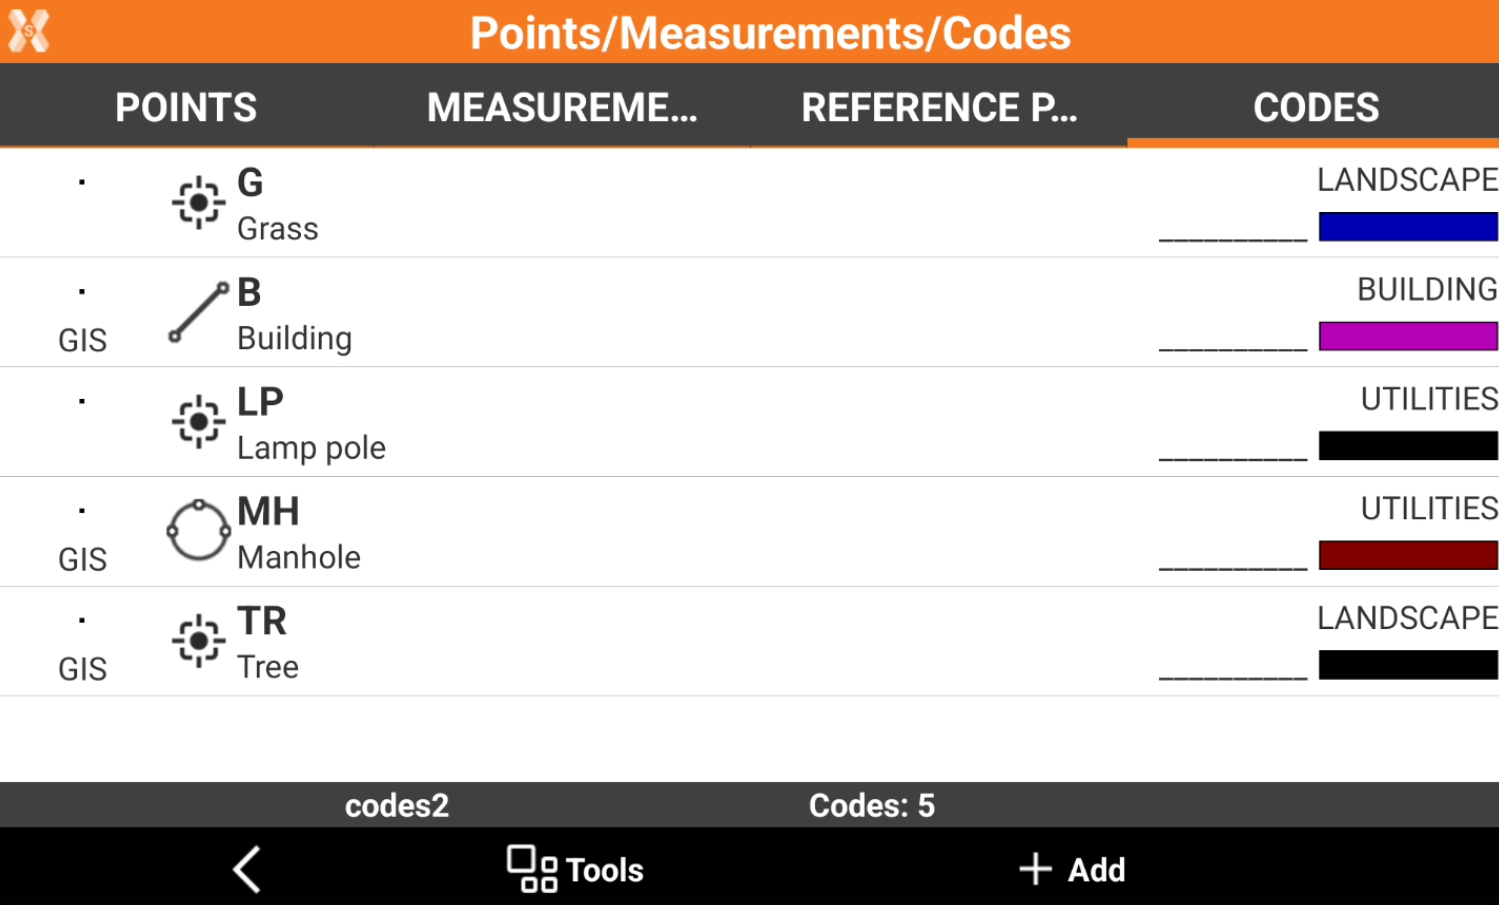
These are the codes in X- PAD after the codelist has been imported. The codes B, MH and TR have GIS attributes.
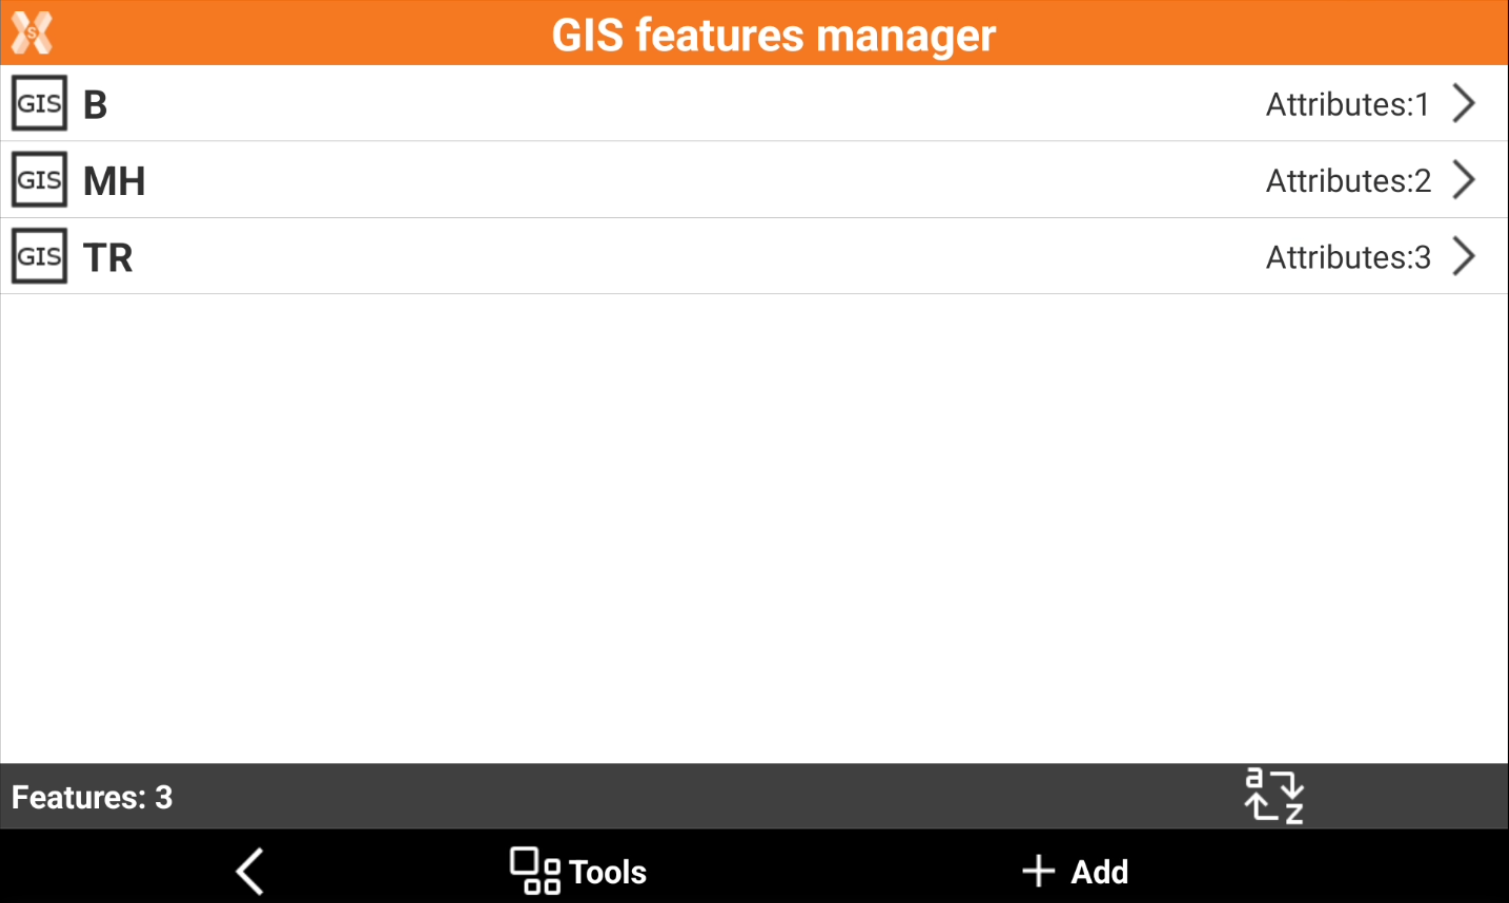
And the GIS features.
Import a code list from LandXML
This option allows to import a code library as LandXML file.
Select Load library from LandXML.
Select either to add codes to the current library or to create a new library.
Select the file to import the codes to the existing library or create a new library.