
-
This profile is an RTK profile where we will using internet from field controller. The rover will be connected to a CORS network using NTRIP protocol.
-
This profile requires the controller to be connected in internet.
-
Since Zenith60 Pro is multi-constellation it is recommended to work with a mountpoint providing corrections for all constellations.
-
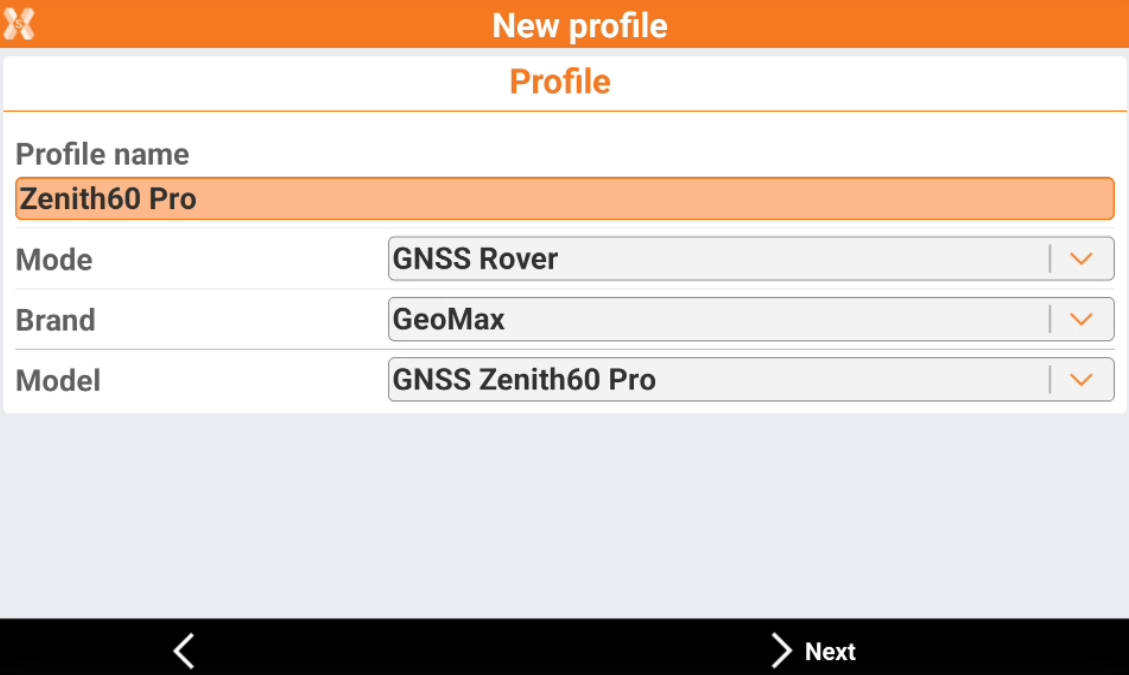
Enter the Profile information:
-
Mode: select the working mode. This is a rover profile.
-
Brand: select GeoMax.
-
Model: select GNSS Zenith60 Pro.
-
-
Click Next.
-
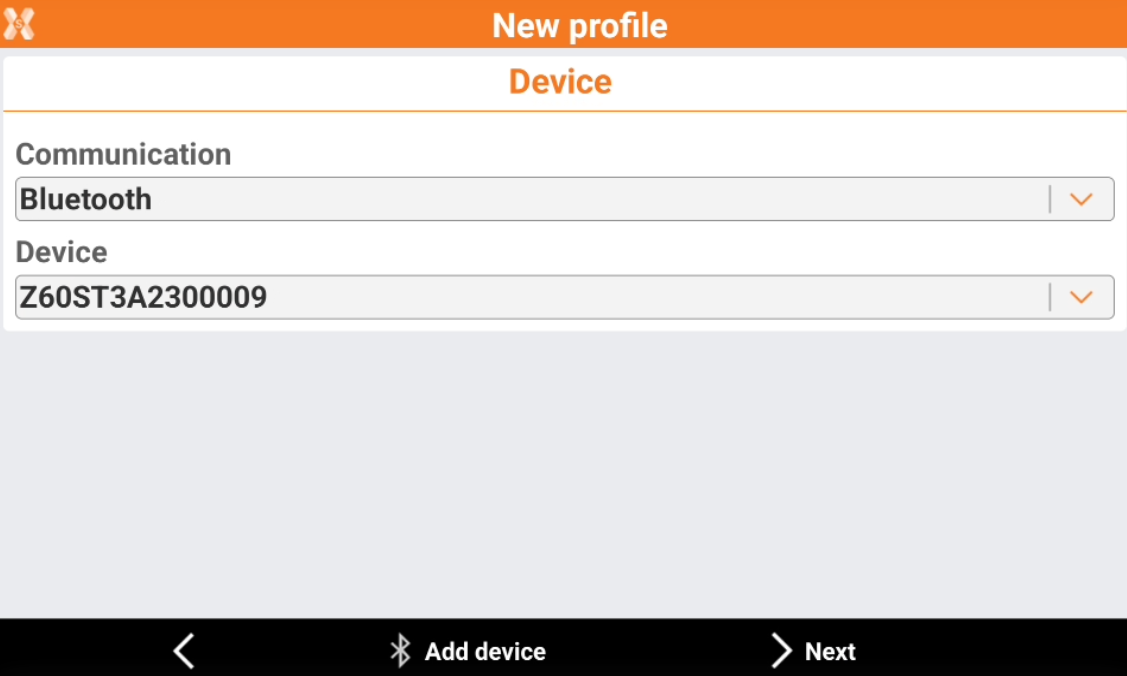
The Device page allows to search and connect the receiver using Bluetooth.
-
Click Add device to search the Zenith60 Pro. The BT address for the Zenith60 Pro is its serial number.
-
Click Next.
-
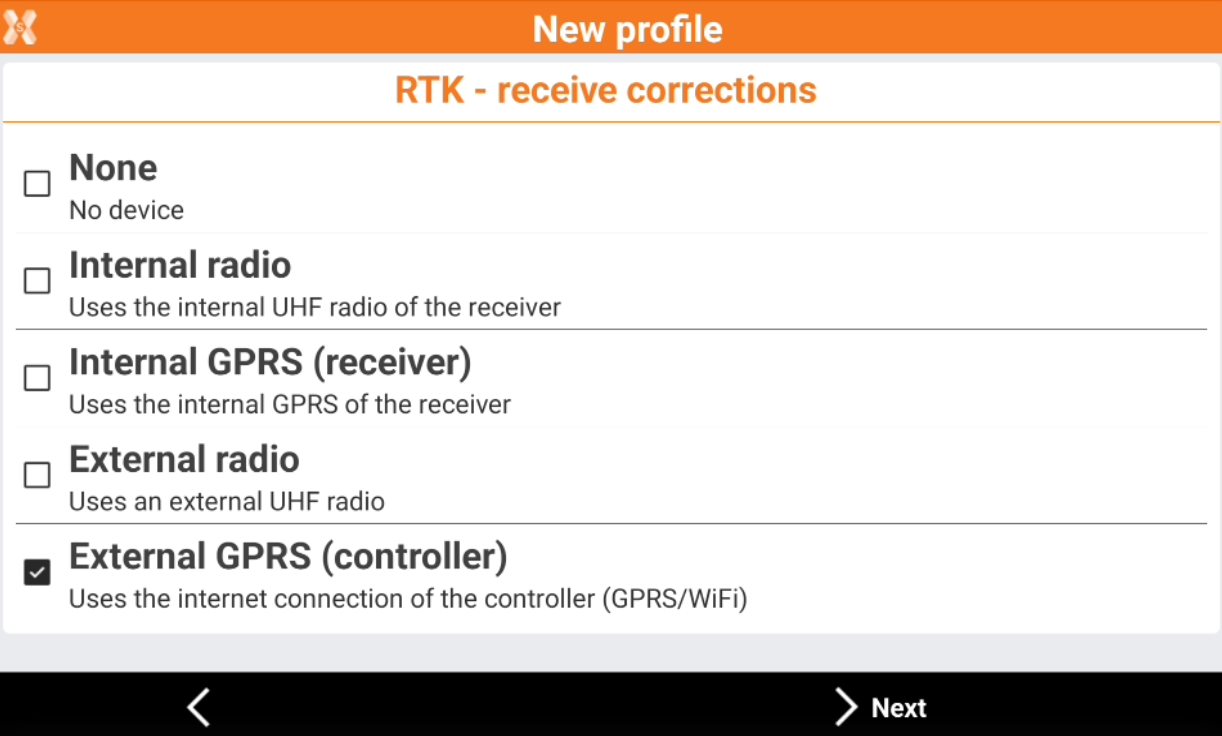
In the RTK page we have to select the working mode:
-
None: the receiver is configured to not receive RTK corrections.
-
Internal radio: the receiver is configured to receive RTK corrections using the internal radio.
-
Internal GPRS (receiver): the receiver is configured to receive RTK corrections using internet from internal modem. (Requires a SIM card inside the receiver).
-
External radio: the receiver is configured to receive RTK corrections using an external radio.
-
External GPRS (controller): the receiver is configured to receive RTK corrections using internet from the field controller.
-
-
For this profile we select External GPRS (receiver) and press Next.
-
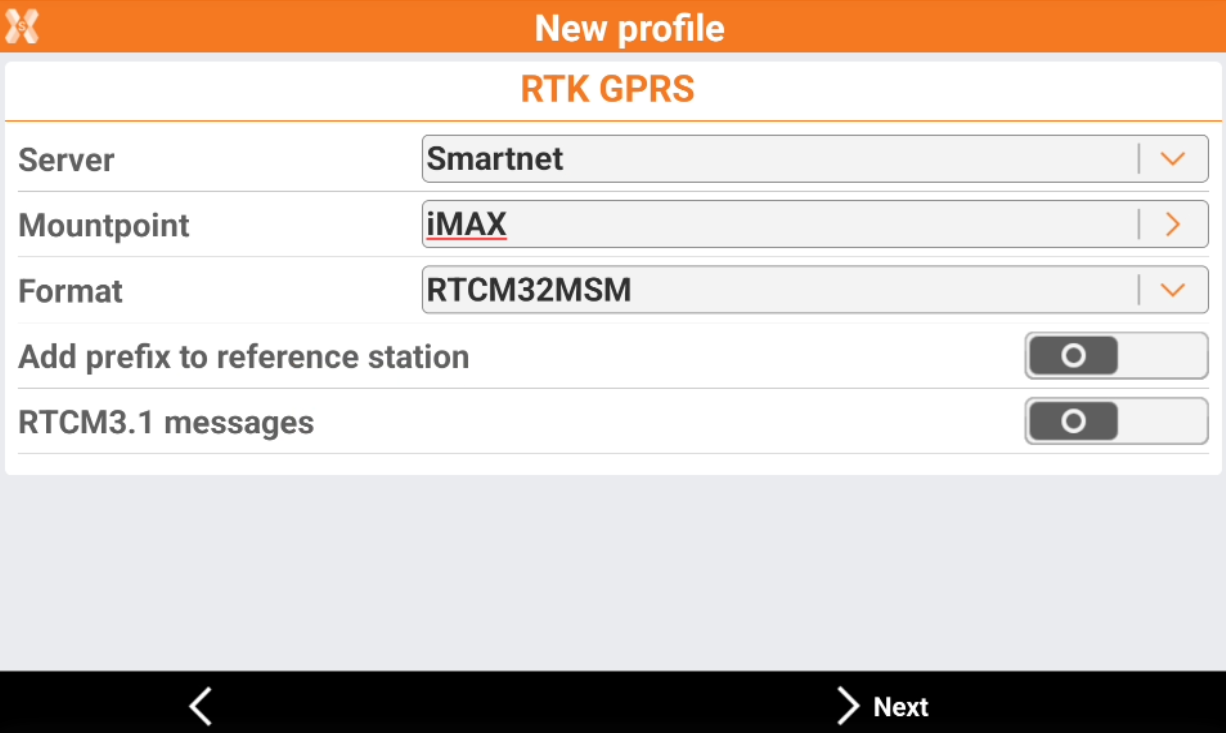
In the RTK GPRS page we have to select the information about the connection.
-
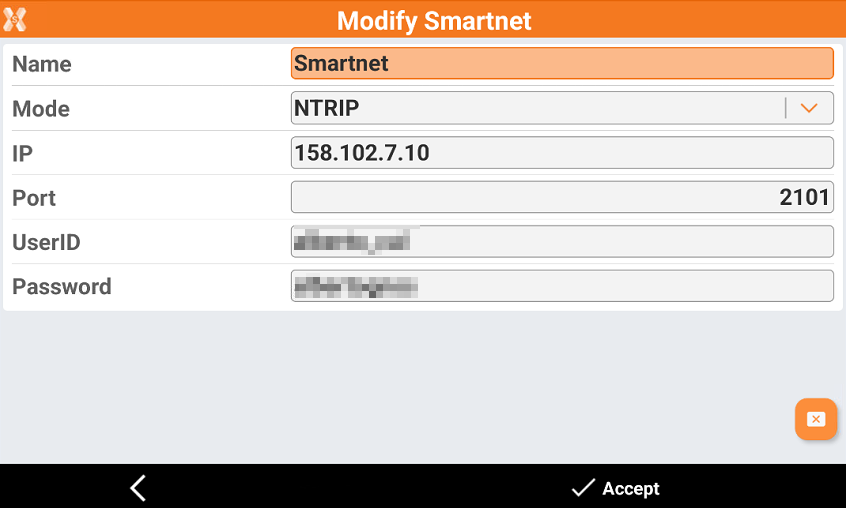
Server: enter here the NTRIP server information. To create a new server click on the orange arrow and select NTRIP servers…
-
Name: the name of the NTRIP server.
-
Mode: the connection mode. For connections to CORS networks select NTRIP.
-
IP: the IP address or hostname of the CORS network.
-
Port: the port to be used for the connection to CORS network.
-
UserID: the username provided from the CORS network.
-
Password: the password provided from the CORS network.
-
-
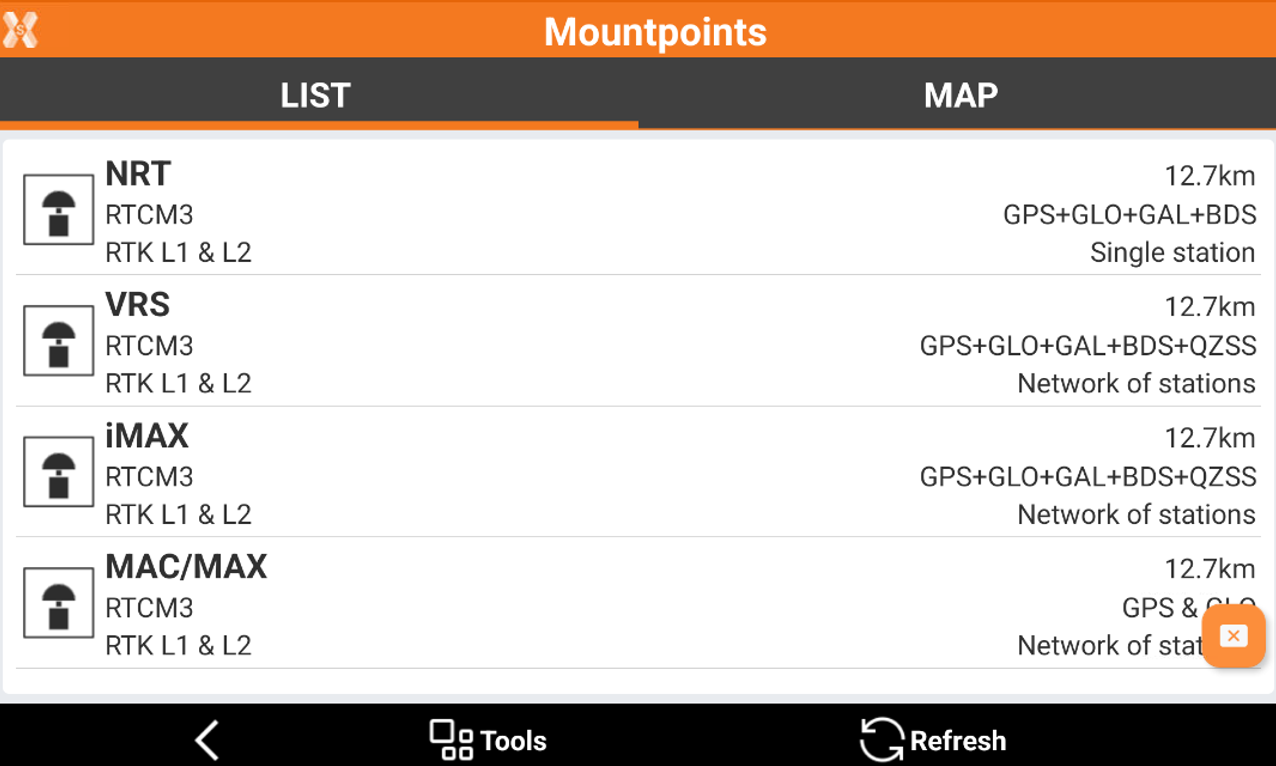
Mountpoint: allows to search and select the mountpoint to use. To retrieve the mountpoint list click on the orange arrow and select Refresh.
-
Format: the format of the corrections received. Since Zenith55 is multi-constellation, it is recommended to work with a mountpoint providing RTK corrections in RTCM MSM format.
-
Add prefix to reference station: allows to enter a prefix to reference station points.
-
RTCM3.1 messages: enables the reading and use of coordinate system messages in the RTCM3 streaming if supported from the selected network.
-
-
Click Next.
-
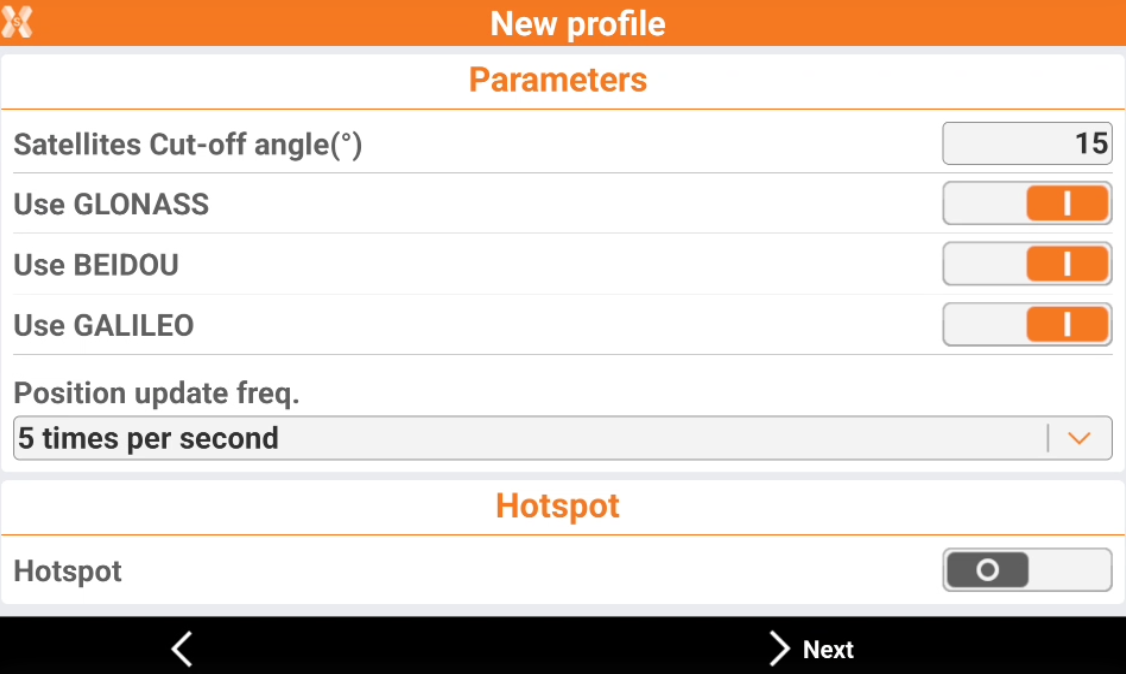
In the Parameters page it is possible to set some receiver parameters:
-
Satellites cut-off angle: allows to select the tracking satellites cut-off angle.
-
Use GLONASS: enables the tracking of GLONASS satellites.
-
Use BEIDOU: enables the tracking of BEIDOU satellites.
-
Use GALILEO: enables the tracking of GALILEO satellites.
-
Position update freq: allows to select the position update (1sec, 5Hz, 10Hz).
-
Hotspot: allows to use the Zenith60 Pro as a WiFi hotspot (requires a SIM card inside the GNSS receiver).
-
-
Click Next.
-
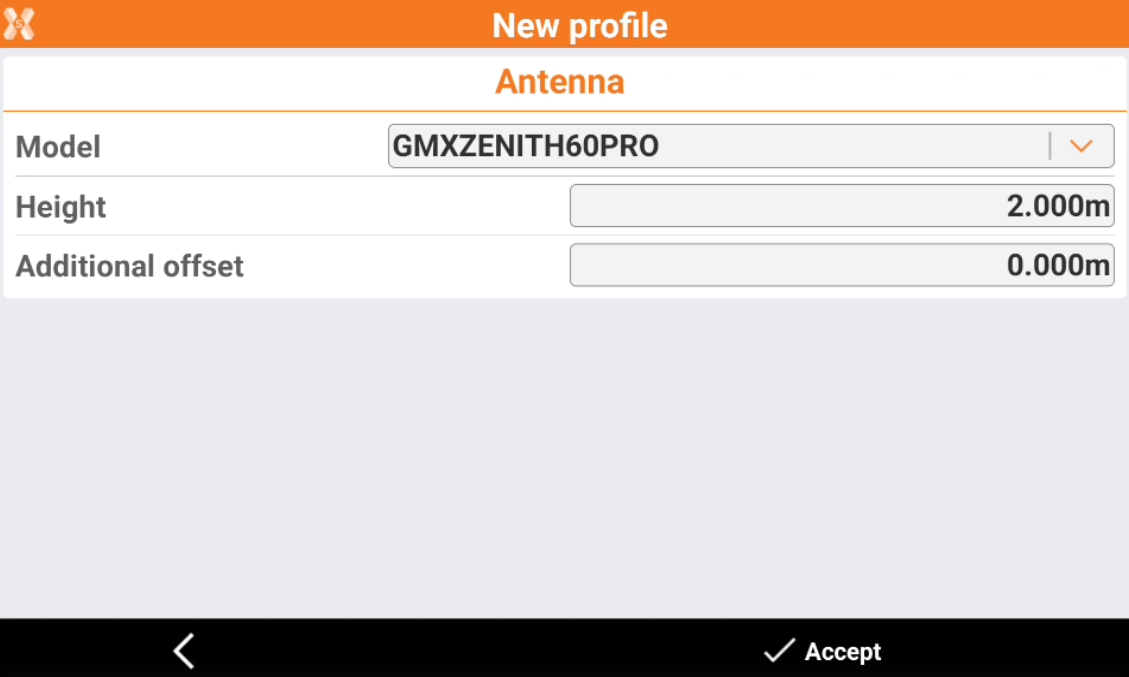
In the Antenna page we can define how is configured the antenna.
-
Height: to define the pole height.
-
Additional offset: to add an additional vertical offset.
-
-
Click Accept to complete the receiver configuration.
-
Now the receiver is ready to work! Check the X-PAD portal for more information on how to use the GNSS receiver (X-PAD Ultimate) or check our video tutorials (Video tutorials).