
-
To access the file manager from the web platform, login in X-PAD365 from a web browser.
-
Click File Manager to open the application.

-
The tool is opened in a new page.
-
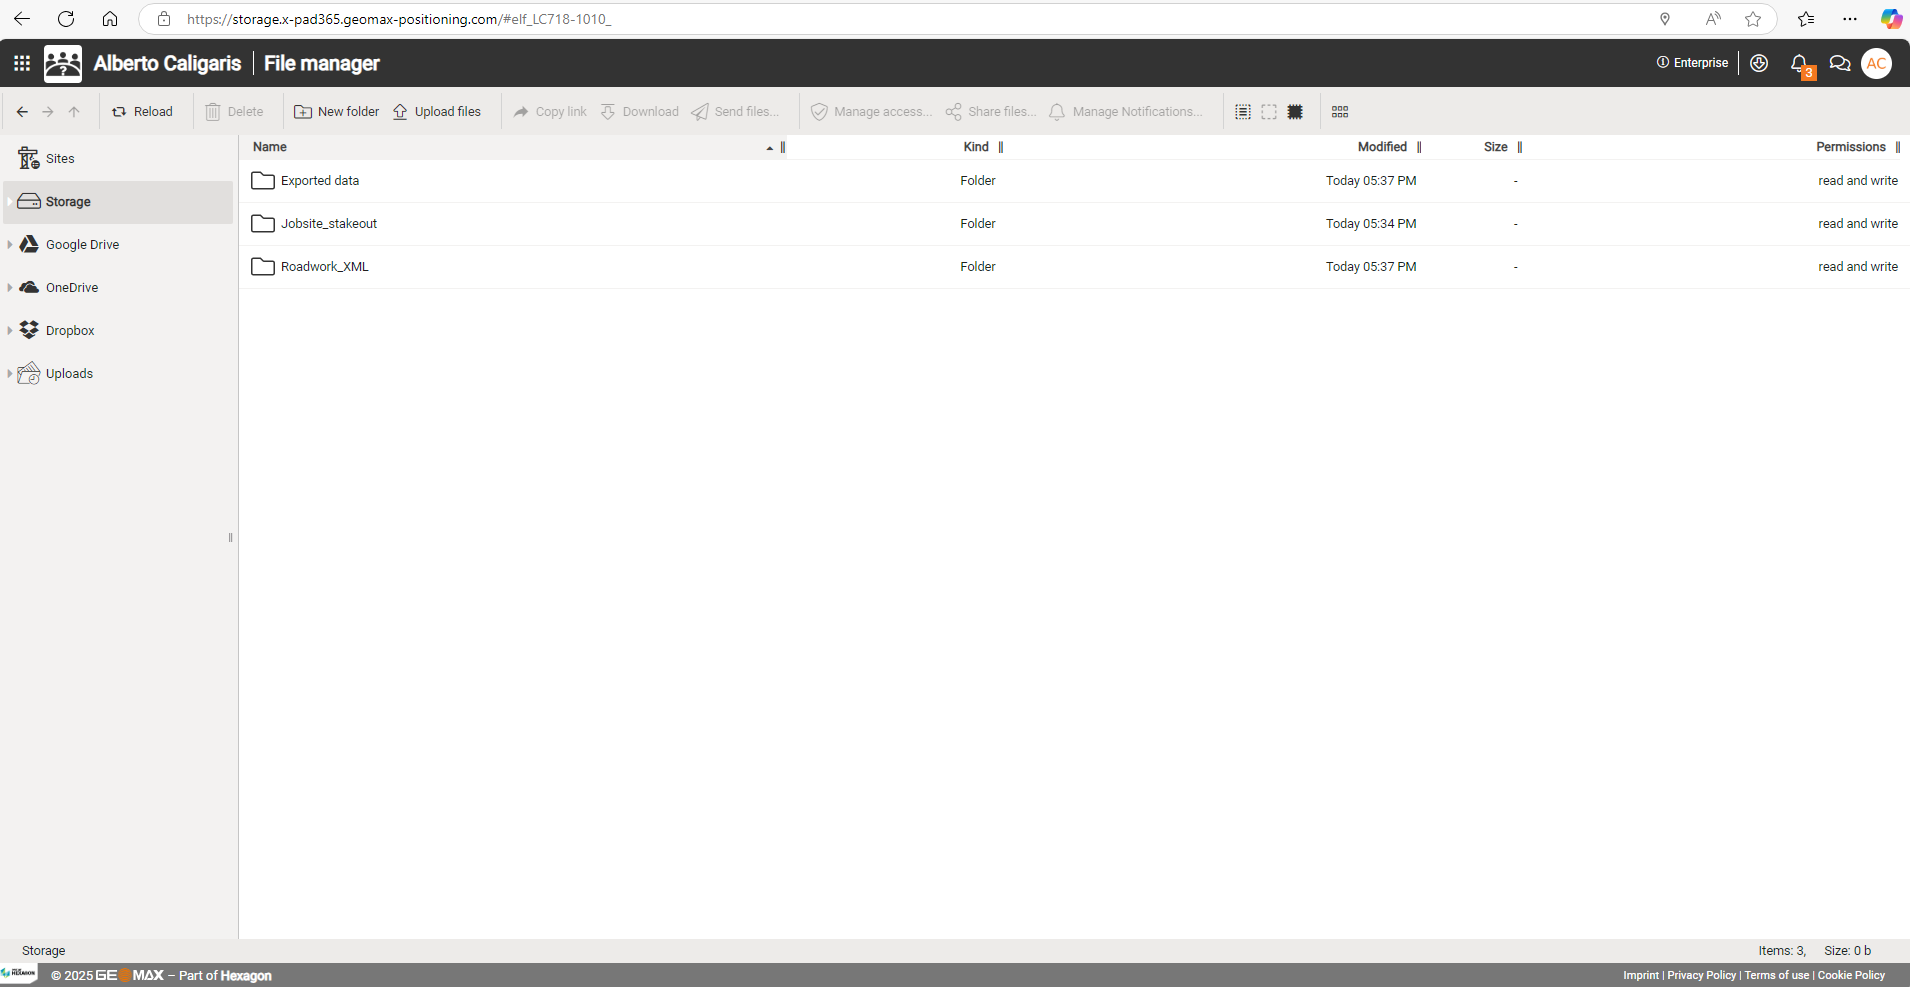
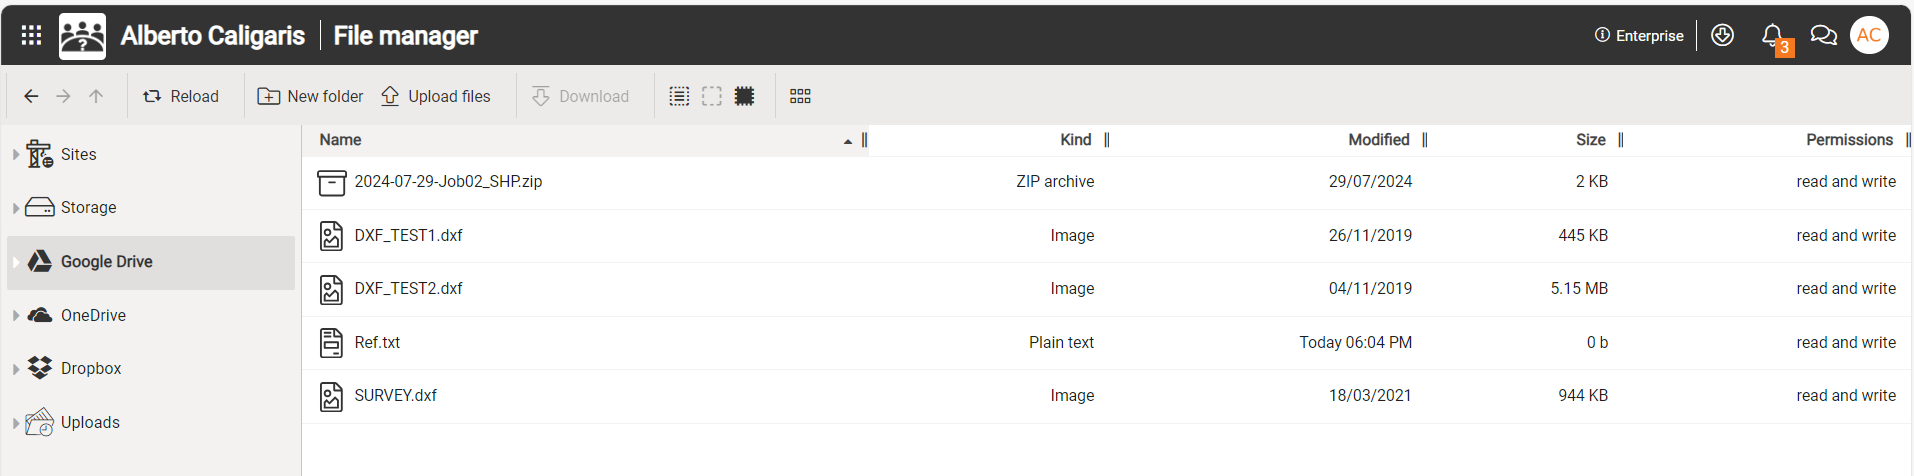
In the left panel the different storages are available:
-
Sites: opens the list of collaborative sites. See Collaborative Sites and Jobs.
-
Storage: opens the cloud storage.
-
Shared: the shared data from other X-PAD365 users.
-
Google Drive: allows to connect a Google Drive account and its storage.
-
OneDrive: allows to connect a OneDrive account and its storage.
-
Dropbox: allows to connect a Dropbox account and its storage.
-
Uploads: lists the files uploaded in the X-PAD365. These files are maintained for about 30 days.
-
-
On the top-bar there are commands to manage the storage.

-
Reload: allows to refresh the page.
-
Delete: deletes the selected folder or files.
-
New folder: creates a new folder in selected location.
-
Upload files: allows to upload files or a folder to selected location.
-
Copy link: creates a link that can be shared of a selected file. The link do not require an authentication and has a limited validity in time.
-
Download: downloads selected files to local disk.
-
Send files: allows to send selected files as email or by X-PAD365 chat.
-
Manage access: allows to manage access to specific folders or files to selected account sub-users.
-
Share files: allows to share files or folder to other X-PAD365 users.
-
Manage notifications: allows to manage notifications when users who have access to the folder change the content.
-
Select all: selects all the files in the current folder.
-
Select none: deselects all the files in the current folder.
-
Invert selection: inverts the current selection.
-
Icon/list view: switches between icon view and list view.
-
The commands are also available right-clicking on a file or a folder.
Download a file from storage to PC
-
Open the cloud storage.
-
Moves between the folder to open the desired folder.
-
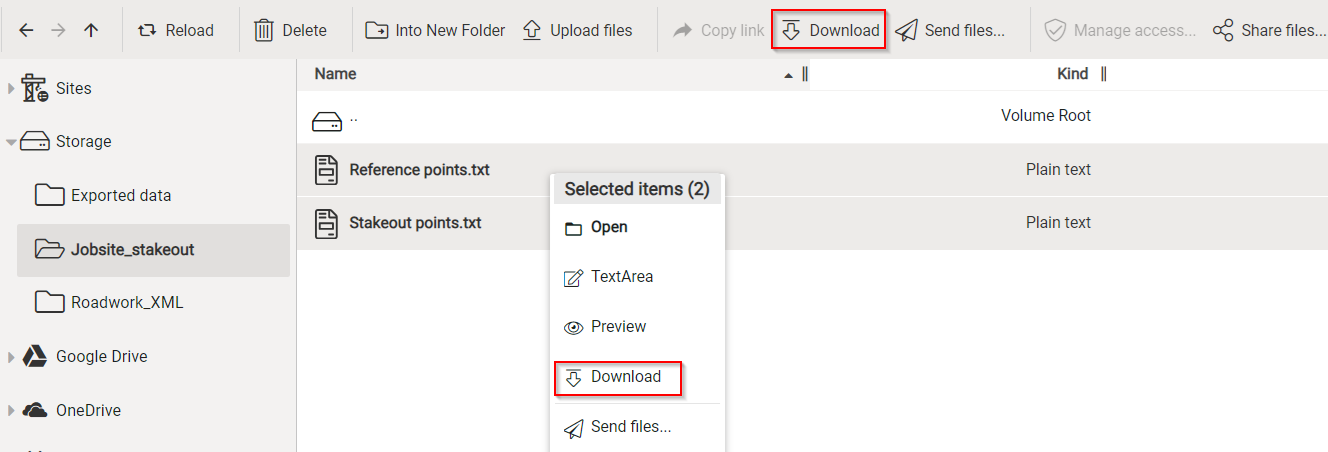
Select the files to download using the selection tools or with the mouse.
-
Right-click and select Download, or click Download from top-bar to download the files to predefined Download folder on the PC.
Upload a file from PC to storage
-
Open the cloud storage.
-
Moves between the folder to open the desired folder.
-
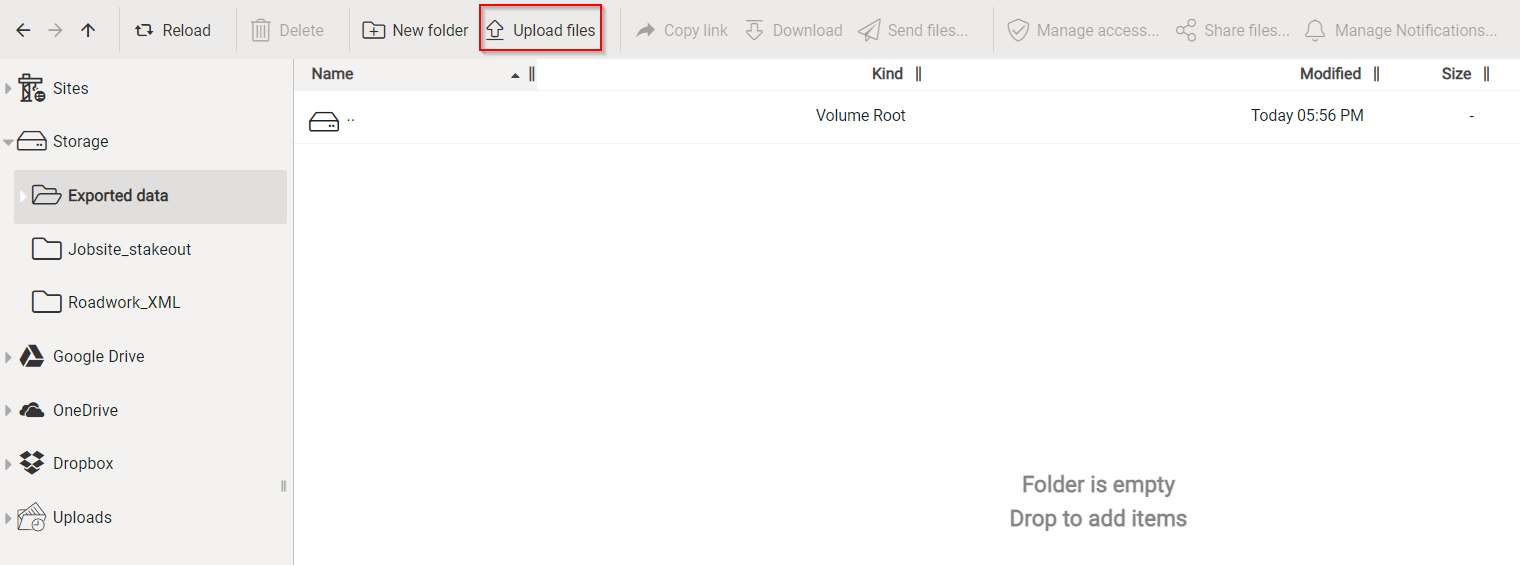
Drag and drop the file from PC to the folder to upload it. Or click Upload files to upload the selected files.
Connect an external cloud storage
-
X-PAD365 Cloud allows to connect external cloud storages from Google Drive, OneDrive and Dropbox.
-
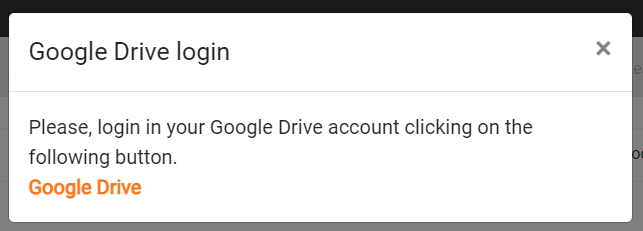
To connect them click on the cloud storage on left panel.
-
Then click to login to the account and follow the procedure.
-
At the end of the process the external cloud storage is connected and it is possible upload and download files.
Create a shareable link
-
X-PAD365 Cloud allows to create a link to a file that can be shared with users without an X-PAD365 account.
-
Select a file from the storage.
-
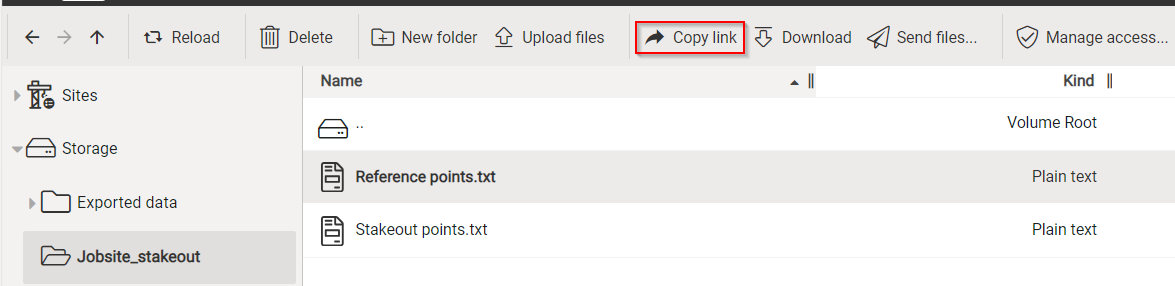
Click Copy link.
-
This command creates a link and copy it to the clipboard.
-
The link can be pasted and shared with any user.
The link is valid for 8 hours.
Manage access
-
With an X-PAD365 Enterprise account it is possible to define the access to specific folders.
By default a folder can be accessed by all account sub-users.
-
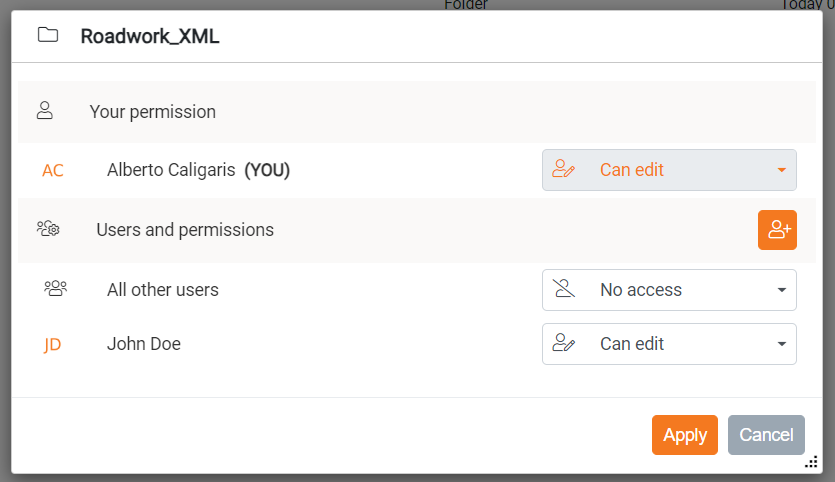
From the storage select a folder and click Manage access.
-
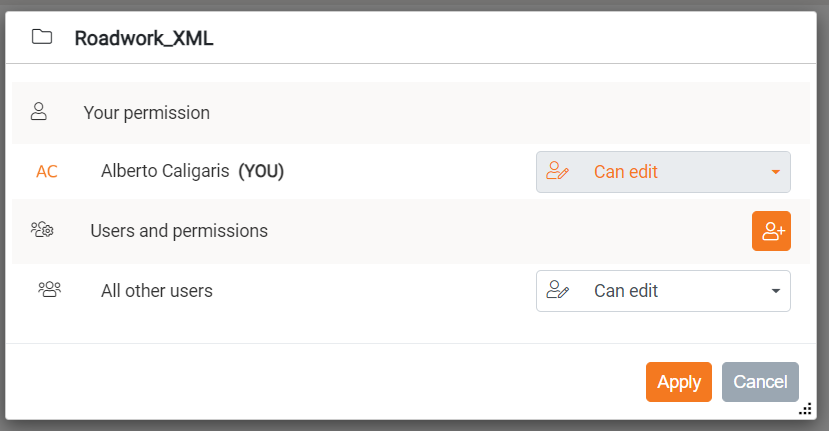
This function opens a new window.
-
Click Grant access

-
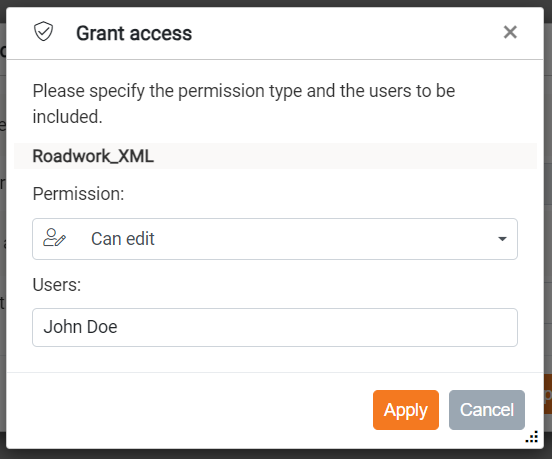
Permission: defines the user permissions. The options are Can edit, Can view or No access.
-
Users: selects from the list of sub-users the user to apply the selected access. See Manage account sub-users on how to create sub-users.
-
-
Click Apply to save the settings.
-
In All other users select instead what are the permissions for all the other sub-users that have not a specific rule.
-
Click Apply to save the settings.
The permissions are applied from main folder to all its sub-folders. If the main folder has more restrictive permissions than the sub-folder, the sub-folder will inherit its permissions.
Share files
-
Share files allow to share files or folders to other X-PAD365 users, even outside the current account.
-
Select the folder or files to share.
-
Click Share files.
-
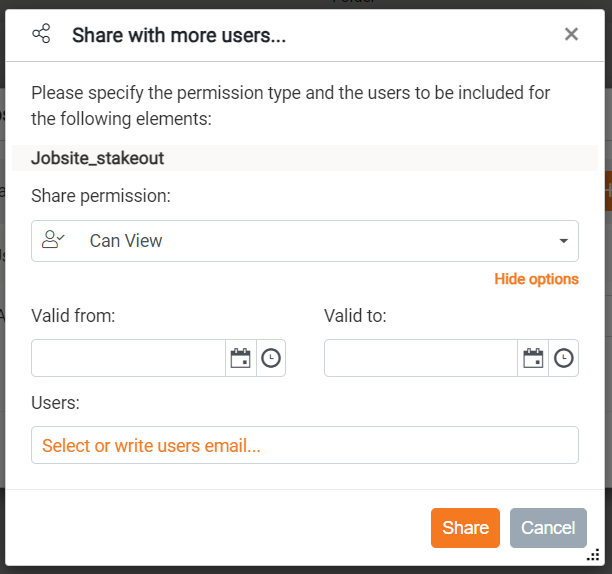
Click + Share to select the users to share.
-
Share permission: select the permissions for the shared data. Options are Can View or Can Edit.
-
Valid from: the data shared is valid from the selected date. This is optional.
-
Valid to: the data shared is valid to the selected date. This is optional.
-
Users: select a user from the list of known account or enter the X-PAD365 account email of the user to share the data.
-
-
Click Share to start the sharing.
-
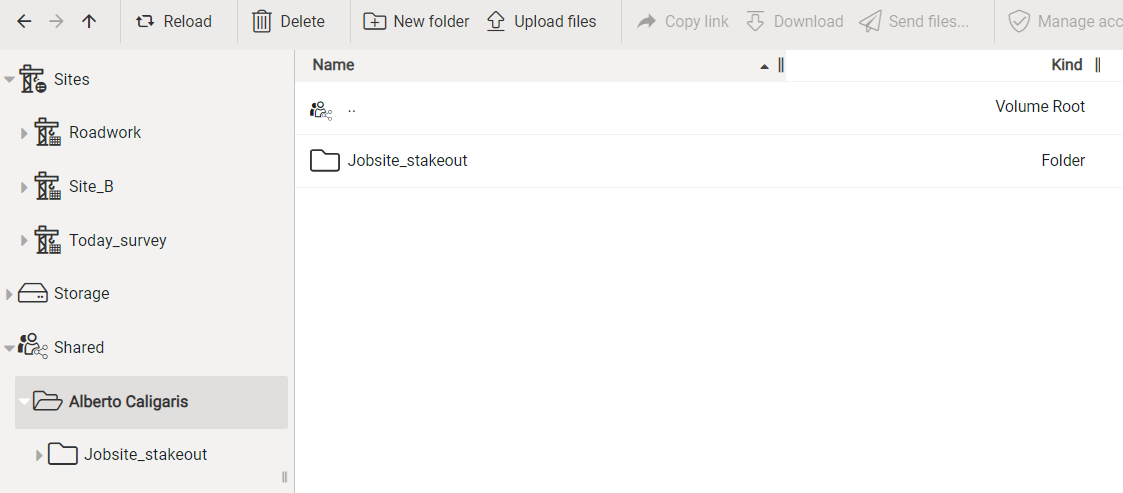
The user will have the shared data visible in his Storage under Shared.
Manage notifications
-
With an X-PAD365 Enterprise account it is possible to define the notifications when users change the content of a folder.
-
Select the folder.
-
Click Manage Notifications.
-
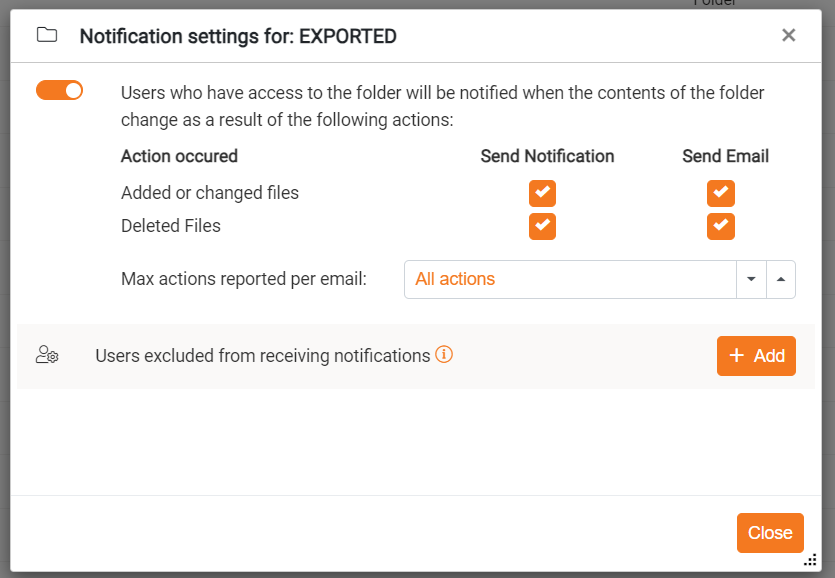
This opens a new window.
-
The switch enables/disables the notifications for the selected folder.
-
Action occurred: it is possible to send notifications as X-PAD365 notification or email notification in case a file is added or changed in the folder. Or a file is deleted.
-
Max actions reported per email: how many actions are notified in a single email.
-
Users excluded from receiving notifications: this section lists users excluded from receiving notifications in the current folder. Click Add to add a user.
-