
-
Observations menu allows to verify the raw data observations and assign the reference or rover status before processing the data.
-
Click Observations.

-
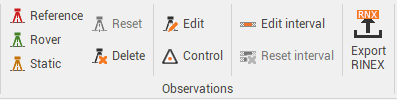
The Observations toolbar is opened.
-
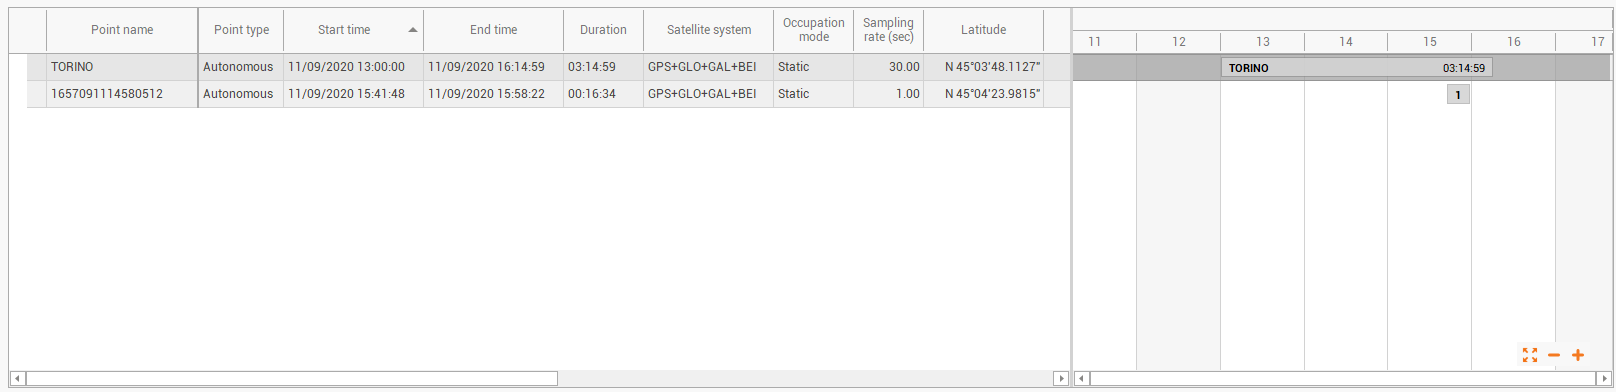
In the central panel the imported observations are visualized.
-
The table shows the raw data sessions imported. The information available are:
-
Point name: the name of the static point.
-
Point type: the type of the point:
-
Autonomous: the point status is navigated.
-
Control: the point status is control. The coordinate of the point is fixed.
-
Averaged: the coordinate of the point is an average. It is possible to expand the information from the Points page.
-
Fixed PP: the point status is ambiguity fixed.
-
Float PP: the status of the point is float.
-
Adjusted: the point has been adjusted with network adjustment
-
-
Start time: the start of the static session.
-
End time: the end of the static session.
-
Duration: the session duration.
-
Satellite system: the satellite system recorded in the raw data.
-
Occupation mode: the occupation mode if static or kinematic.
-
Sampling rate (sec): the sampling rate in seconds of the imported raw data.
-
Latitude: the latitude of the point.
-
Longitude: the longitude of the point.
-
Height: the height of the point.
-
WGS84 ECEF X: the geocentric coordinate X of the point.
-
WGS84 ECEF Y: the geocentric coordinate Y of the point.
-
WGS84 ECEF Z: the geocentric coordinate Z of the point.
-
Antenna height: the height of the antenna.
-
Antenna name: the name of the antenna used to record the data.
-
Antenna SN: the serial number of the antenna used to record the data.
-
Receiver name: the name of the GNSS receiver used to record the data.
-
Receiver SN: the serial number of the receiver used to record the data.
-
-
Using the Observations toolbar, or right-clicking on an observation, it is possible to edit the points and assign the status Reference or Rover.
-
Reference

-
Rover

-
Static

-
Reset

-
Delete

-
Edit

-
Control

-
Edit internval

-
Reset inverval
-
Edit the observation properties
-
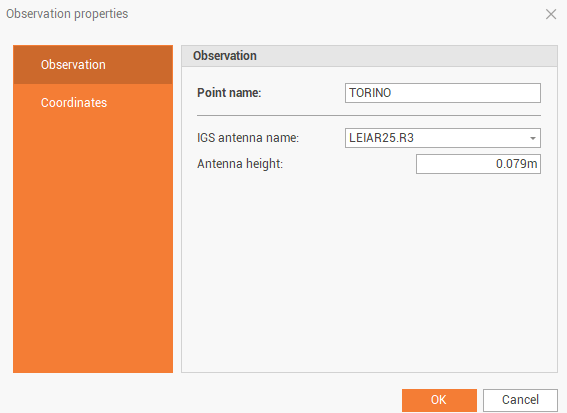
Using the function Edit, it is possible to edit the properties of an observation. This function opens a window.
-
Observation page:
-
Point name: the name of the observation, it is possible to modify the name editing this field.
-
IGS antenna name: the IGS antenna name for this observation, it is possible to force a difference antenna name from antennas available in the Antennas page.
-
Antenna height: the height of the antenna, it is possible to modify the value editing this field.
-
-
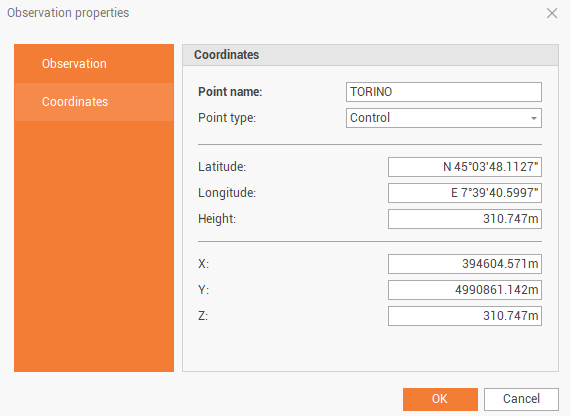
Coordinates page:
-
Point name: the name of the observation, it is possible to modify the name editing this field.
-
Point type: the type of point, it is possible to change the point type depending on the available types for the selected observation.
-
Latitude/Longitude/Height: the WGS84 coordinates for the point. The coordinates are editable if the point type is Control.
-
X/Y/Z: the local coordinates for the point, depending on the coordinate system assigned to the project. The coordinates are editable if the point type is Control.
-
Edit the inverval
-
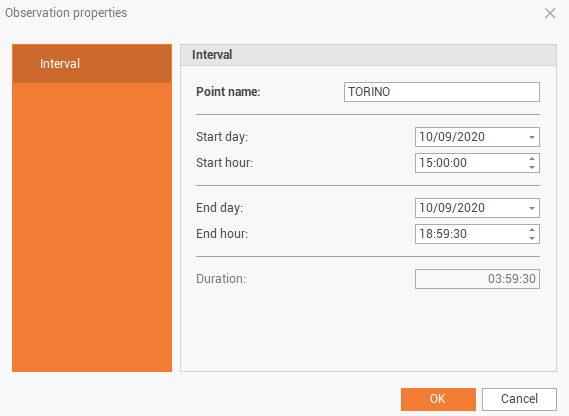
Using the function Edit interval it is possible to edit time interval of a selected observation.
-
Start day: the starting day for the observation, change this field to use selected observation from another starting day.
-
Start hour: the starting time for the observation, change this field to use selected observation from another starting time.
-
End day: the ending day for the observation, change this field to use selected observation from another ending day.
-
End hour: the ending time for the observation, change this field to use selected observation from another ending time.
-
Duration: the duration of selected observation.
-
Export RINEX
-
It is possible to export observations in the standard RINEX format.
-
Select the observations to export.
-
Click Export RINEX.

-
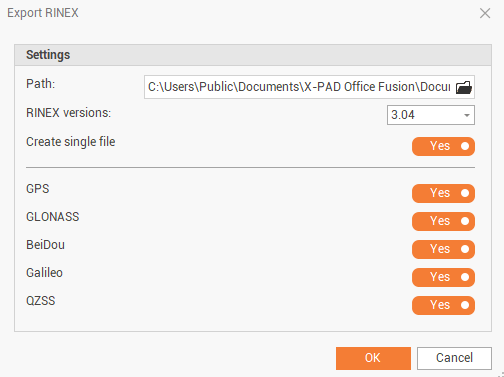
This command opens a new window.
-
Path: the destination folder where to save the RINEX data.
-
RINEX versions: the RINEX version to export the data (2.11, 3.02, 3.04)
-
Create single file: enables/disables the creation of a single file or multiple files in case more observations are selected.
-
GPS/GLONASS/BEIDOU/GALILEO/QZSS: enables/disables the inclusion of observations from the selected constellations.
-
-
Click OK to export the data.