
-
Hatch command fills an enclosed area with a hatch pattern or solid fill. A large variety of hatch patterns can be used and adjusted by specifying the scale and the direction angle.
-
Area to fill can be selected manually or detected automatically by clicking an internal point.
-
A transparency can be applied to solid fill.
-
Click Draw.
-
Click Hatch.

-
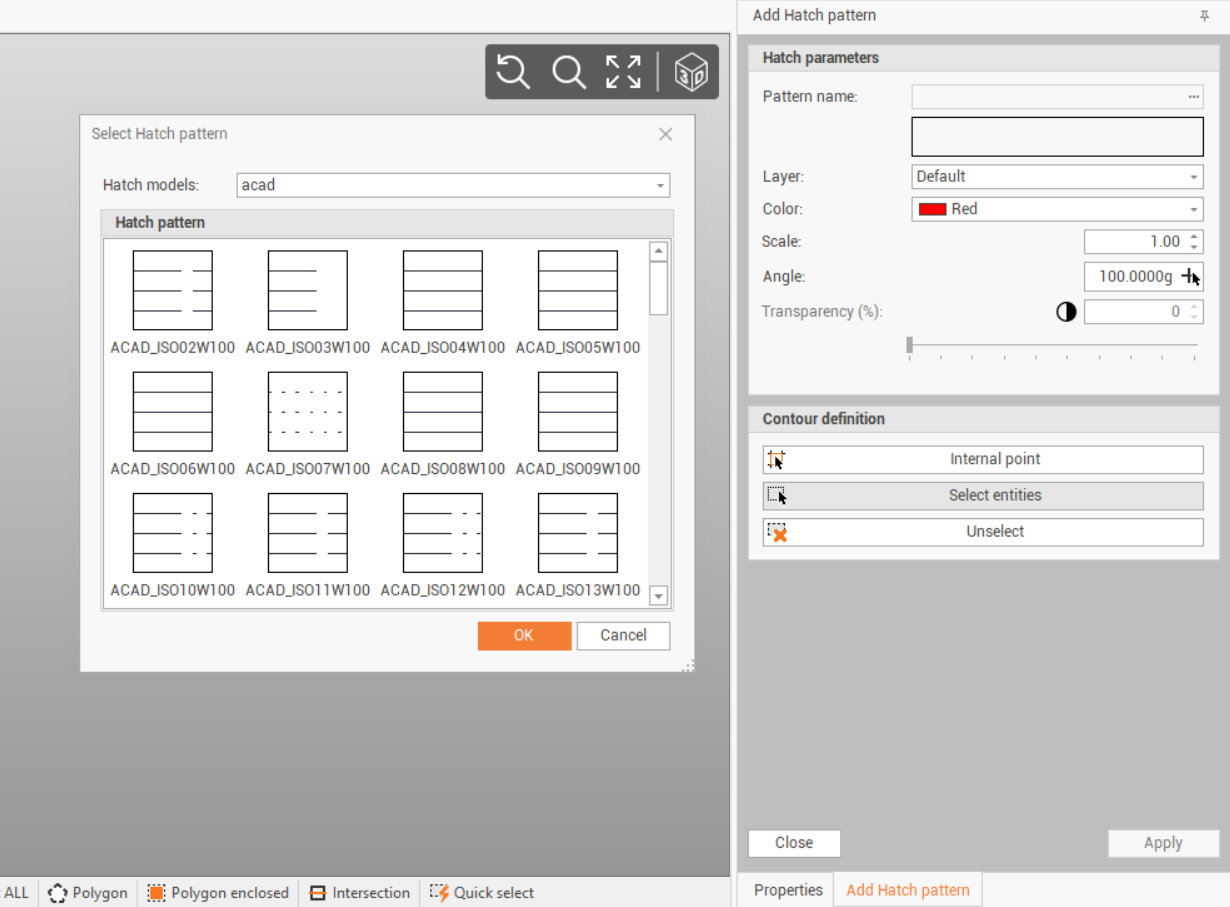
This command opens a new panel on the right and allows the selection of the pattern.
-
Select from the Select Hatch pattern window the pattern to use.
-
Click Hatch models to select the group of models.
-
From the drop-down menu select Add pattern to import new patterns in the format .pat
-
Select the pattern to use from the window.
-
Patterns are stored in the folder C:\Program Files\GeoMax\X-PAD Office Fusion\Support
-
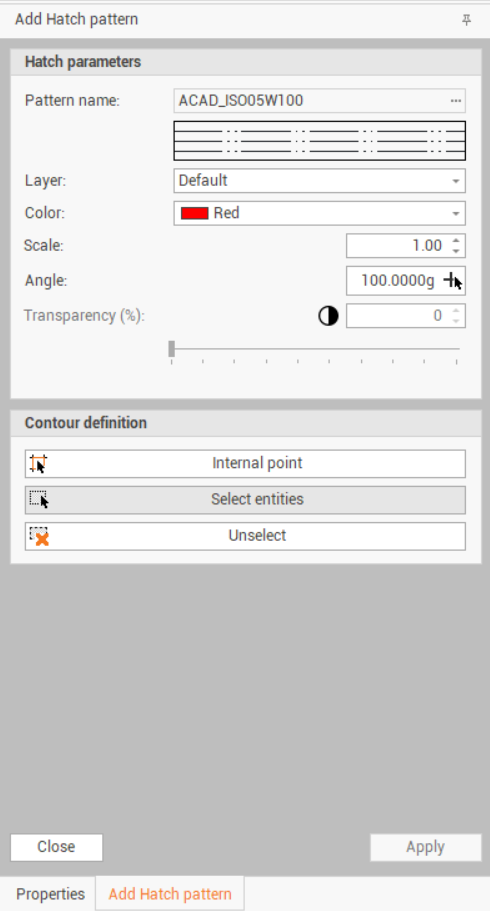
After pattern is selected, we can define the properties in the Add Hatch pattern panel.
-
Pattern name: the selected pattern. Click to select a different one.
-
Layer: the layer where the pattern will be recorded.
-
Color: the pattern color.
-
Scale: the pattern scale factor.
-
Angle: the pattern direction. Click on arrow icon to define the direction clicking on the graphic view.
-
Transparency (%): if the pattern is solid, allows to define the transparency.
-
-
Select how to identify the area where to apply the pattern:
-
Internal point: selects an internal point.
-
Select entities: selects the entities (like closed polylines or polygons).
-
Unselect: cancels the current selection.
-
-
The software shows a preview of the hatch. Click Apply to save it.
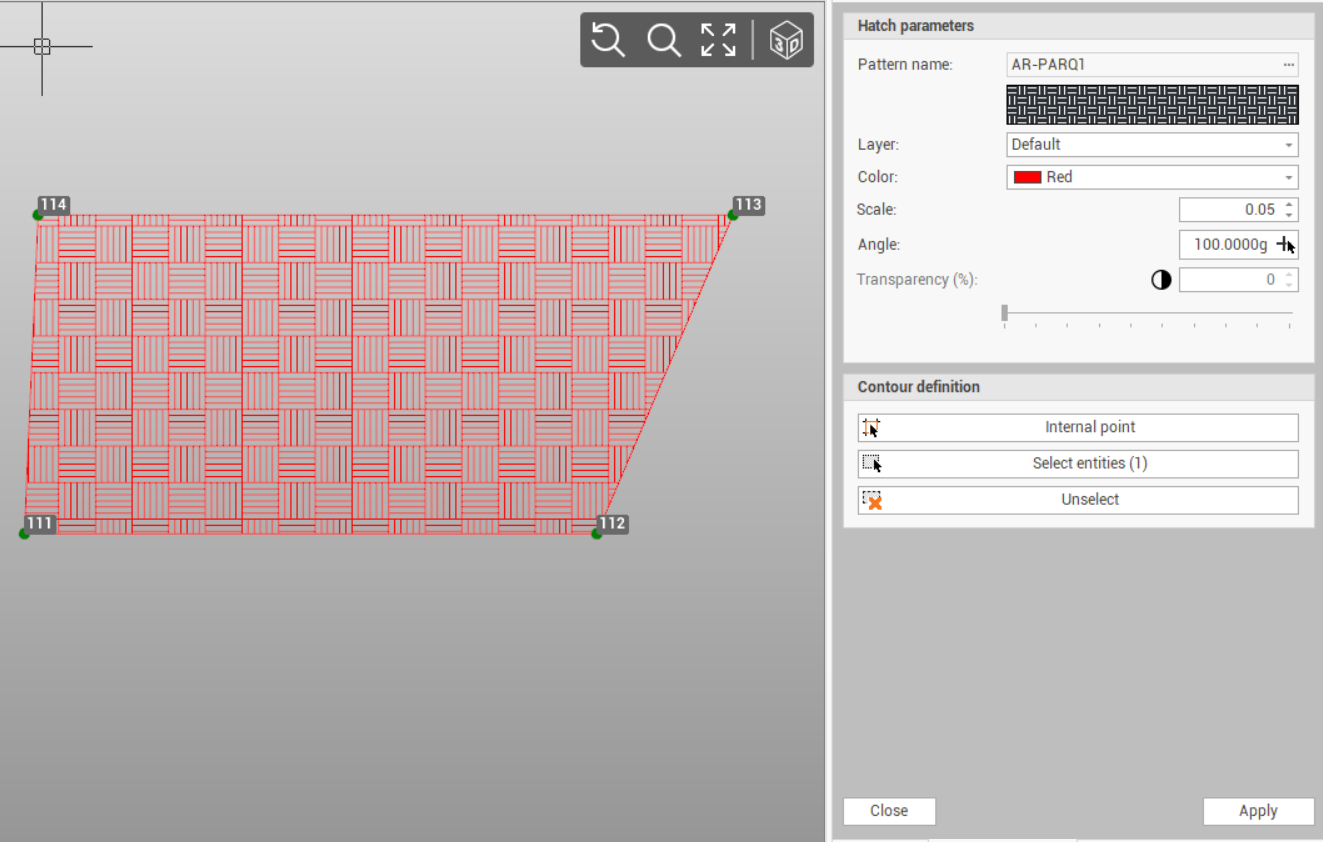
If the hatch is not visible, verify the scale factor applied to the hatch.